In this project I will be exploring the theme of heritage and ideas surrounding it. I will specifically be looking at heritage that is personal to me, such as the crafting heritage in my family and surrounding the areas where I live in the northeast. I will also be looking at folklore and traditional heritage of the area. I have chosen this area of focus as I have found that the rich crafting heritage of the northeast of England is commonly overlooked and forgotten about as the majority of it has been lost over time, so I would like to highlight this through the lives and memories of my family members as well as my own. I will be mainly working through the medium of ceramics and telling my stories through illustration.
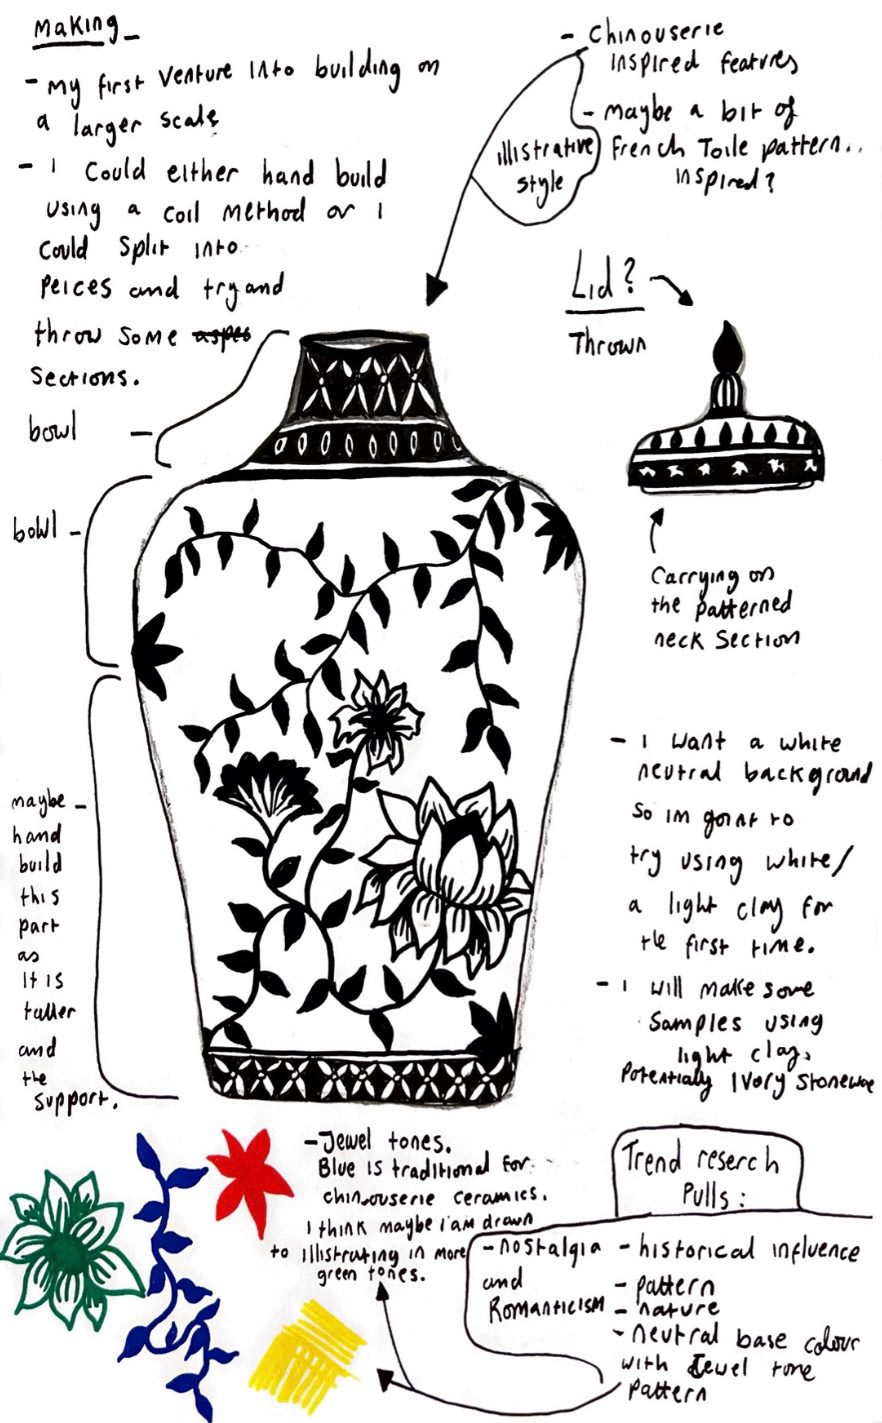
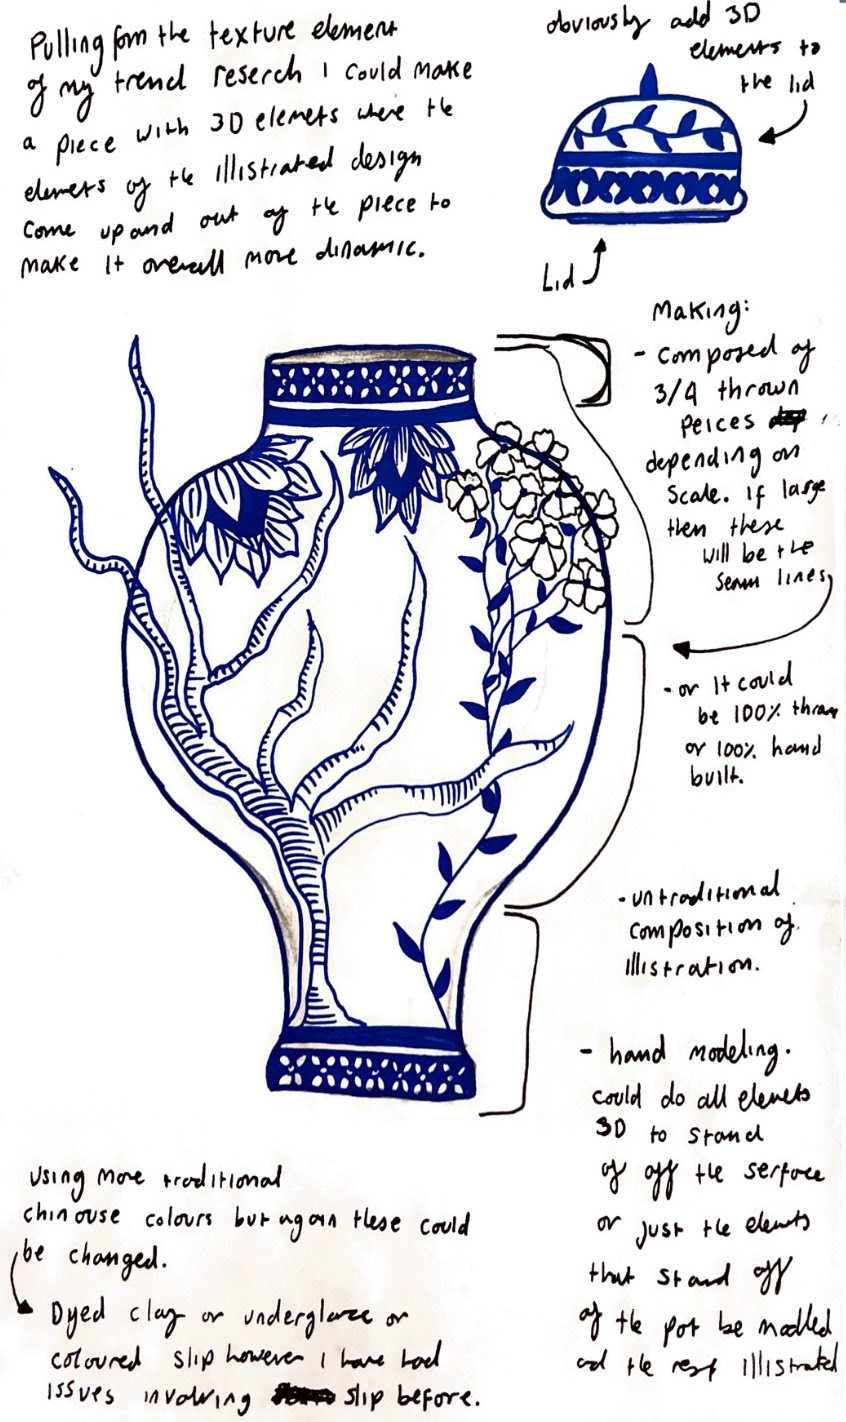
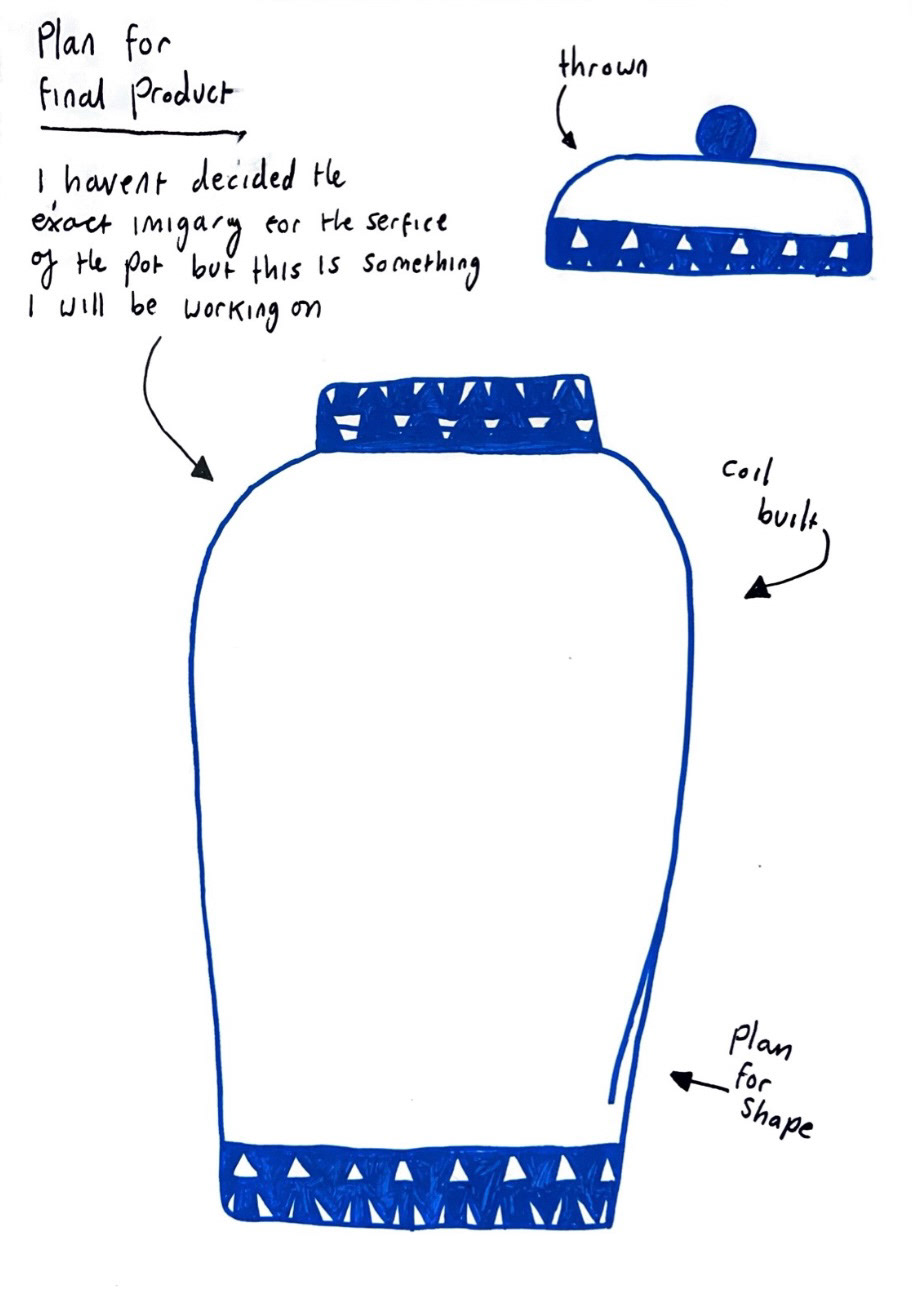
I have decided that I will work with historical heritage forms such as ginger jars. I really love the stories and interpretations that these vessels hold, as well as their instantly recognisable look of blue and white decorative surface. At the end of part one of this project I had done some illustrations showcasing my understanding of ginger jar forms and surface design. I also annotated these illustrations with potential building methods and ideas based on my trend research that I had completed in part one of this project also. (below).
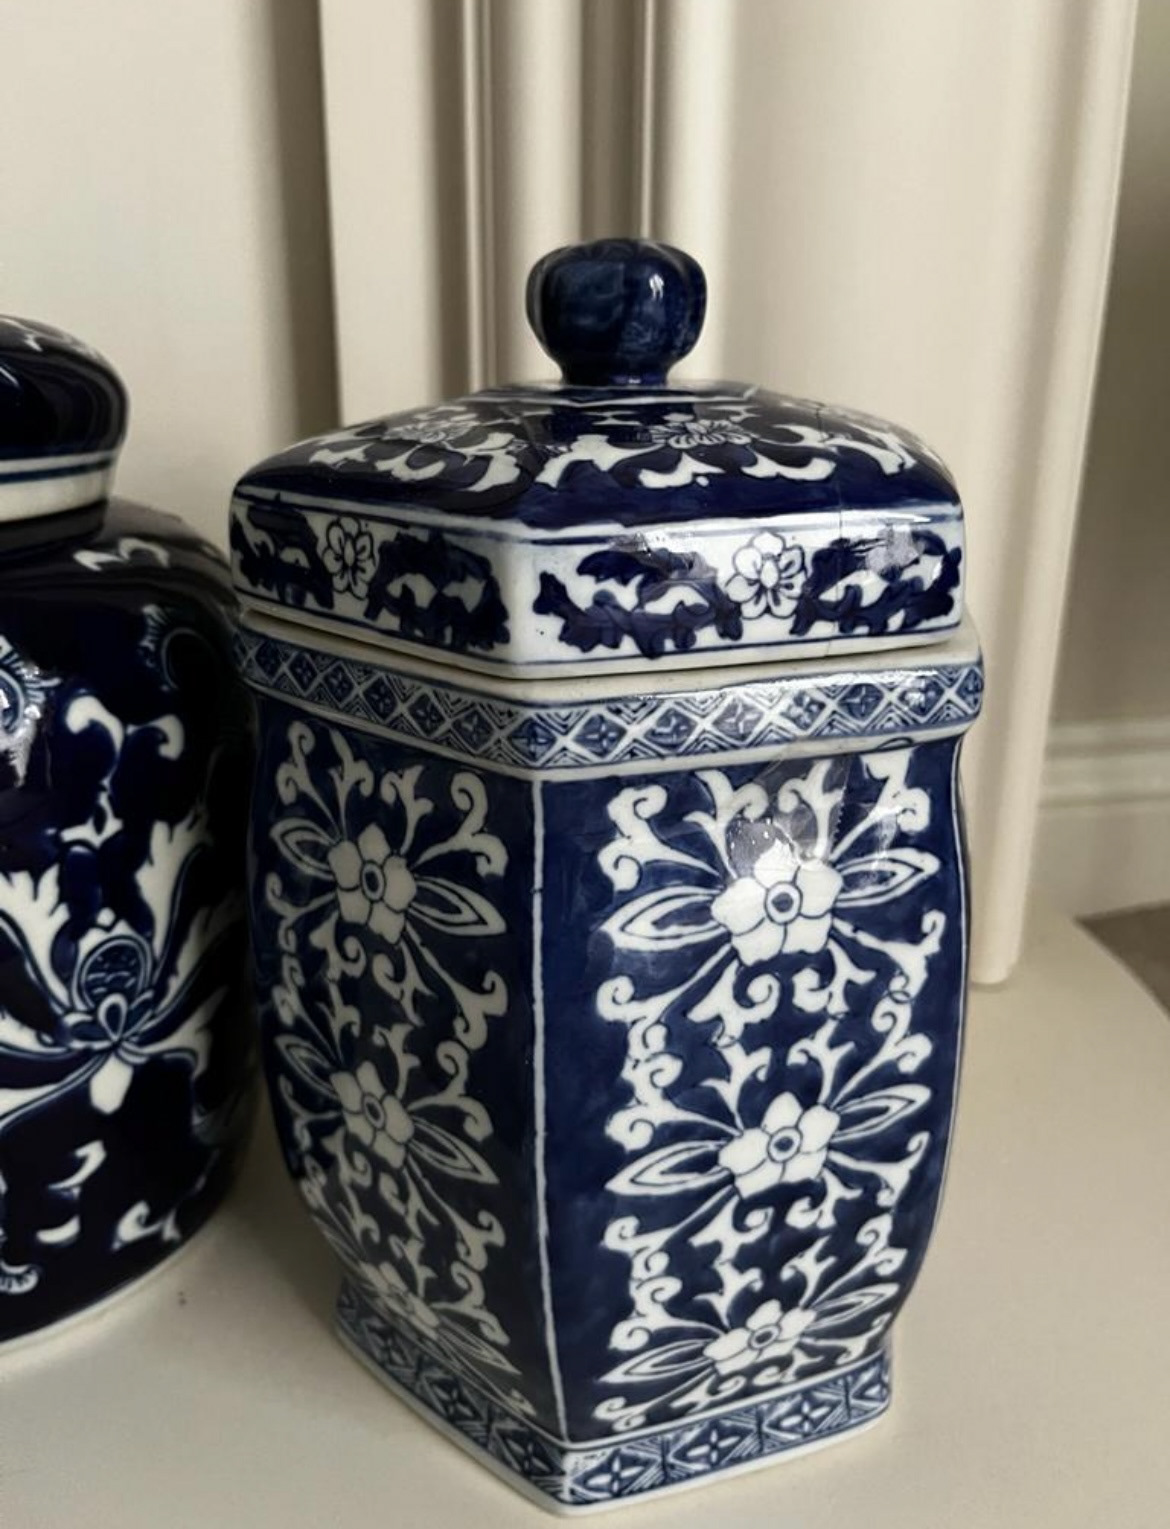
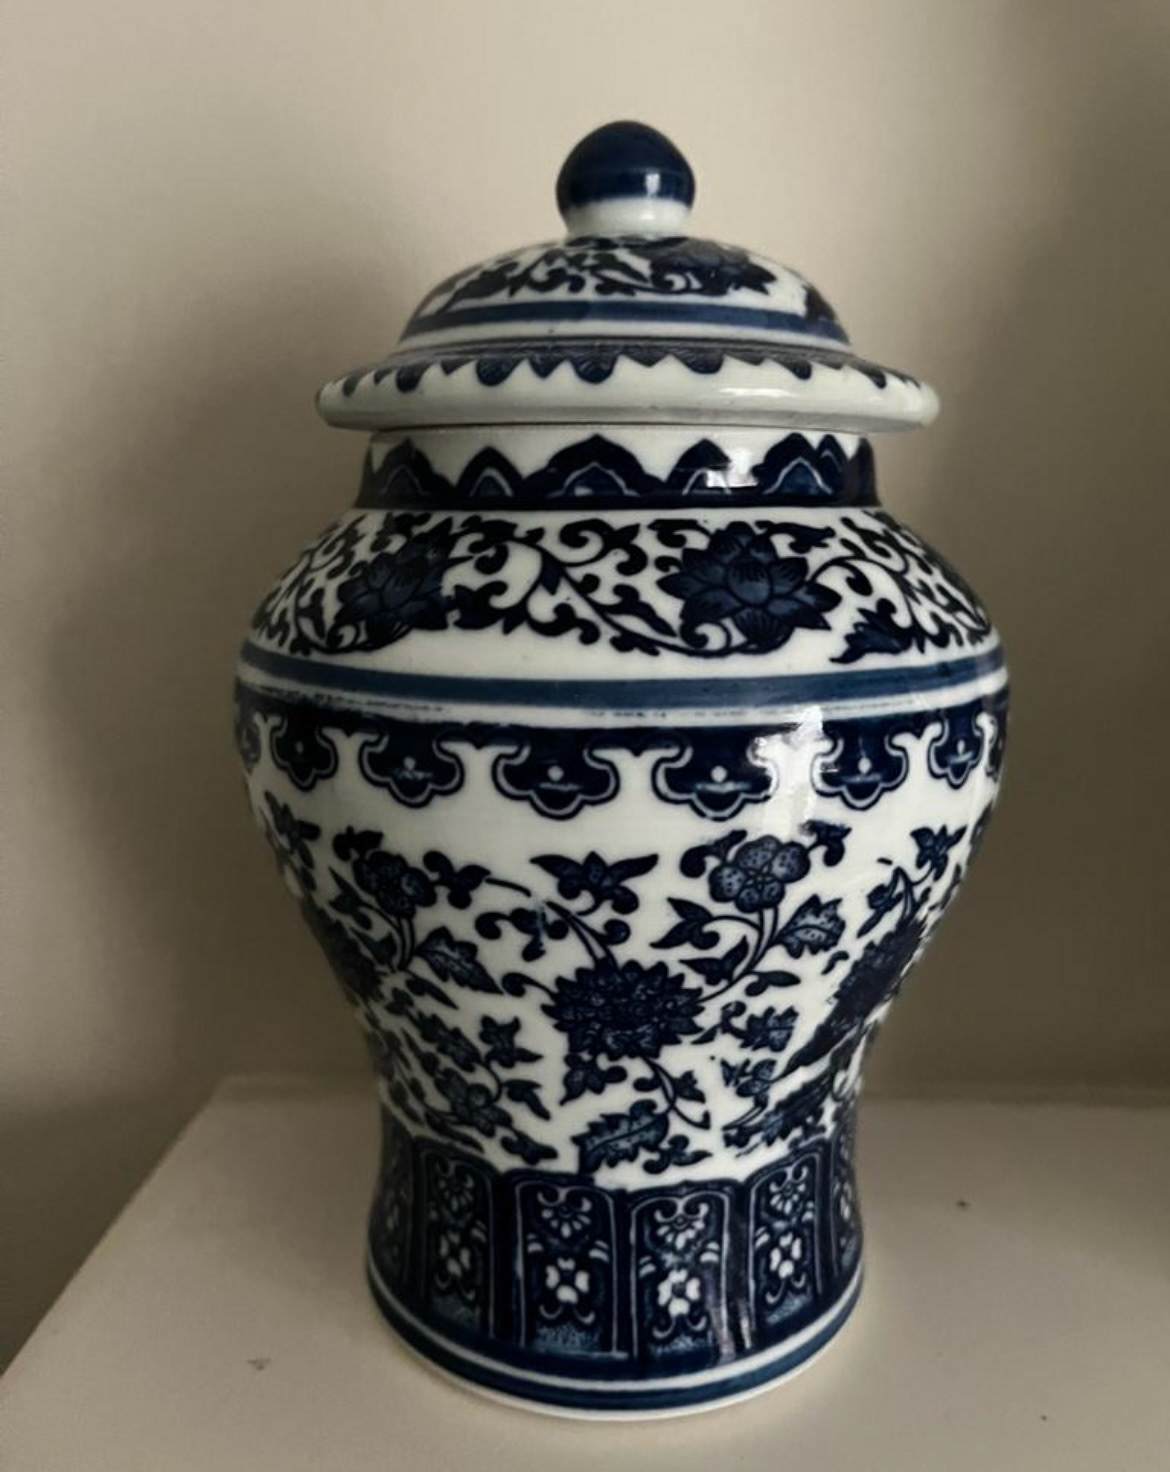
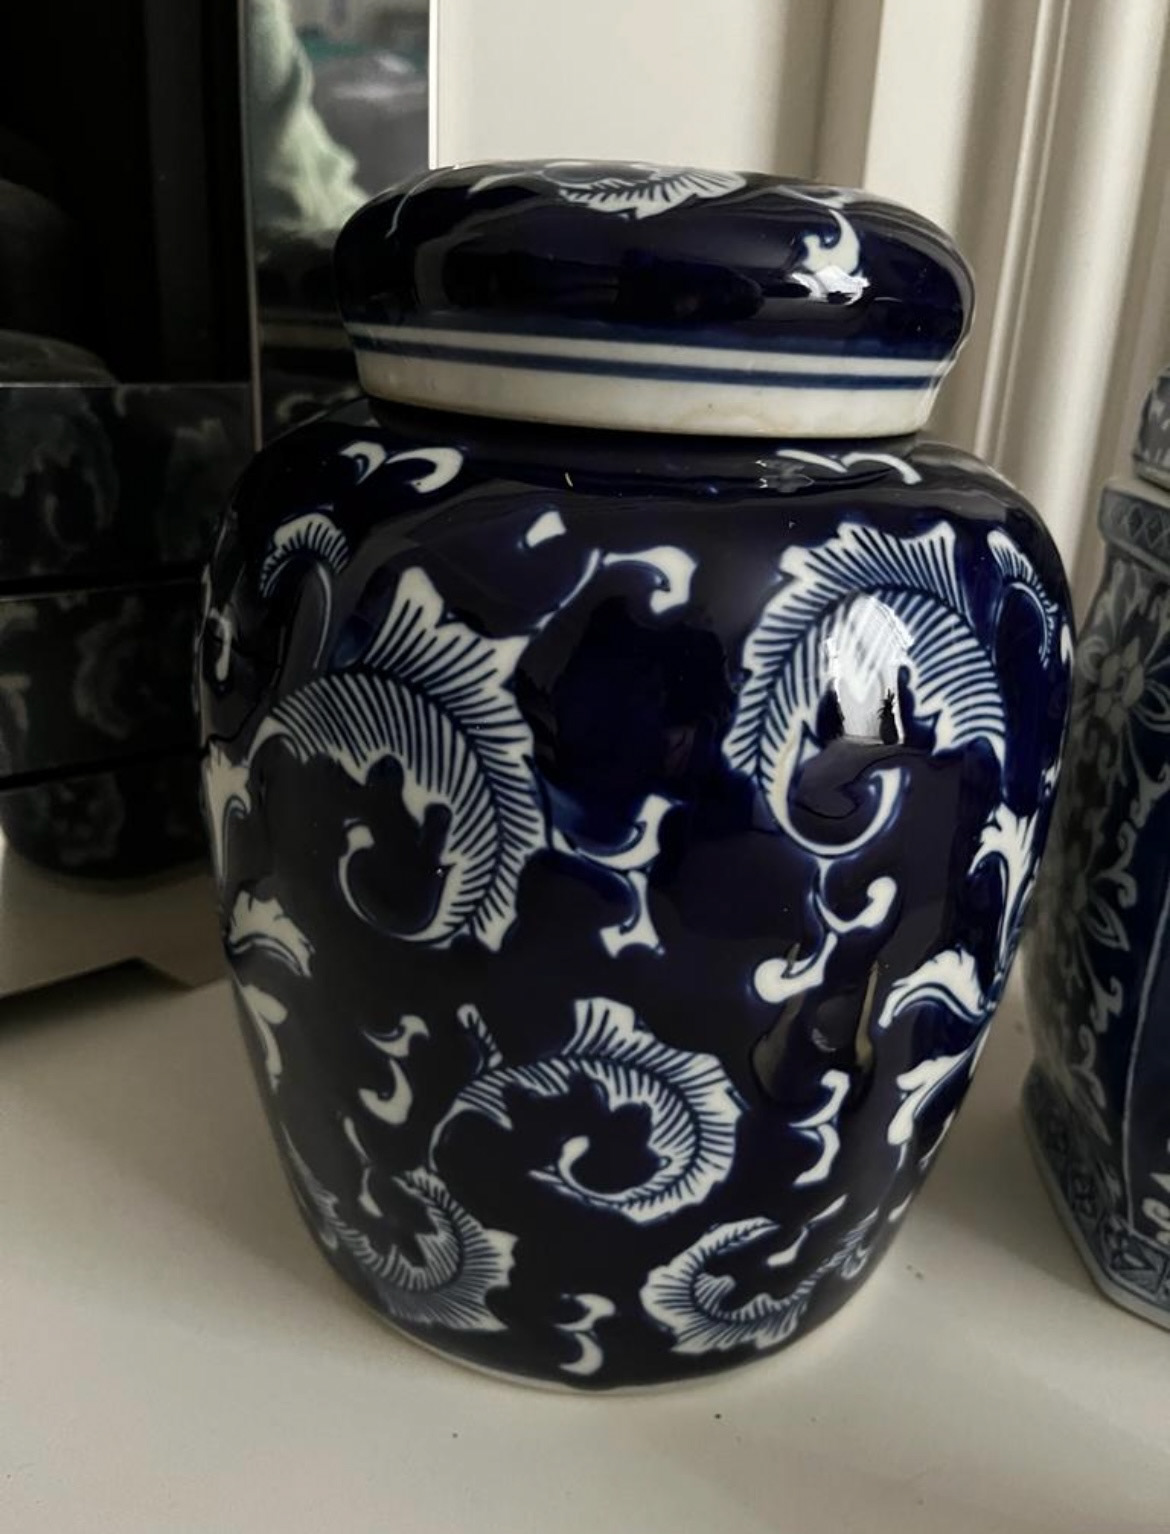
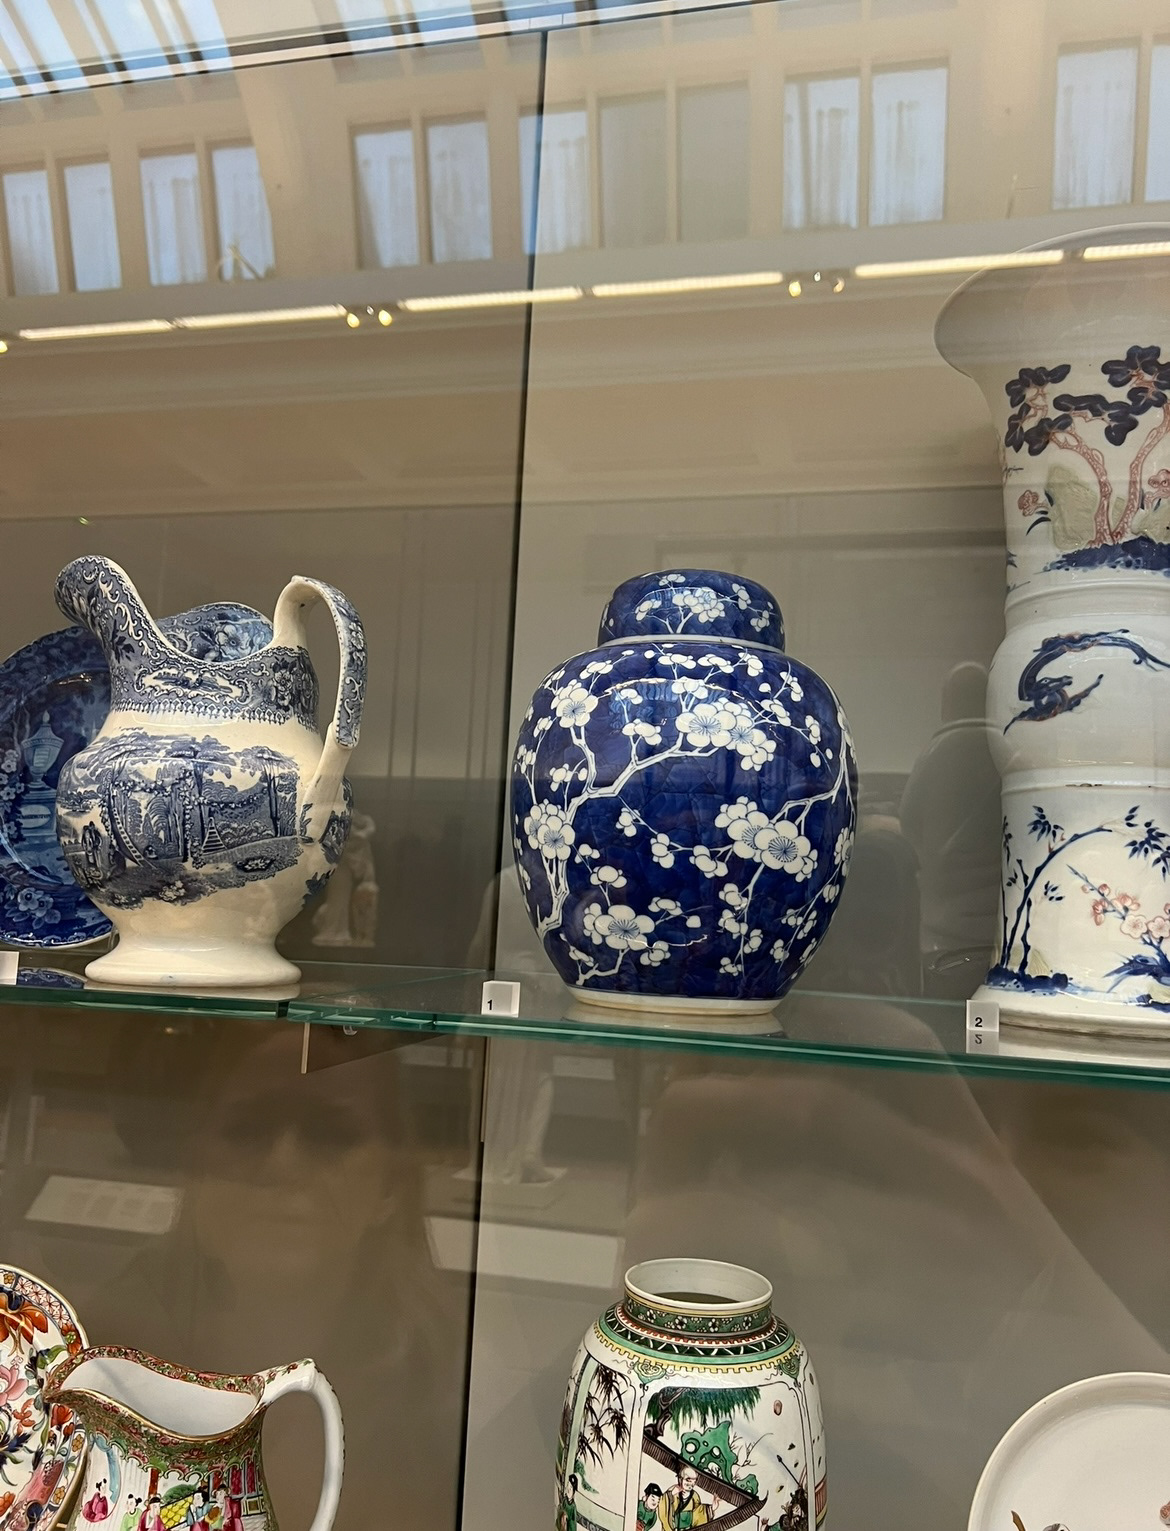
when looking at ginger jars, a large amount of my inspiration came from the ginger jars collected in my own home by my mother. She owns a collection of a mix of antique, reproduction and hand made modern ginger jars. What I am really captivated by is how, while all falling under the same umbrella, each one has their own unique size, shape, shade of blue and elaborate design, however they all work as a cohesive group due to their recognisable blue and white colouring as well as their lidded and bulging design. (a few jars from my mothers collection below).

The visual of a collection of ginger jars is in my mind an icon of heritage interior design, since the 18th and 19th centuries when they were first imported to Europe, carrying spices such as salt and ginger. They soon captured the imagination of the high classes of society and were soon considered a high luxury item to have and decorate your home with. At first these were items that were scarce and difficult to acquire, naturally adding to the exclusivity and price. These factors added to the desirability of these pieces to the upper classes of society. Manufacturers in Europe saw this as a chance to create reproductions of a desirable product and therefore sell these high market pieces to the upper echelons of society and create a high profit.
At this time in the 18th century, imports from the east were new and the designs and cultural ascetics of these pieces were capturing the imagination of society as a whole. reproduction in every creative manufacturing industry was booming, especially in France where the term "Chinoiserie" was coined, meaning "Chinese like" in French. King Louis XIV of France was so enamoured with this style that towards the end of his life, he even had a folly built in the grounds of Versailles in a blue and white chinoiserie style, naturally boosting its popularity in the courts of Europe even further. However at this time, in the days before readily available photography, designers of the reproduction pieces only had word of mouth (often fantastical stories), and drawings of the real thing to go off of. In most cases these drawings were of poor quality, therefor a lot of the designs were built from the designers own interpretation of what they thought looked Chinese, even though they had never actually been to china themselves. After a while, Chinoiserie pieces took on a design style of their own, showcasing interpretations from China, Korea and Japan, all mixed together with some European influences. Dr. Aldous Bertram (an interior designer with a doctorate in chinoiserie from Cambridge university) states that "Chinoiserie differs from authentic East Asian design in almost every way imaginable"
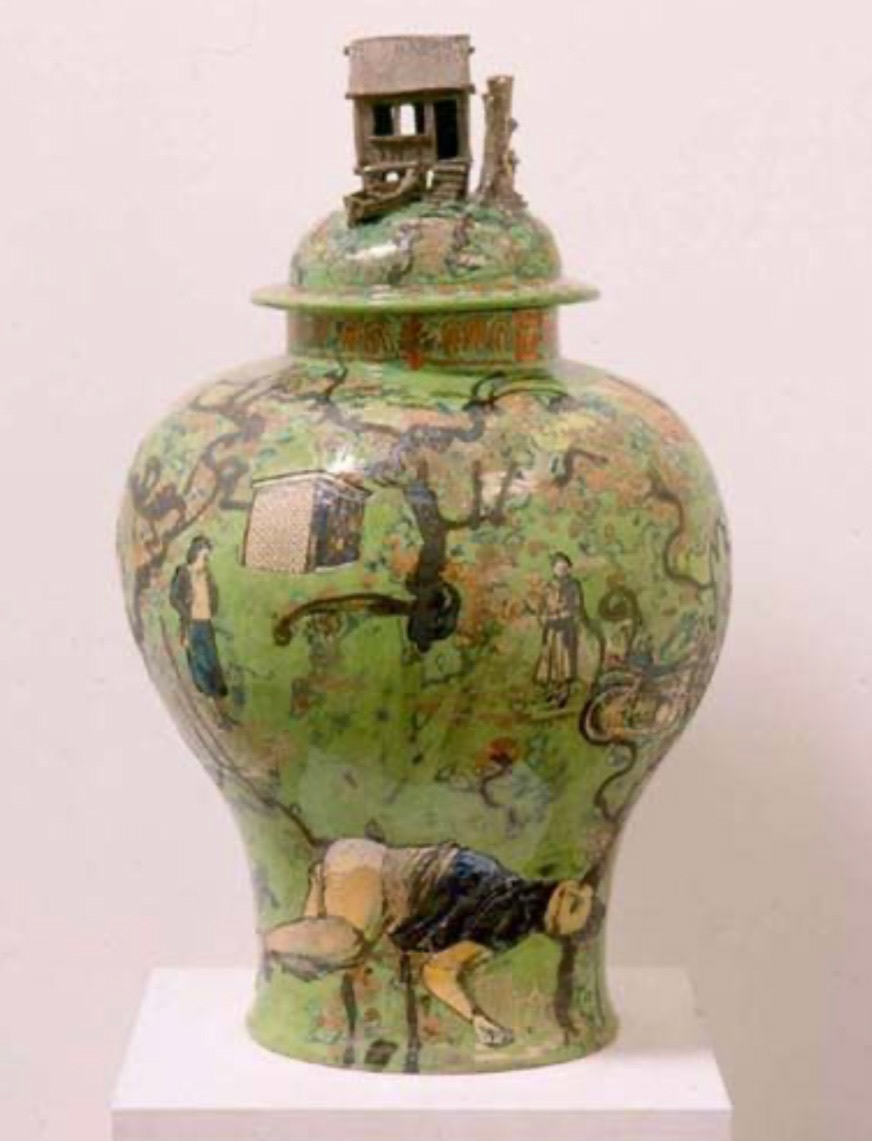
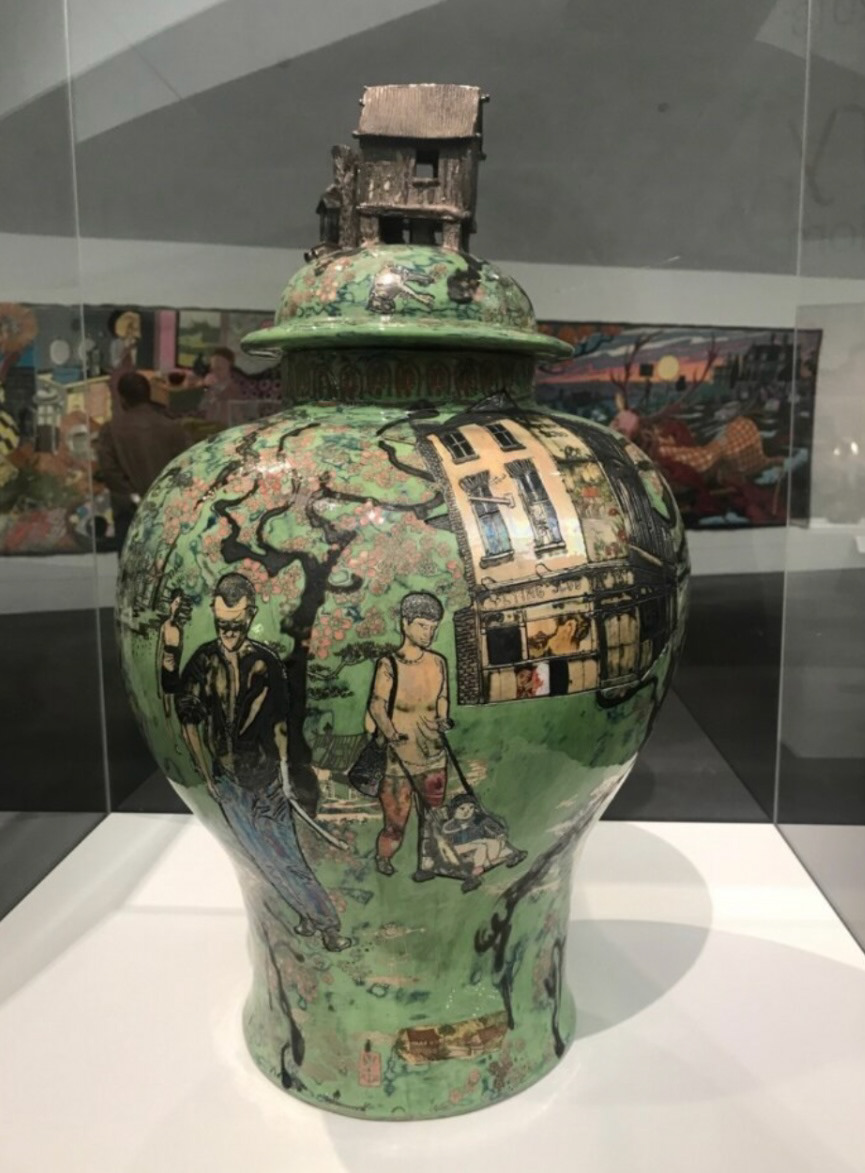
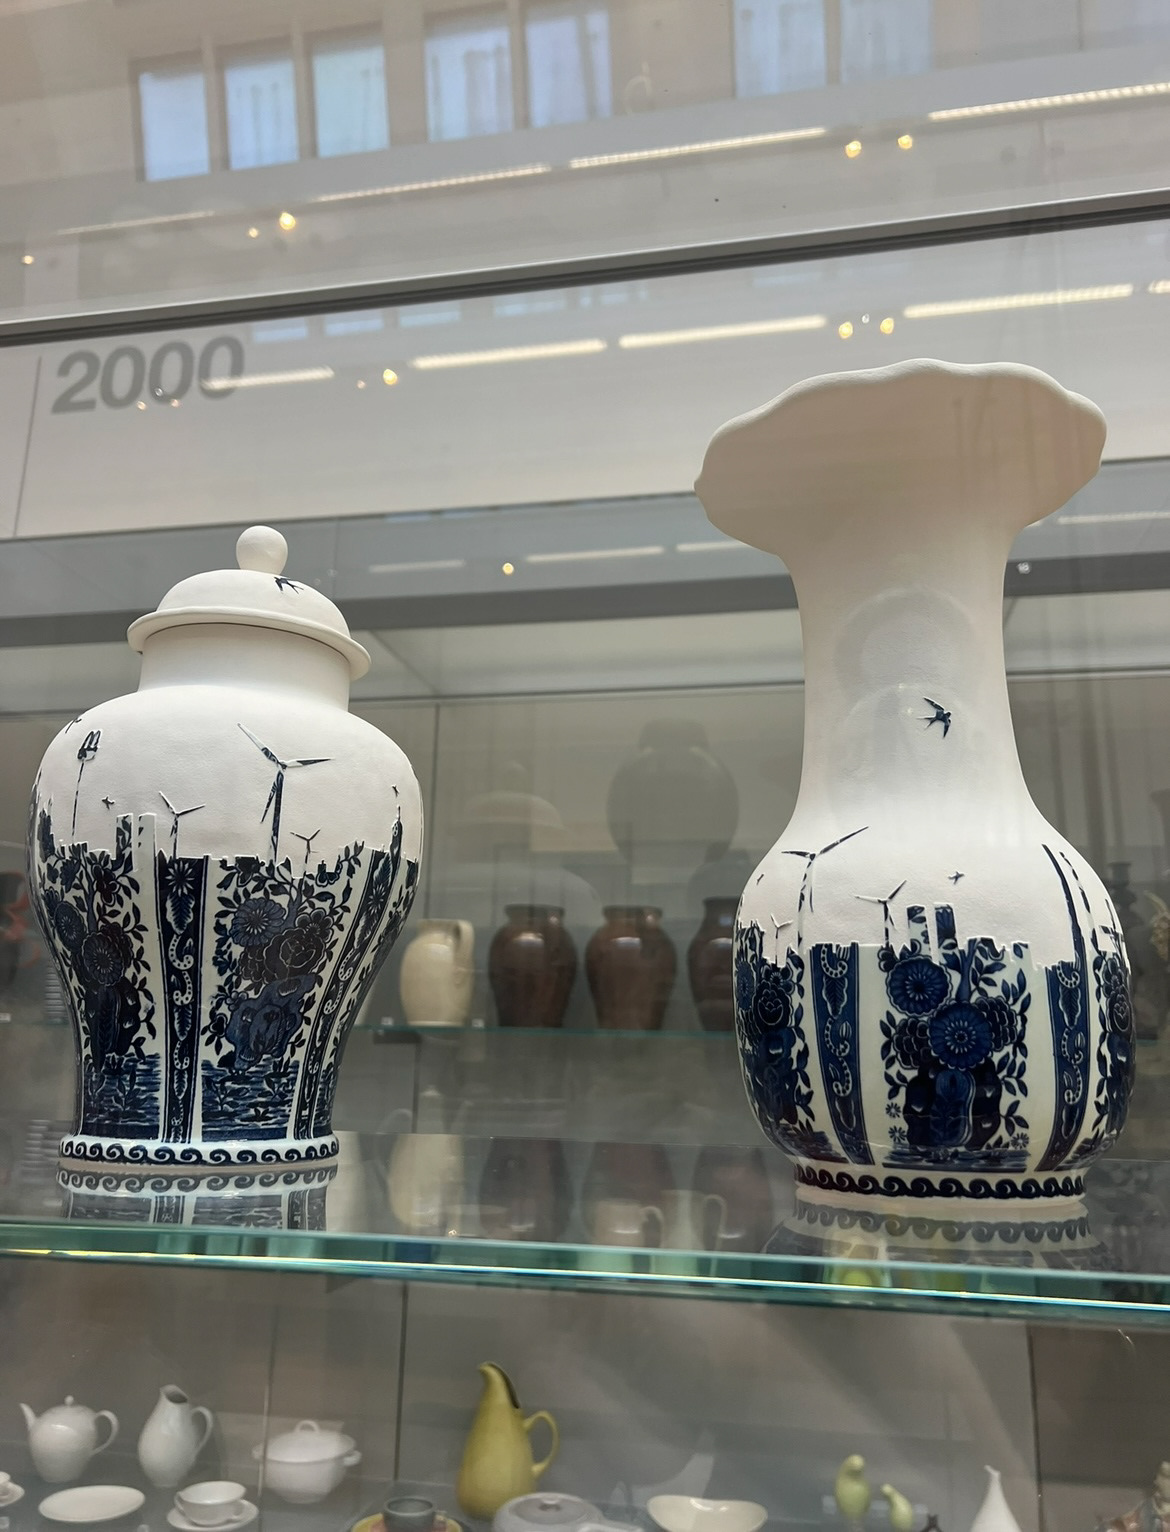
From here I started looking at how other artists and makers had interpreted the ginger jar. I remembered that last year I attended an exhibition at the Southbank centre in London, and had the privilege to see a piece by Grayson Perry named "Poverty Chinoiserie". In this 2003 piece by Perry, he observed that many traditional depictions of life present on chinoiserie pieces are either of royalty or of the lower classes of historical Chinese society such as rice farmers alongside their ramshackle houses. Perry took this as an almost romanticisation of poverty at the time so decided to translate this through a modern-day lens and through the eyes of the English class system. The shape of the piece is taken from the form of a ginger jar and depicts scenes of struggling English people alongside boarded up buildings and broken-down pubs. Perry tries to push the commentary on romanticisation by intertwining these scenes with cherry trees, pattern and decorative flora and fauna as is present is traditional cases of chinoiserie. (poverty chinoiserie below).
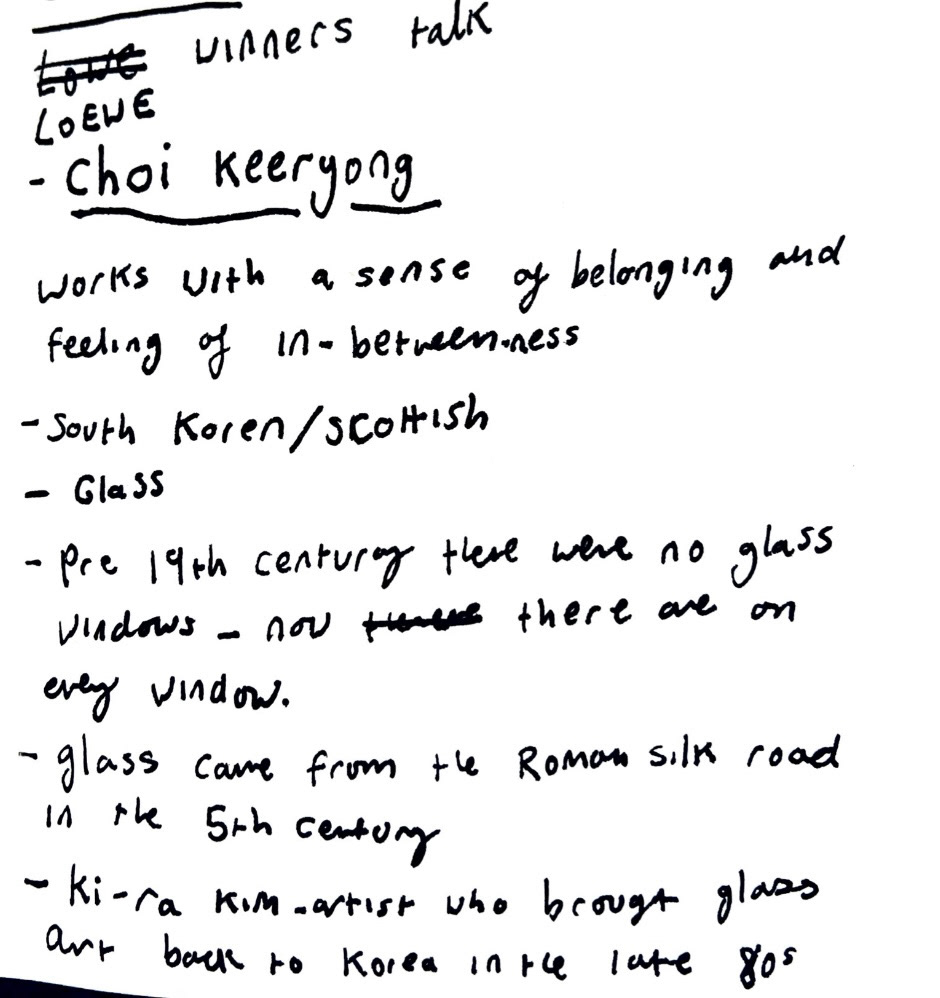
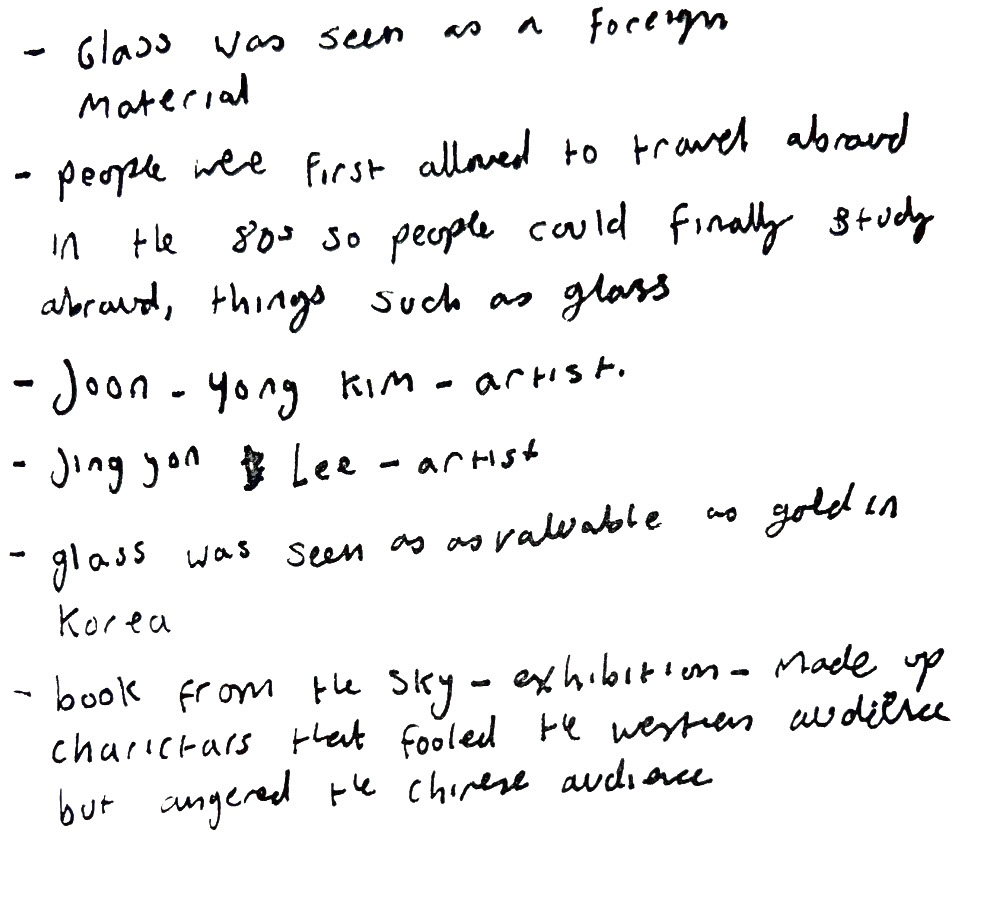
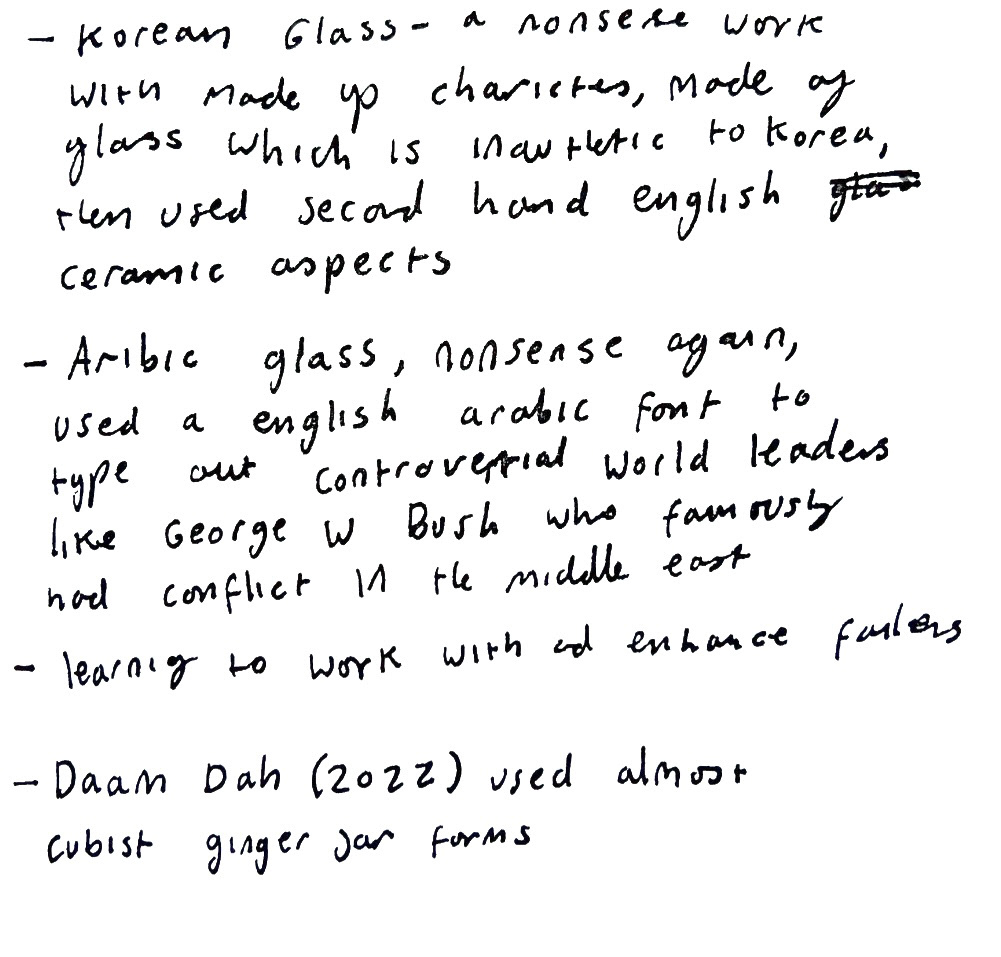
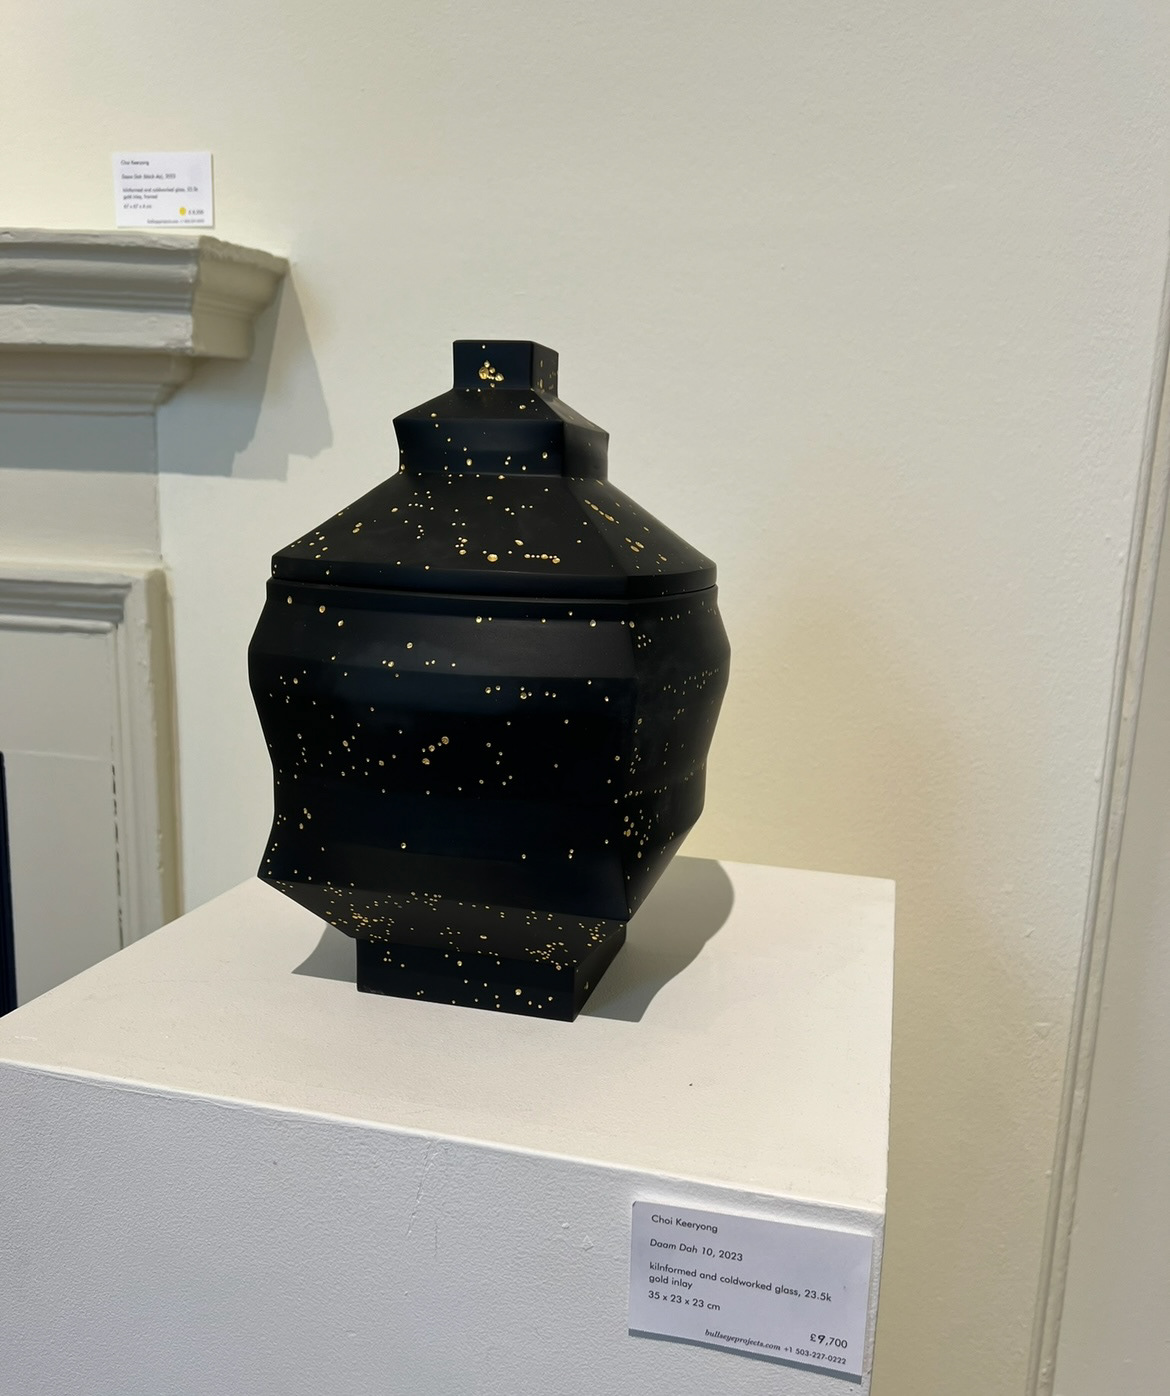
Another artist that I observed using ginger jar forms was Choi Keeryong. Choi lead a talk with us about his work as part of a guest lecture with another winner of the Loewe prize, David Clarke. It was really exciting for me to hear from two Loewe prize winners as last term as part of my research into craft prize opportunities was on the Loewe prize and I thought it sounded really interesting and a potential goal for future submissions.
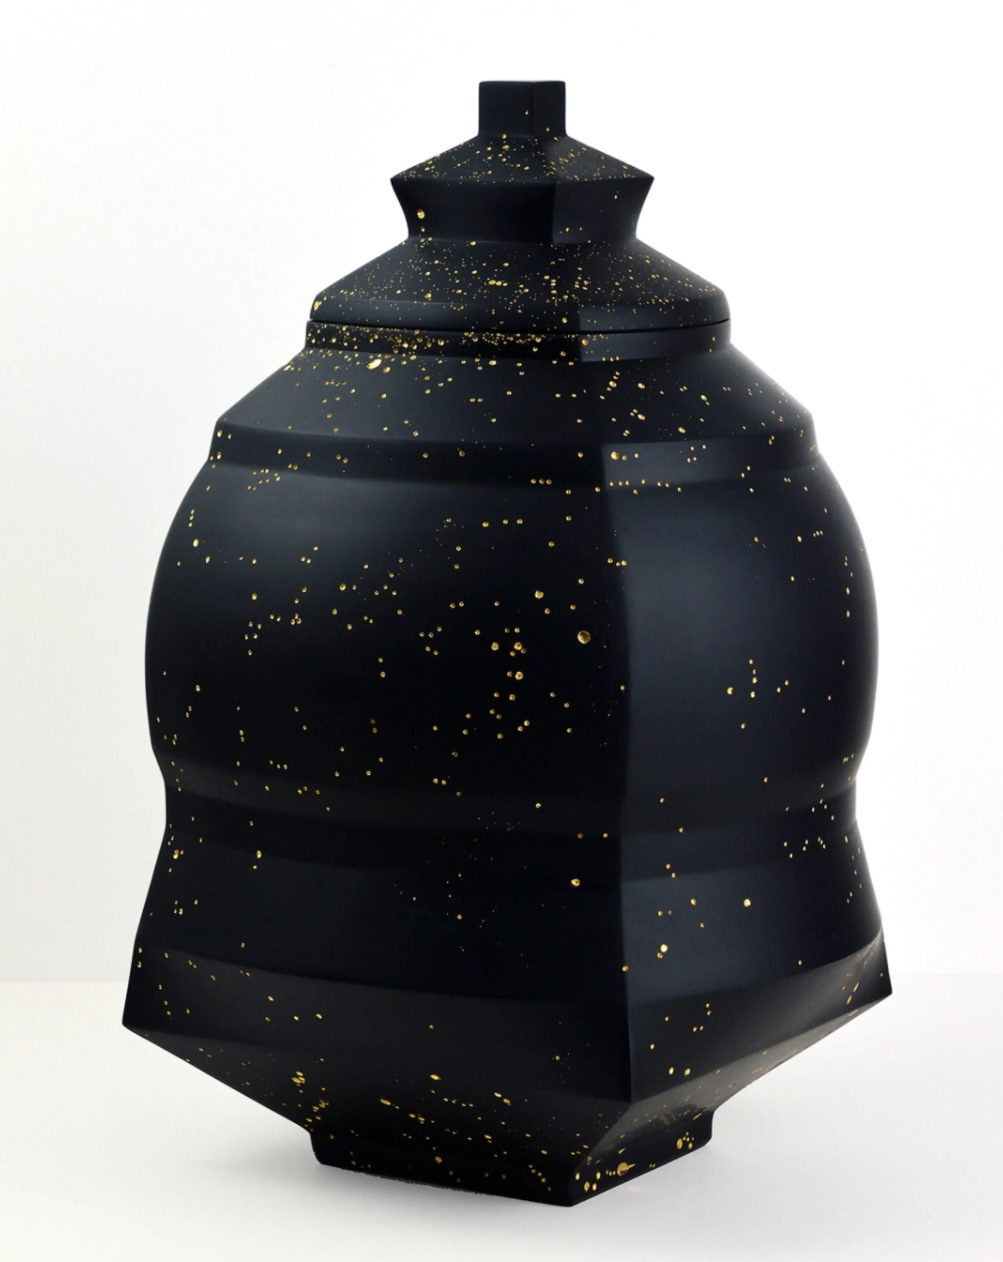
I was really captivated by Chois' work as he interpreted ginger jar forms in a modern way by making them more geometric in shape rather than the traditional round form most commonly found in historical pieces. I also liked how he worked with and harnessed imperfections in his pieces, which is a thing in crafting that I am very passionate about as I think it shows connection of object to maker which cannot be found in mass manufactured pieces. (Choi pieces "Daam Dah" below)

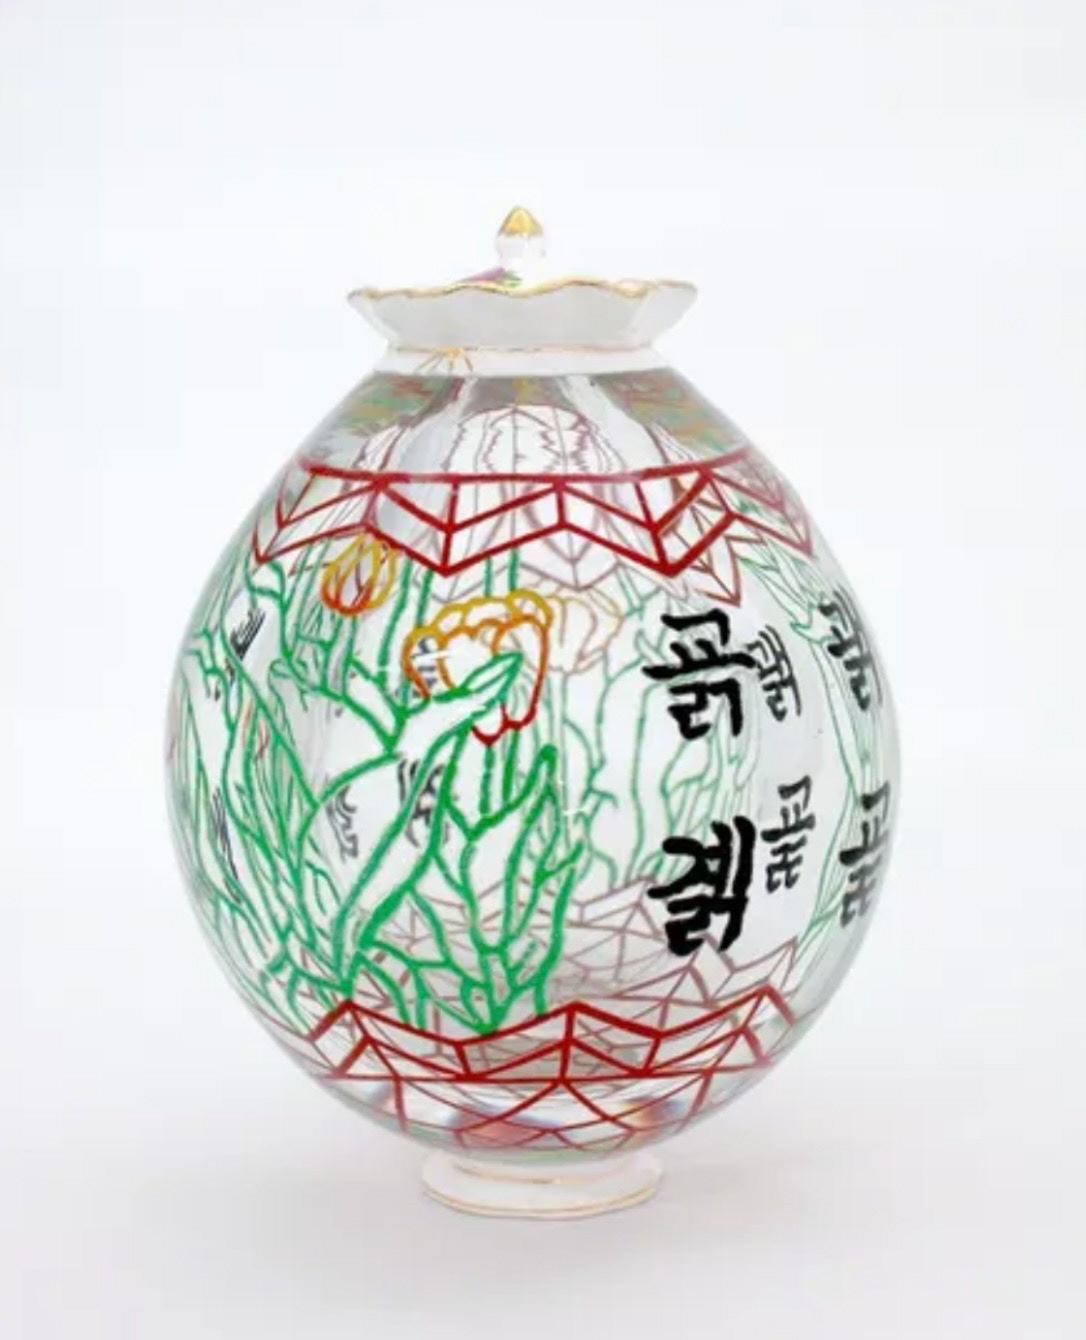
I really liked however a piece by Choi called "Korean Glass", which has really stuck with me. "Korean Glass" is a piece where Choi explores culture through misconceptions. It features glass that is non native to Korea, made up characters that don't mean anything and English antique ceramic aspects, but somehow manages to fool an unaware audience into thinking the peice is of Korean cultural significance. I really liked this as I found similarities in the history of the origins of chinoiserie, how a meshing of cultures and vague motifs can come together to fool and audience that are unaware of the true origins.
(notes on from Chois' talk below).
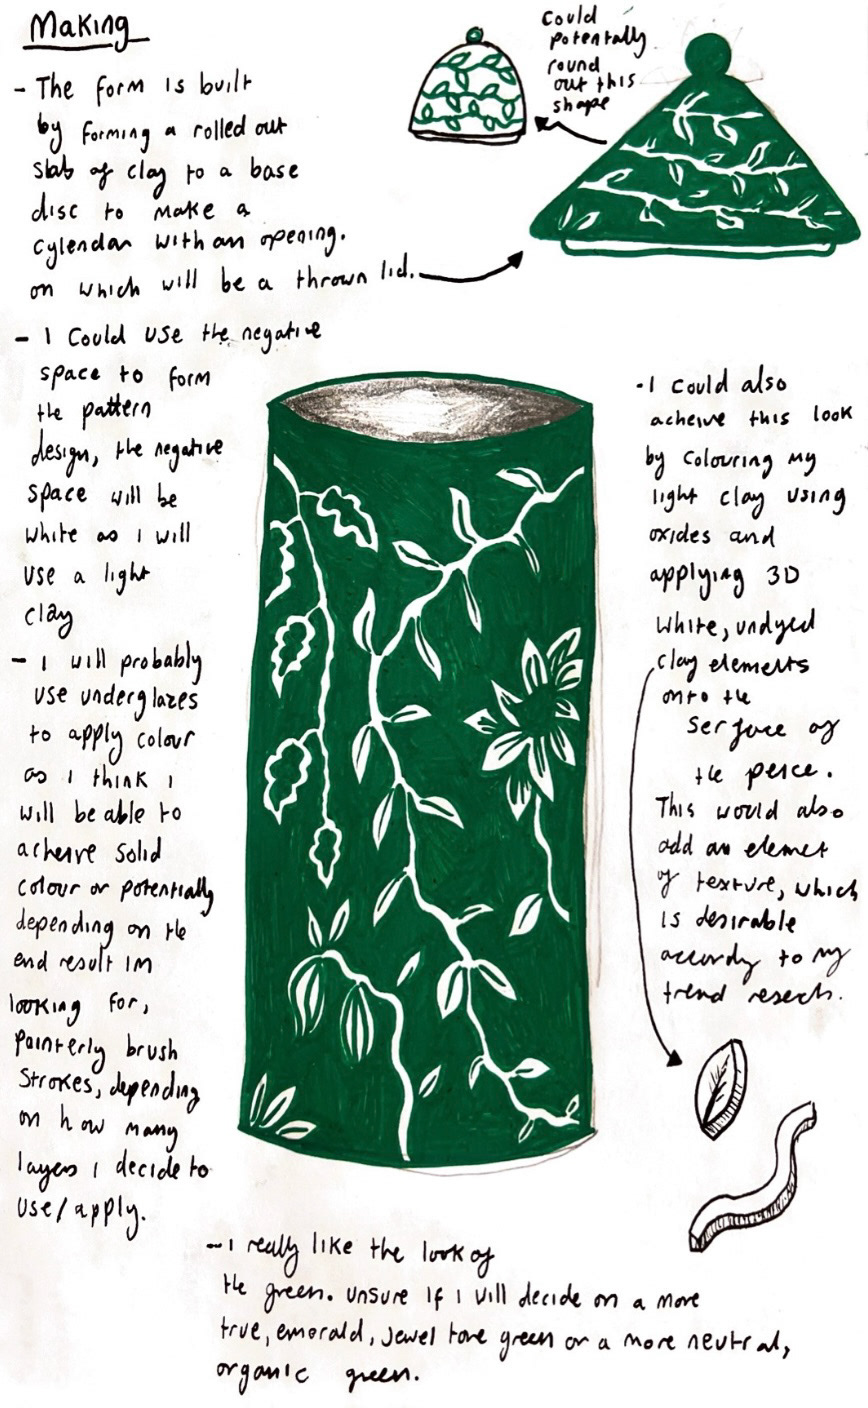
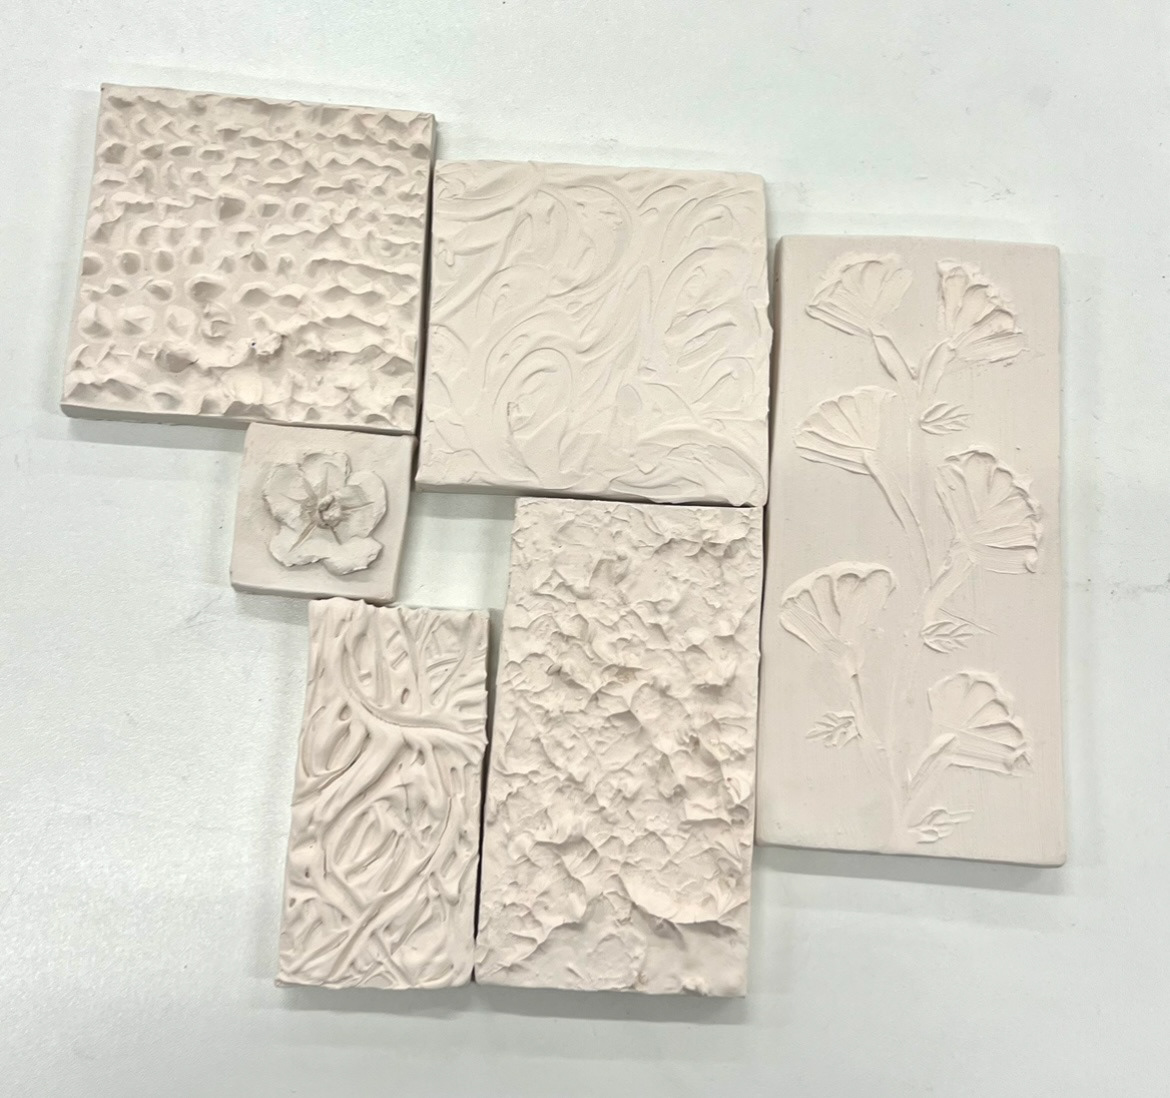
Now that I felt adequately familiar with the form of a ginger jar. I decided it was time to start thinking about making one. I thought that the best way to learn was through doing. However it was my first time back in the studio after Christmas so I thought that I would start off by making some material samples with some ivory stoneware clay. I jotted down some ideas first. (below).
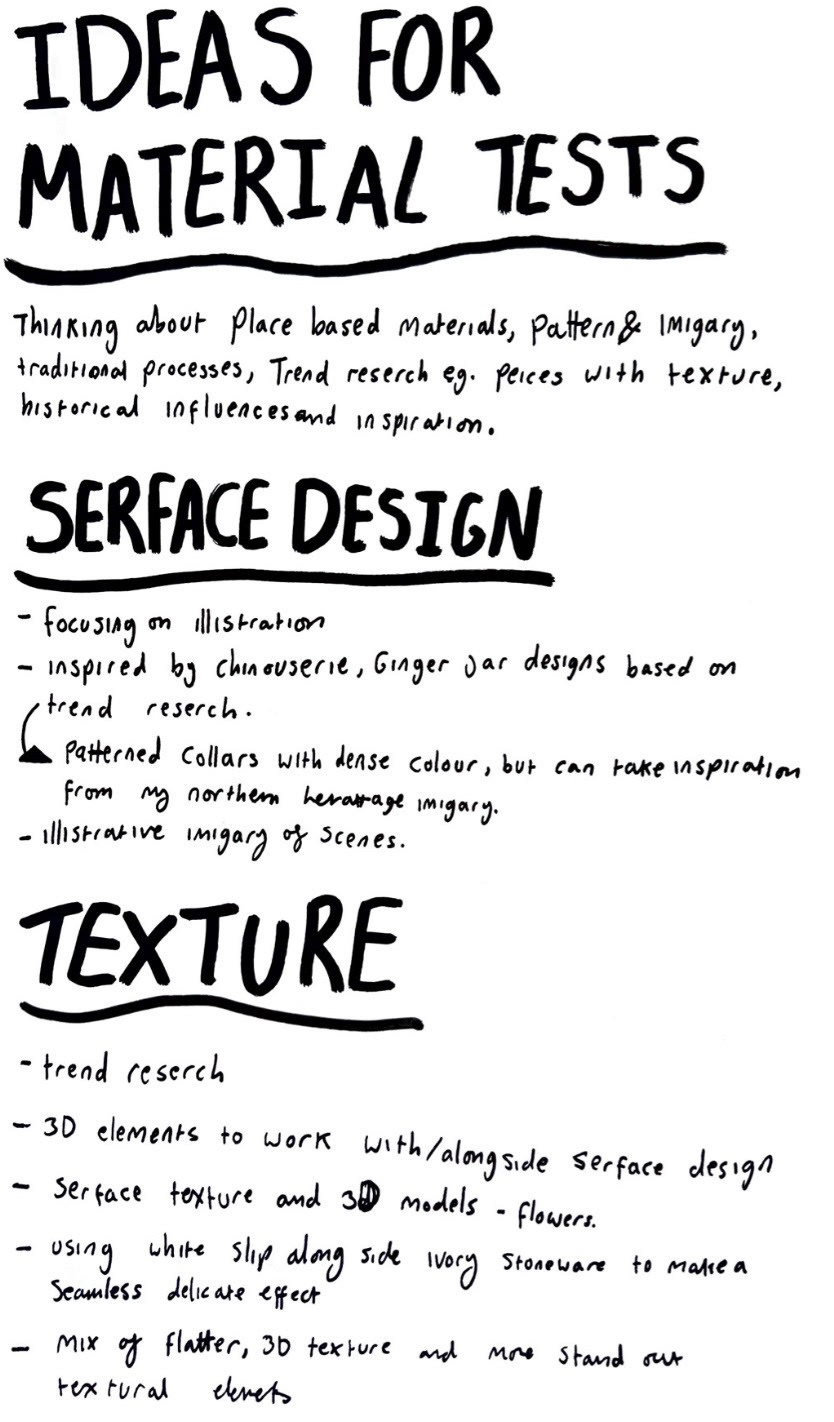
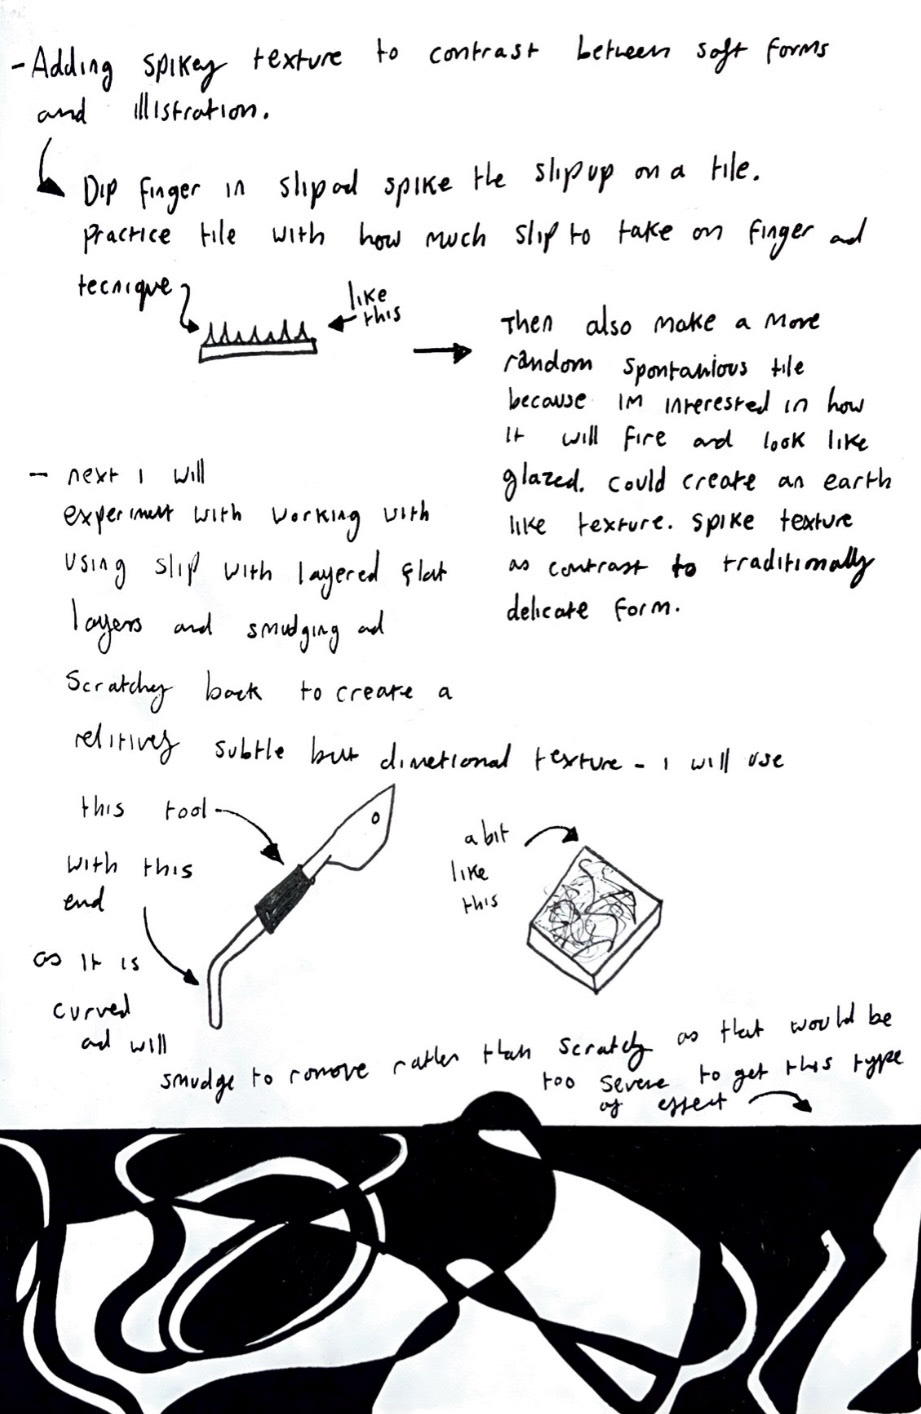
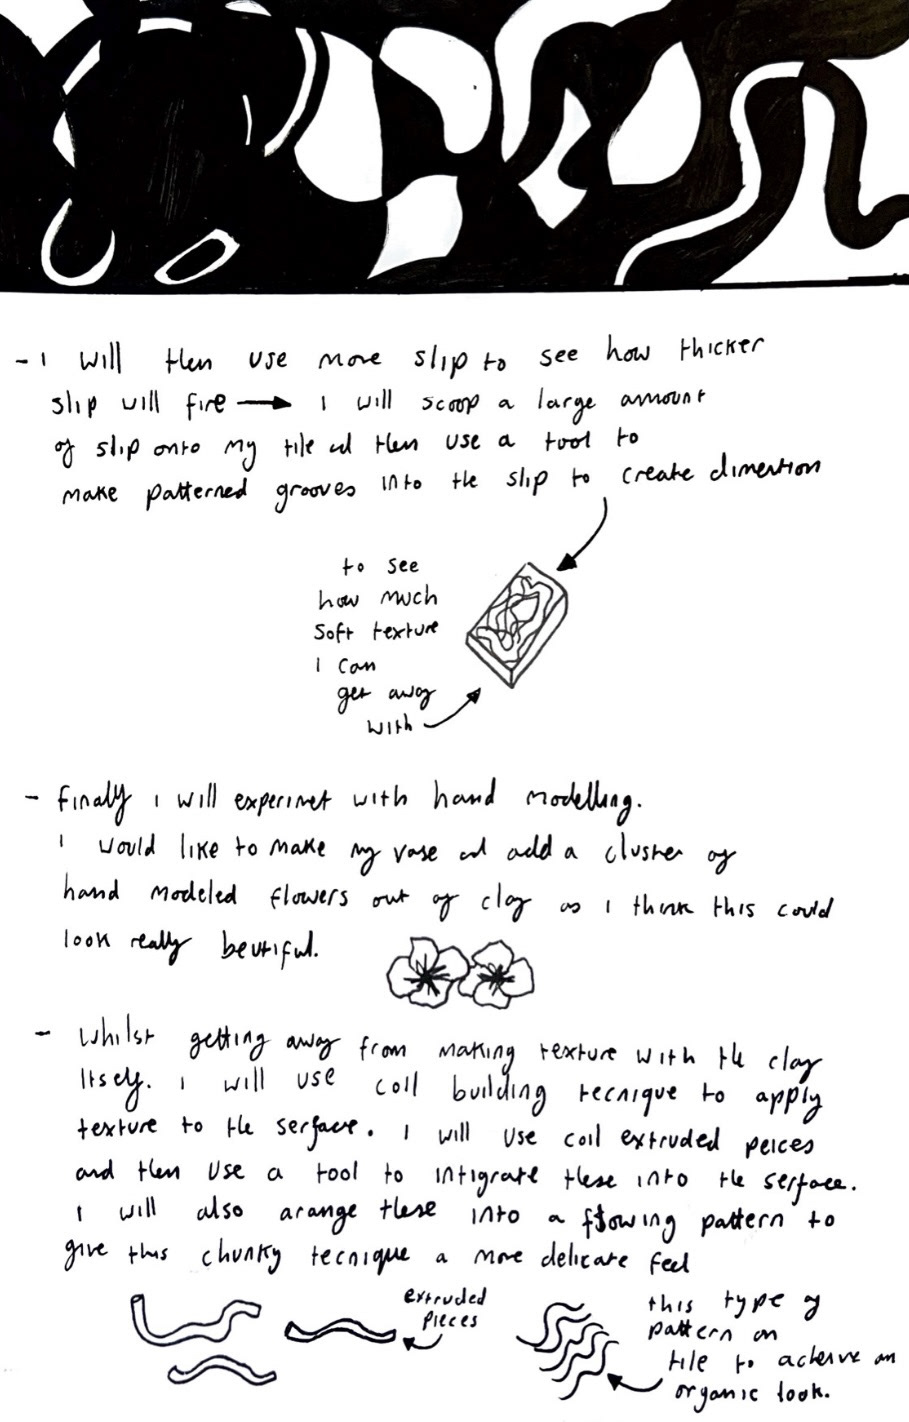
I decided on making some texture samples based on my trend research from last term so that it could maybe work alongside or even enhance my final illustrative design. I completed an illustrated plan of my process for how I would make these samples. (below).
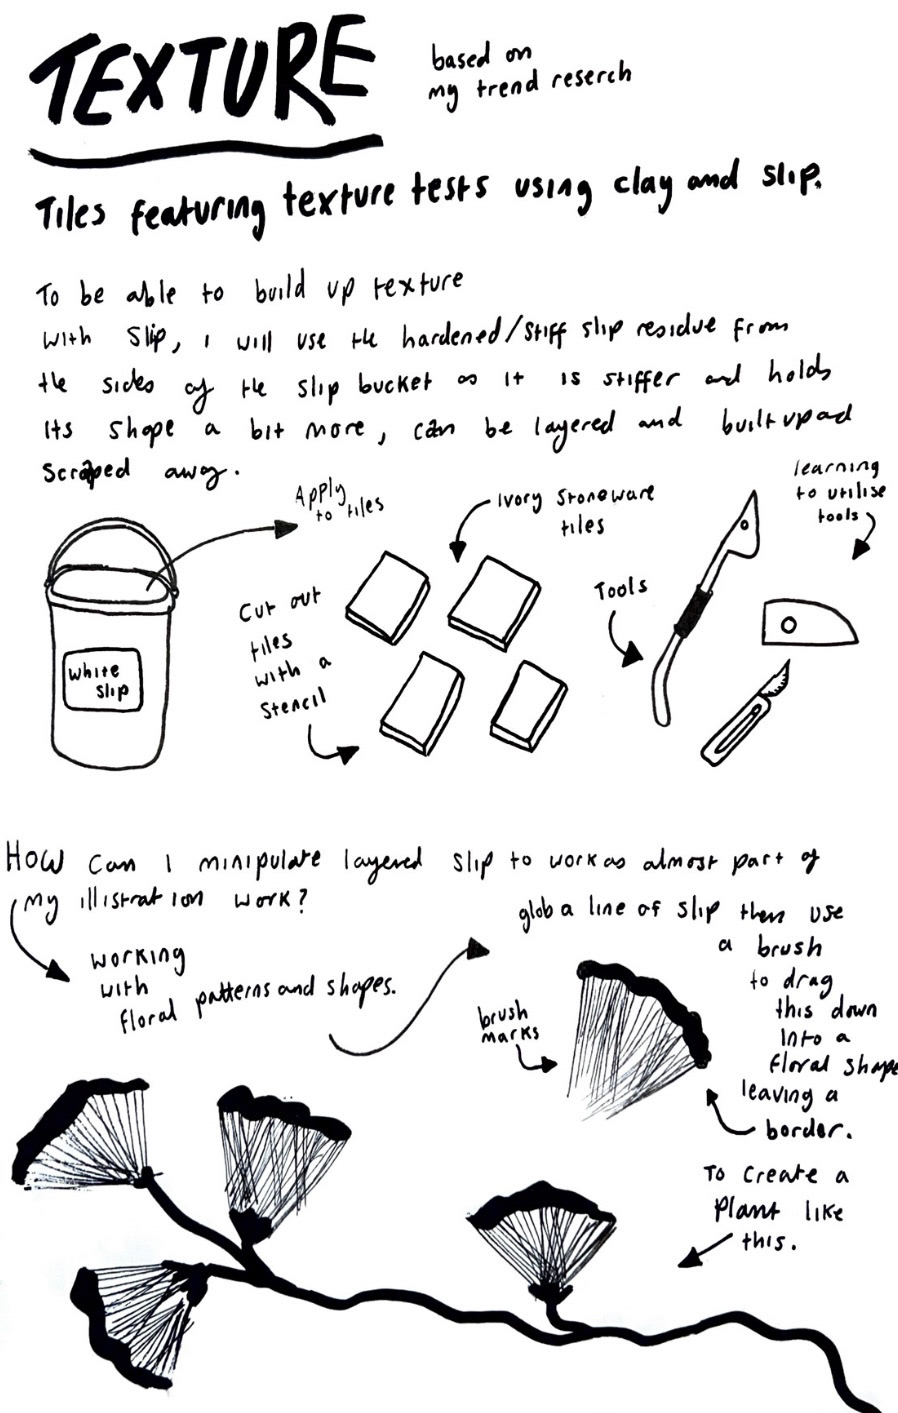
(video of me making these samples in UC2 videos folder).
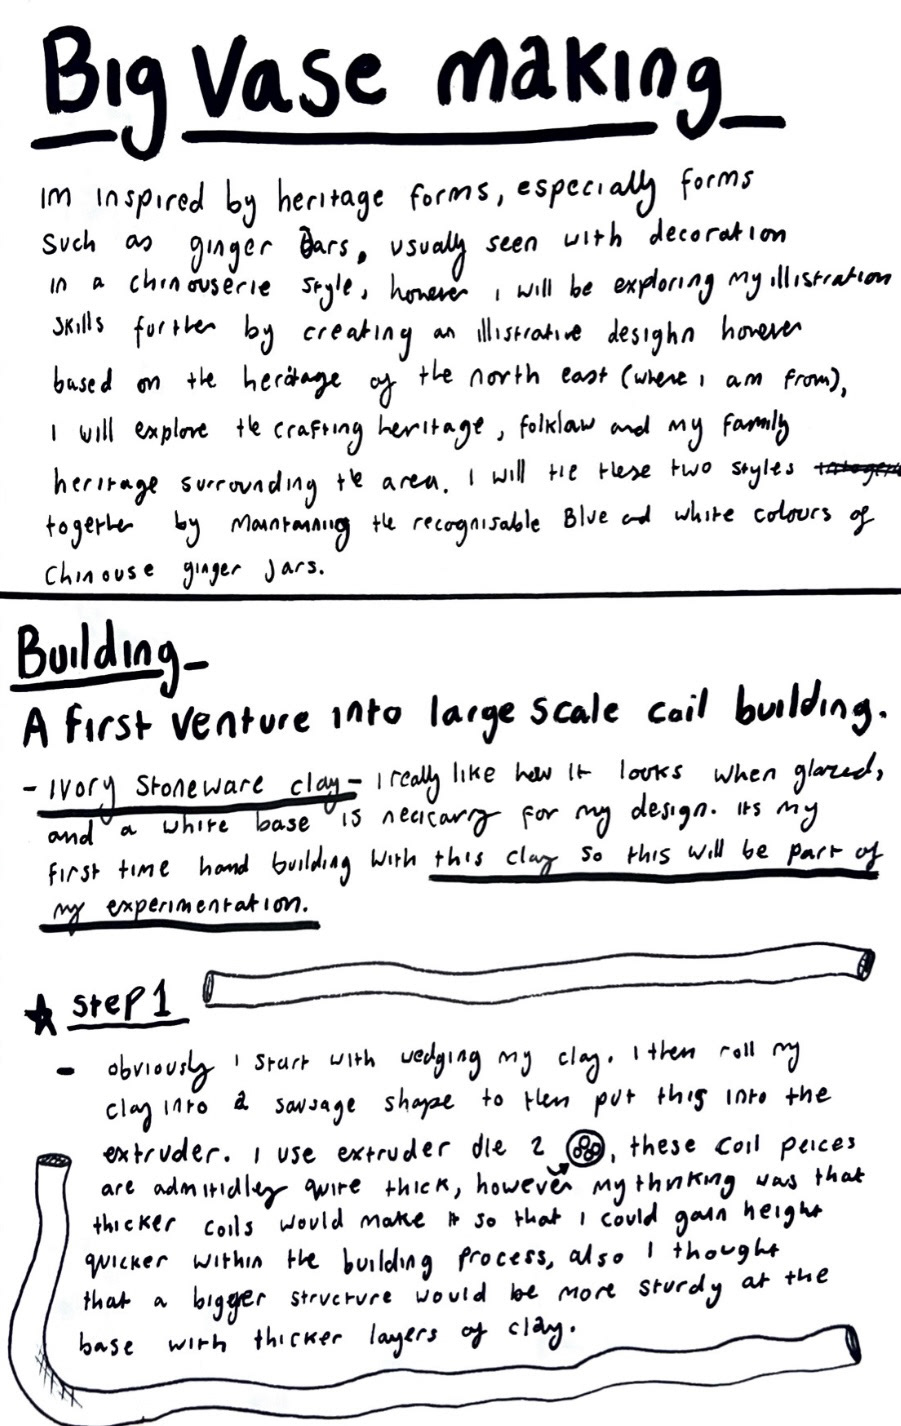
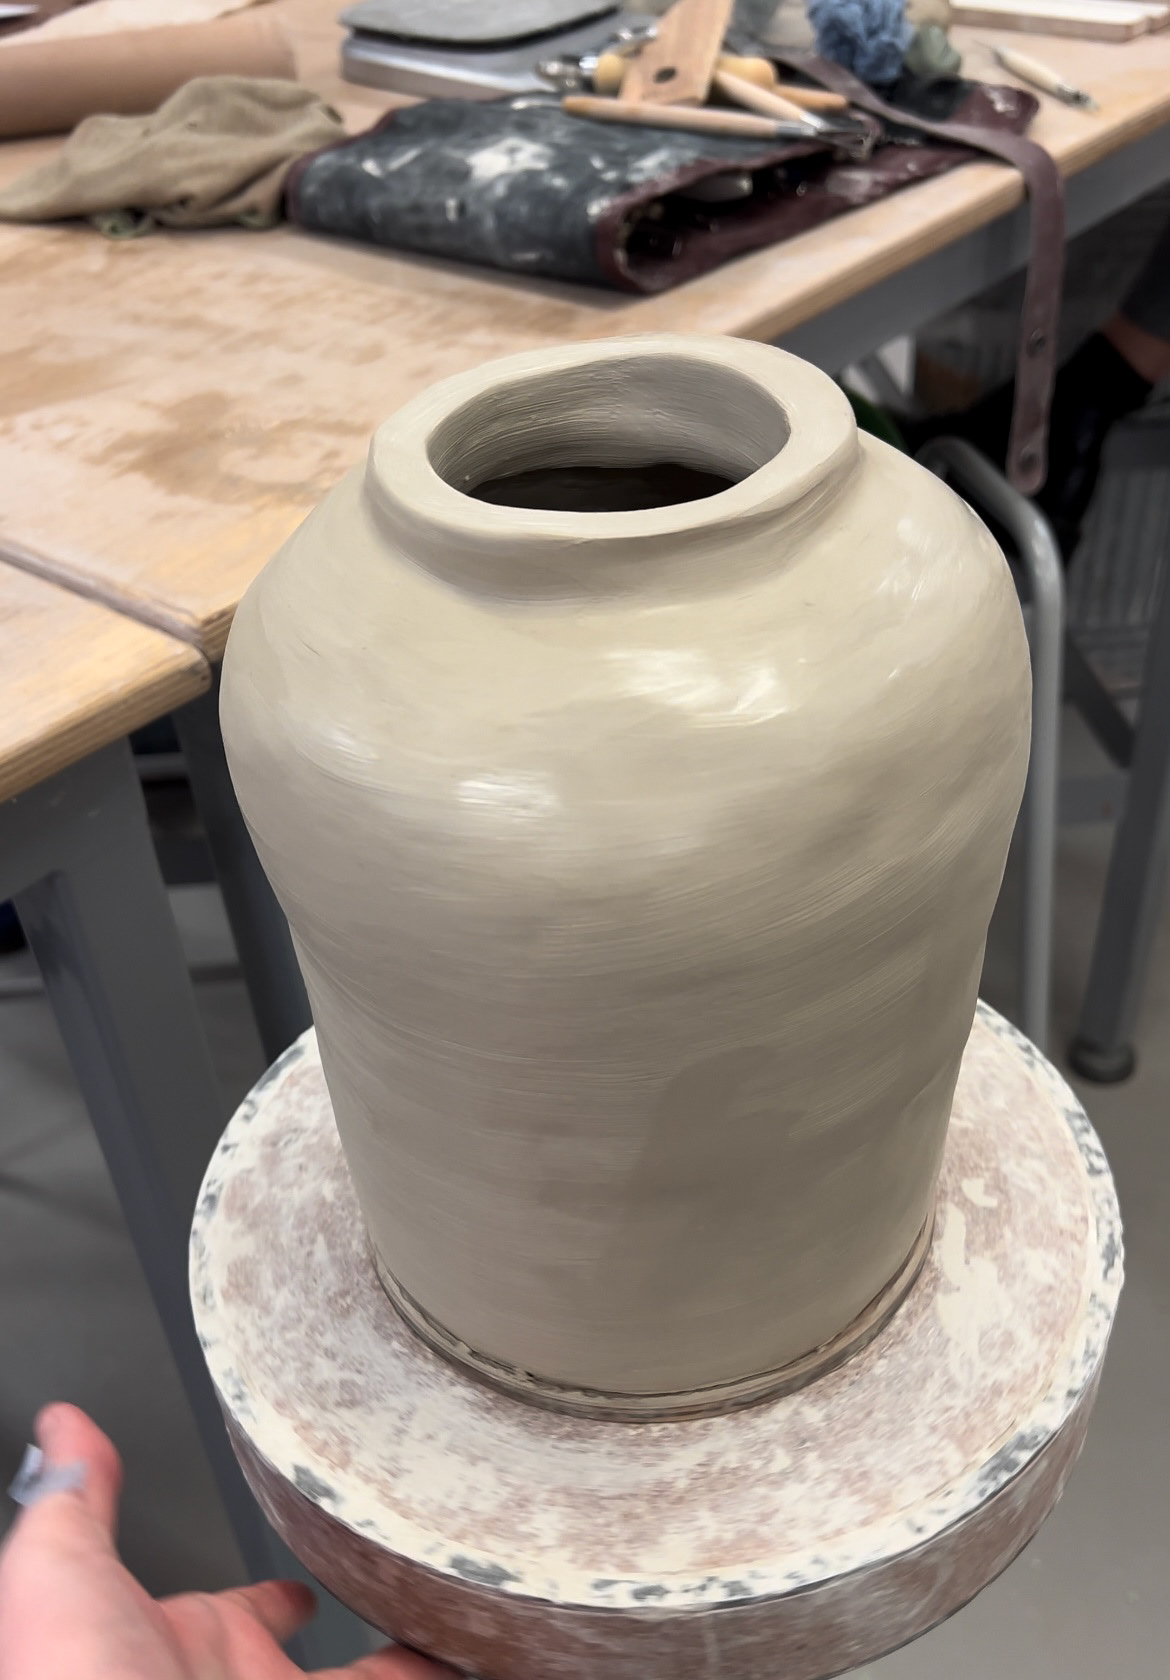
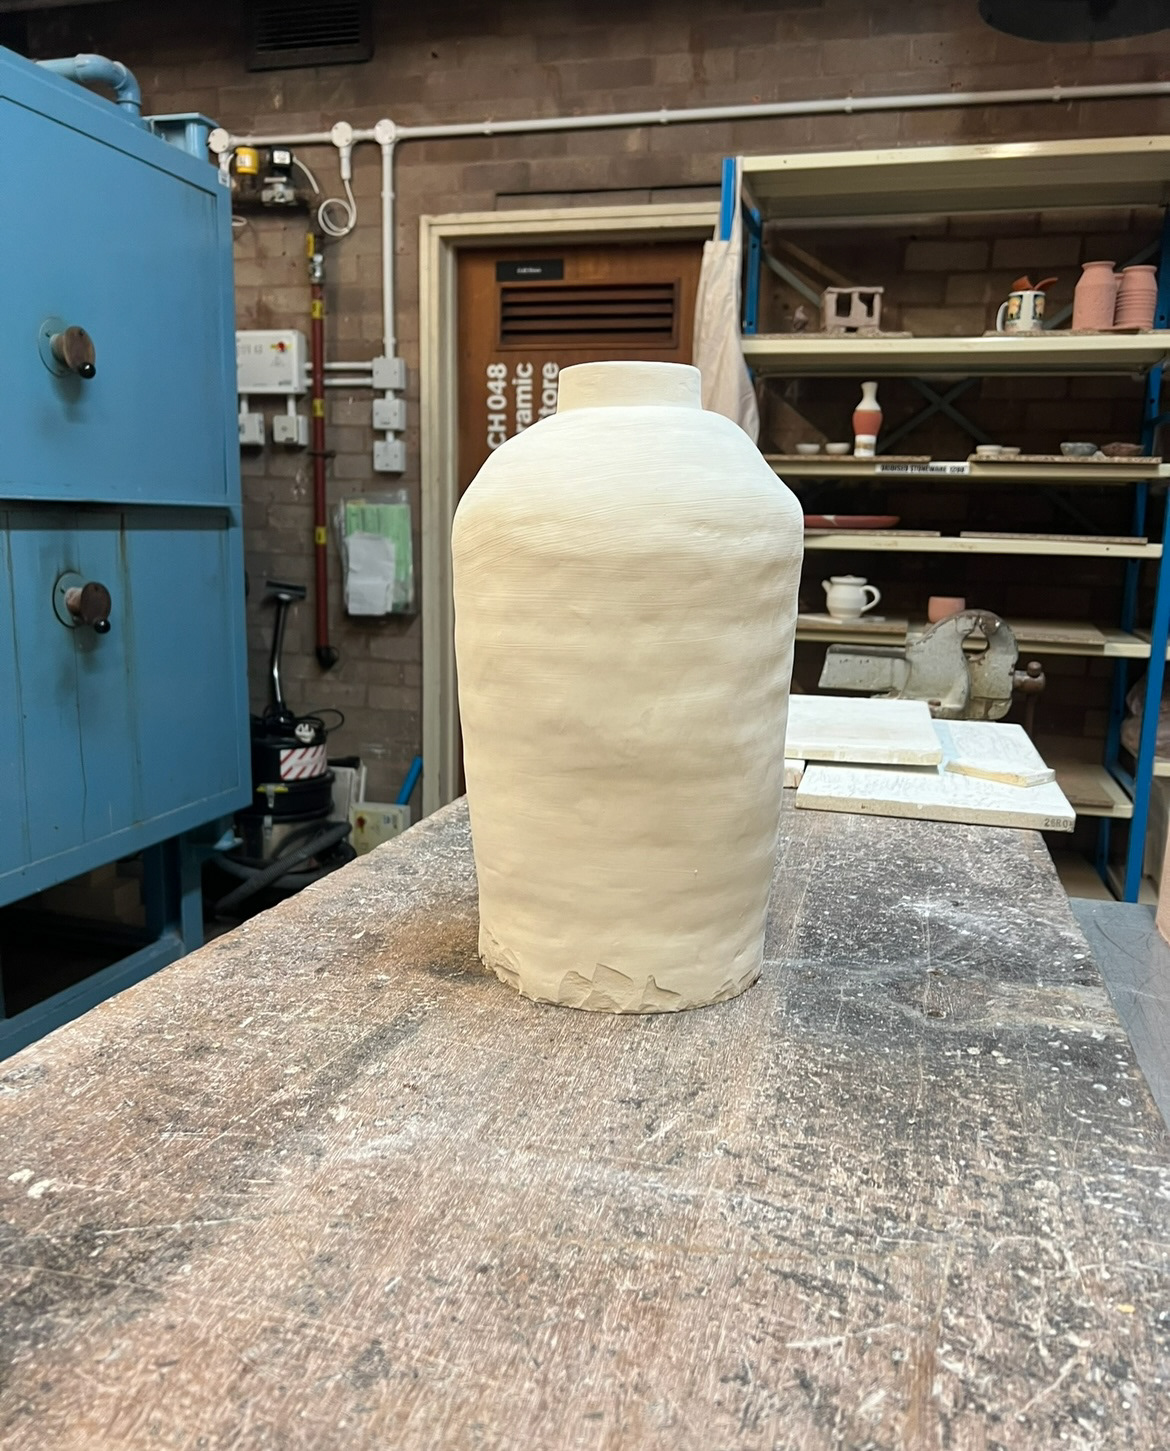
After making my samples I was confident enough to get started with building my first ginger jar. I decided that the best way to learn was through doing, so that's what I set out to do. I had an image in my head of making a large scale piece, I had never undertaken any large scale coil building before so I started to make my first piece, reflecting as I went on my concerns while building that I could emend later if things went wrong.
I started by drawing the shape I was intending to make. (below).
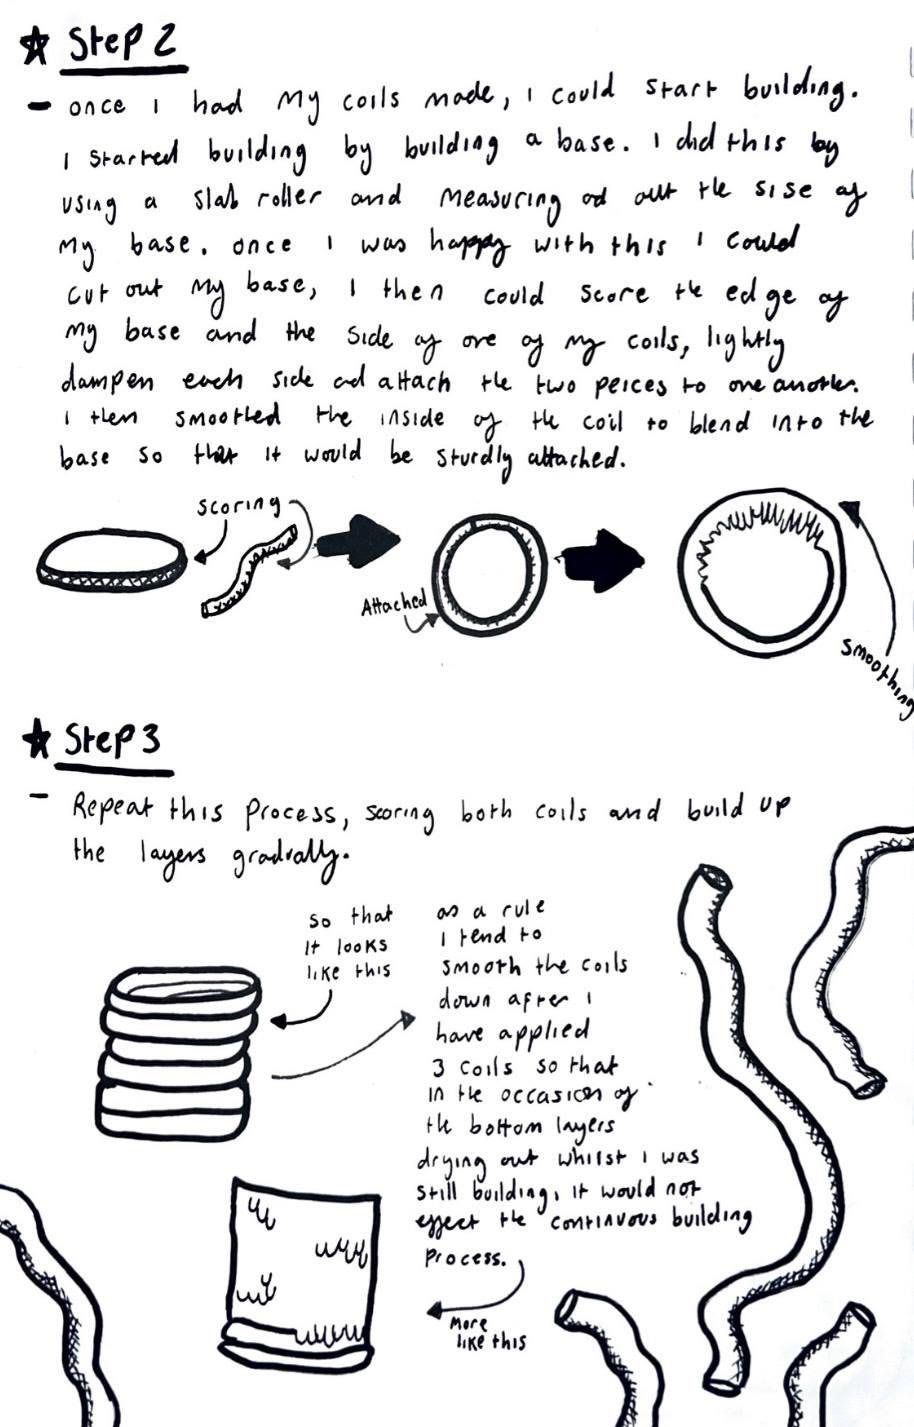
I then set out an illustrated plan of how I would go about the initial coil building of this piece.
(Videos of me carrying out this technique in UC2 videos folder. See 'Building Big Pot video 1 and 2.)
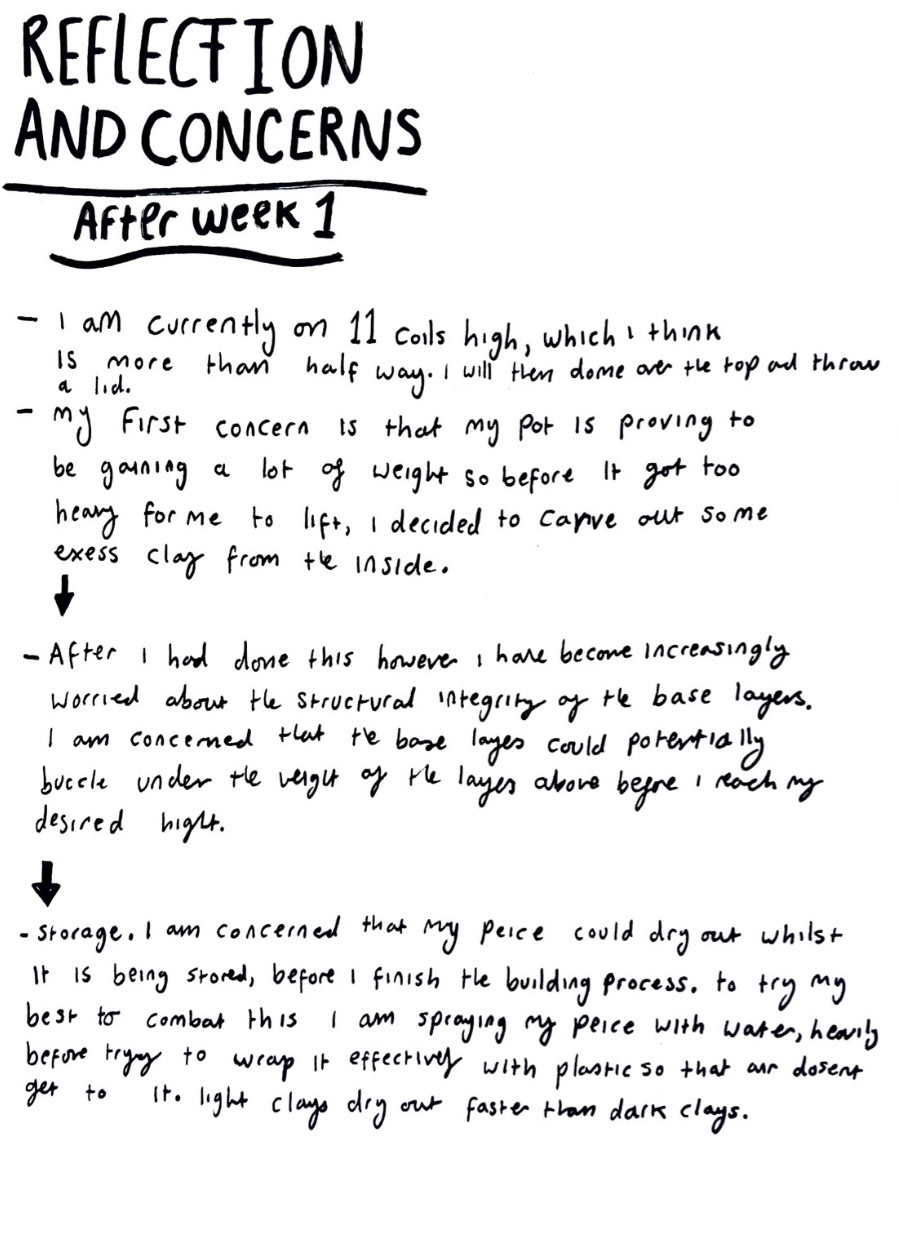
After I had put my plan into practice, I jotted down some potential concerns I was worried about with the build, especially concerning its scale. (below).
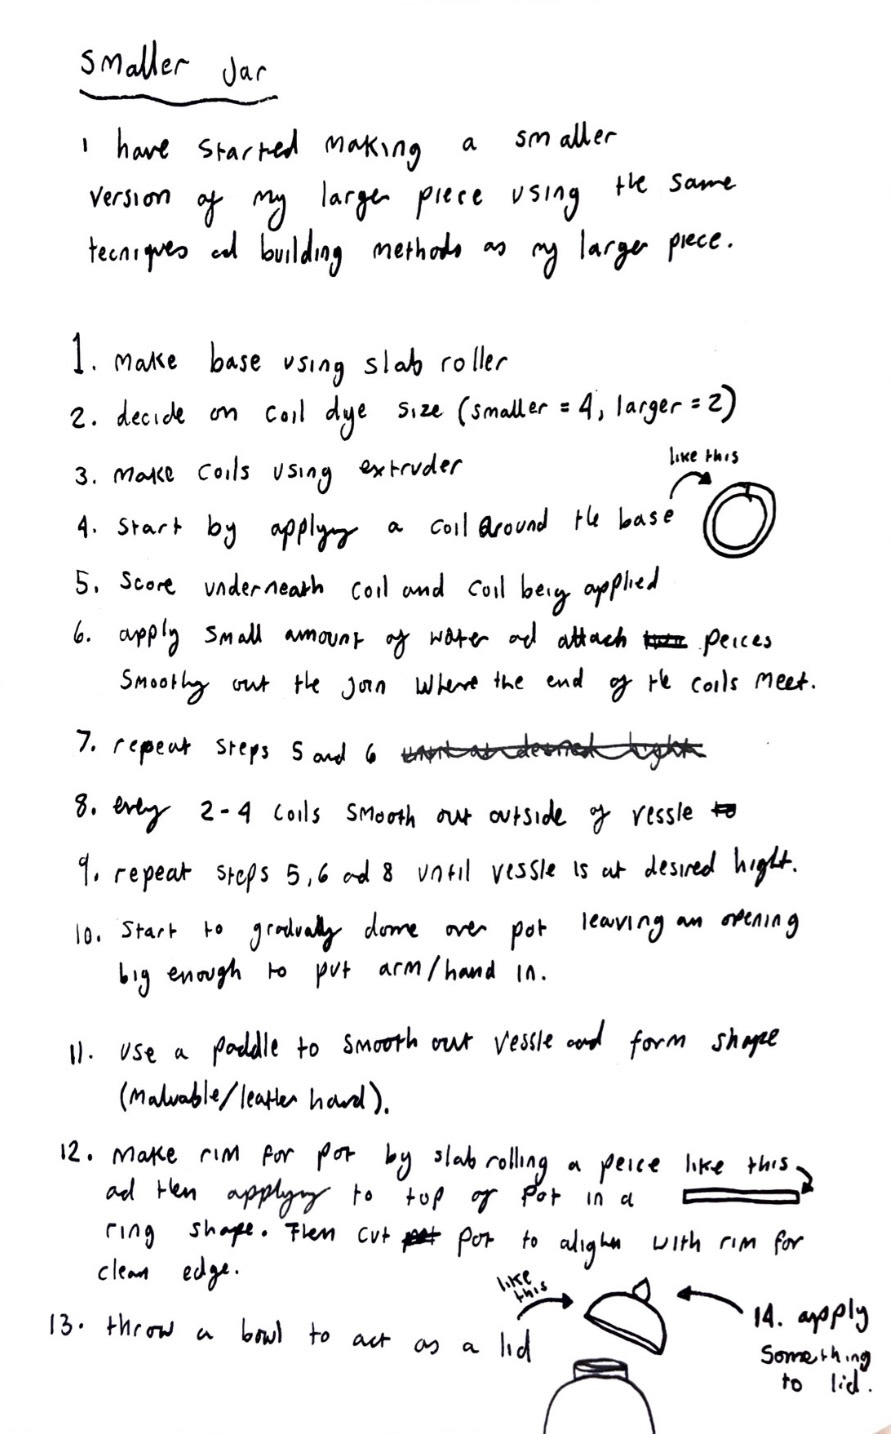
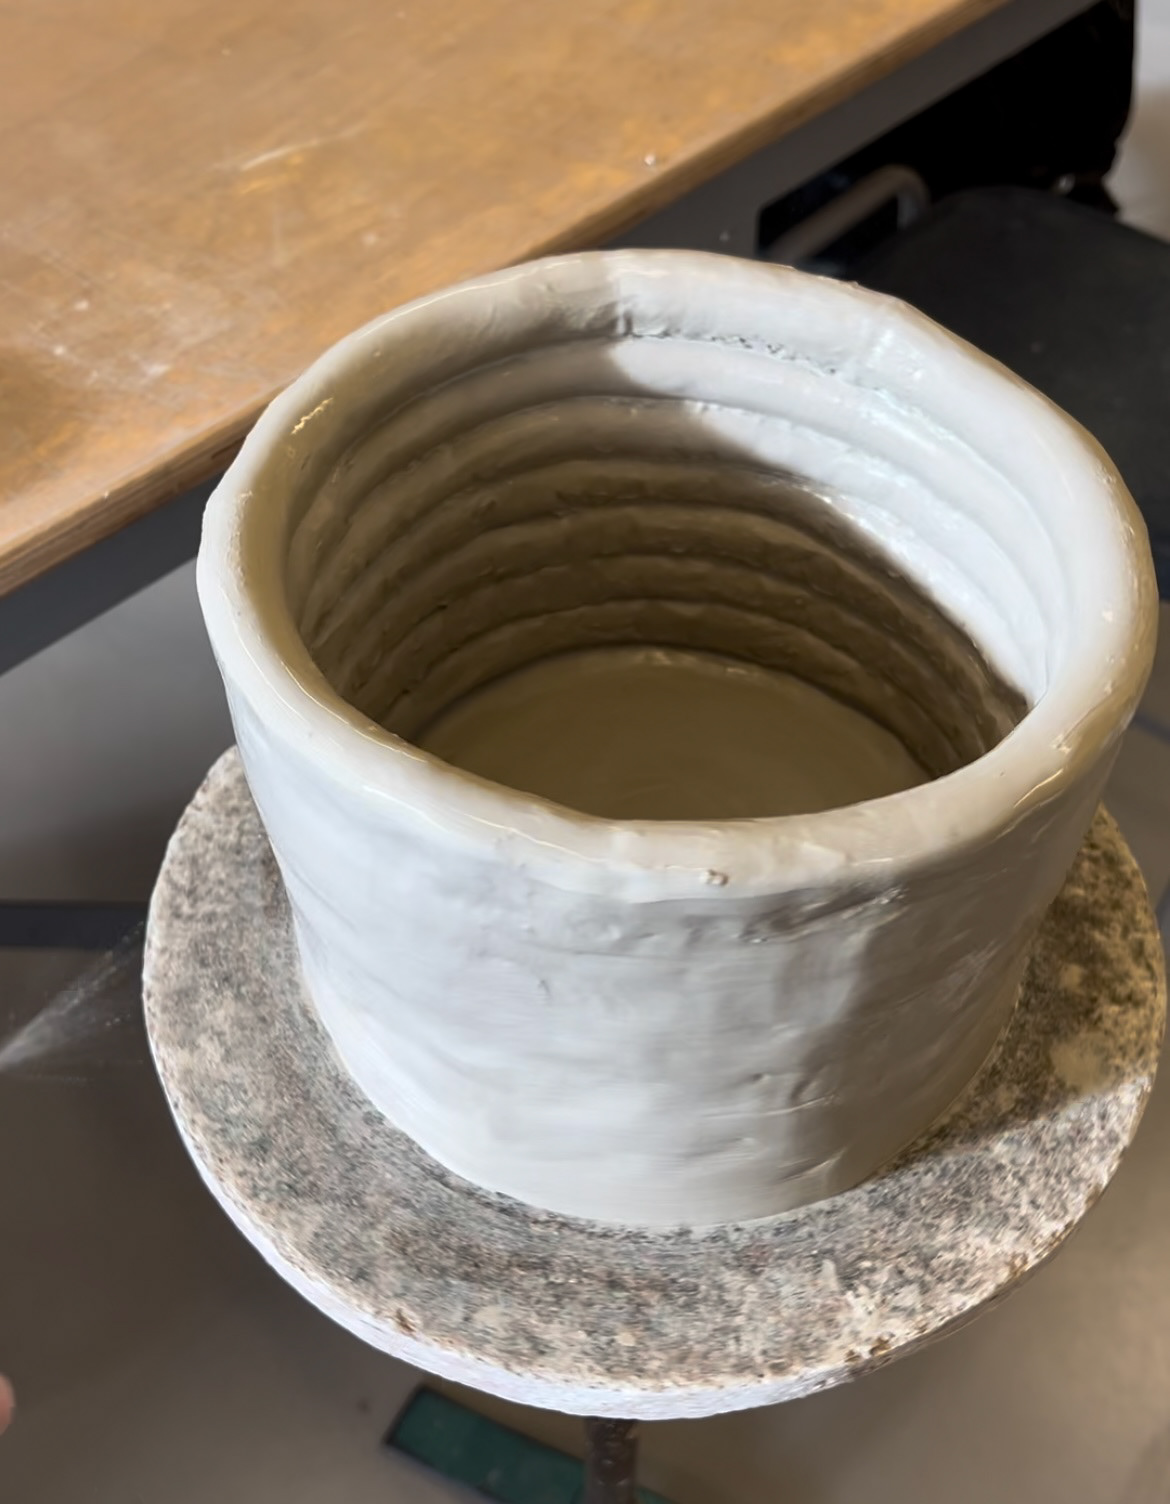
At this point in the building process, I had gotten very precious about my big pot and this had somewhat halted the making process. I decided that instead of trying out all of the new processes I had learnt about on the big piece, instead I would build a smaller sample pot with which to test these out on so that I could be more confident going forward onto the big pot in larger scale. the processes I was most worried about were, doming over the top of my pot, for risk of caving in and also a process to shape the pot and smooth out the sides, where you hit the structure with a paddle, again, this scared be because of the good chance that the piece would collapse.
I stored my large structure, frequently monitoring the moisture of the clay so that it wouldn't dry out, and got to building my smaller scale pot. I wrote down a step by step guide of how I would complete the whole thing. (below).
(Videos of me completing this plan in UC videos folder. See small pot building 1 and 2)
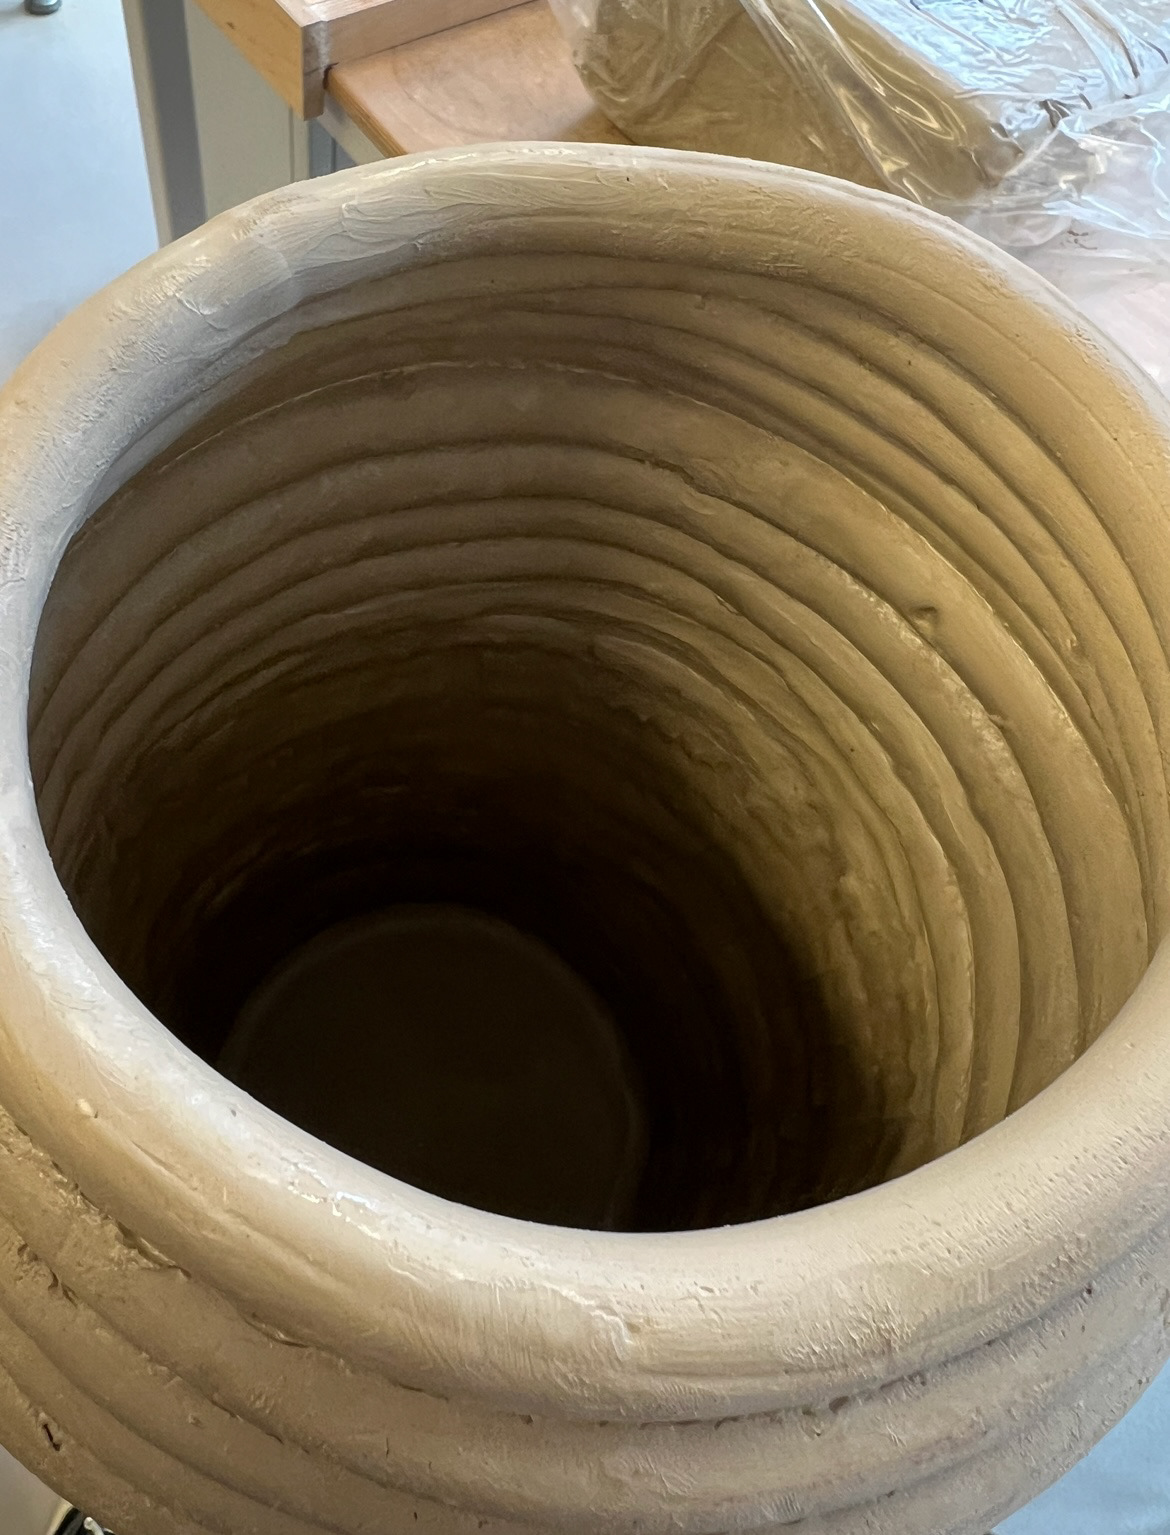
(photo mid build below).
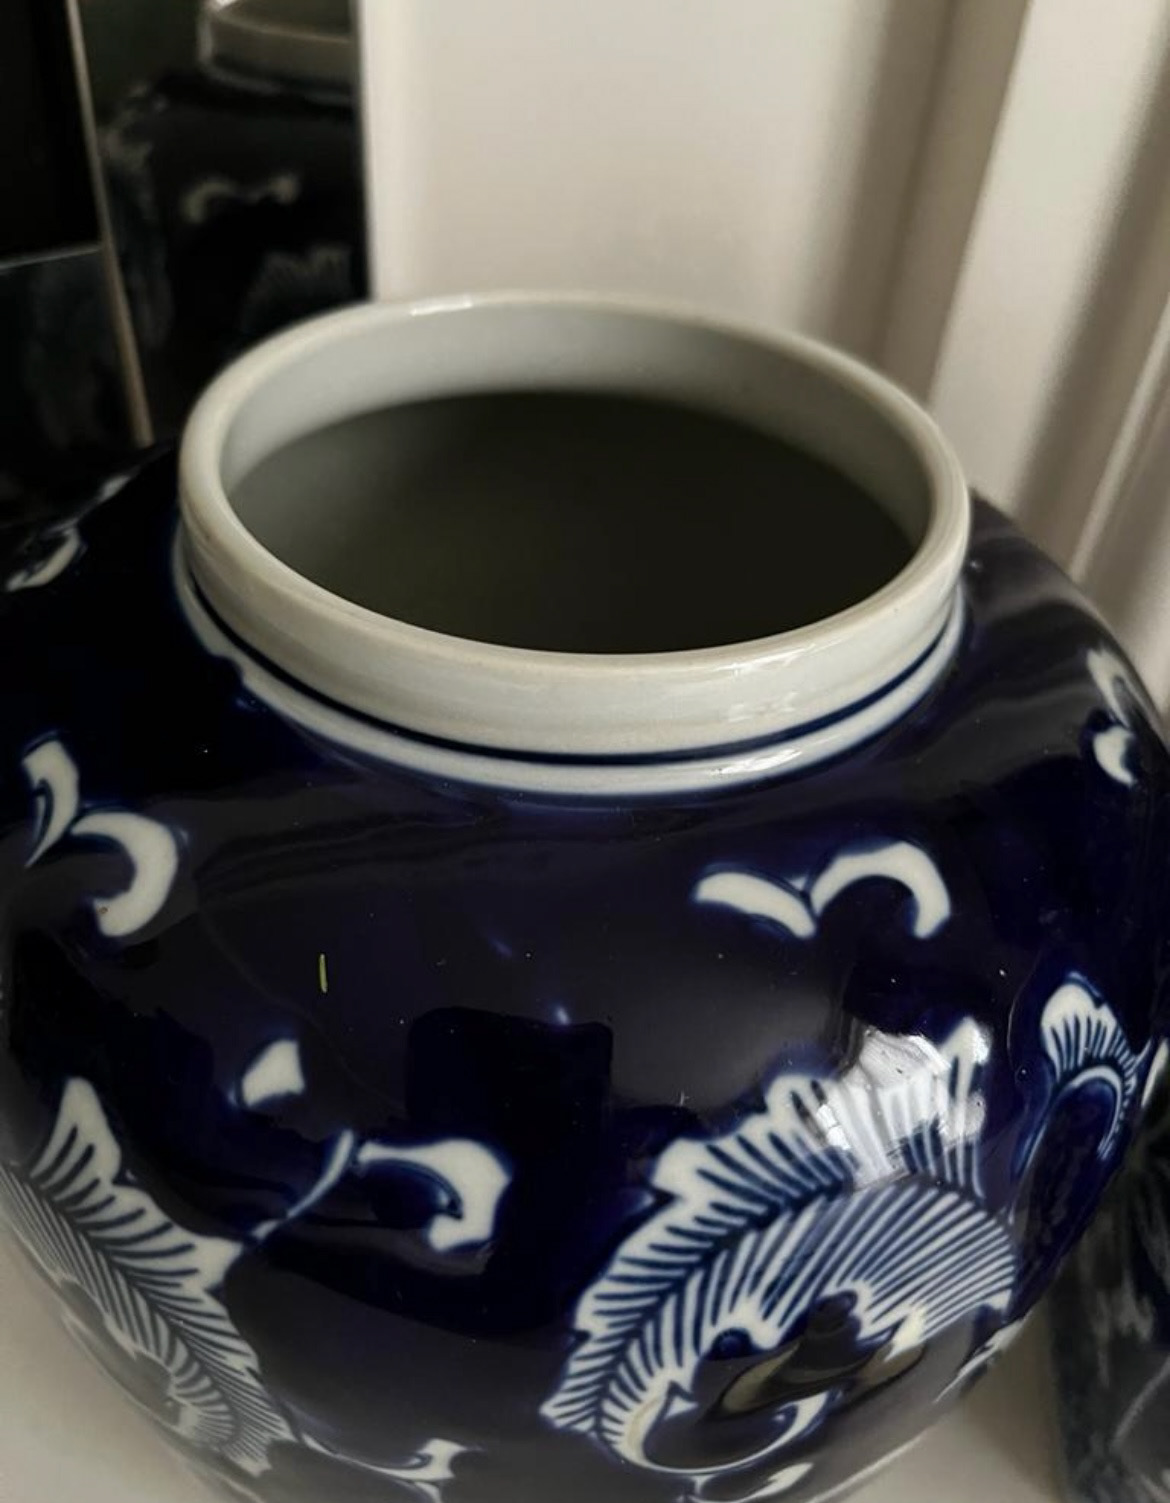
I did defiantly struggle when it came to the rim of the pot, and getting it completely straight. This would have to be a solution I would have to come up with going forward. the style of lid attachment was inspired by an antique ginger jar owned by my mother where the lid is effectively a bowl which rests upon the rim, this is one of the reasons why the rim has to be flat and straight so that the lid wouldn't just wobble off after firing. I was heavily inspired by the form of this pot specifically when building. (example picture below).
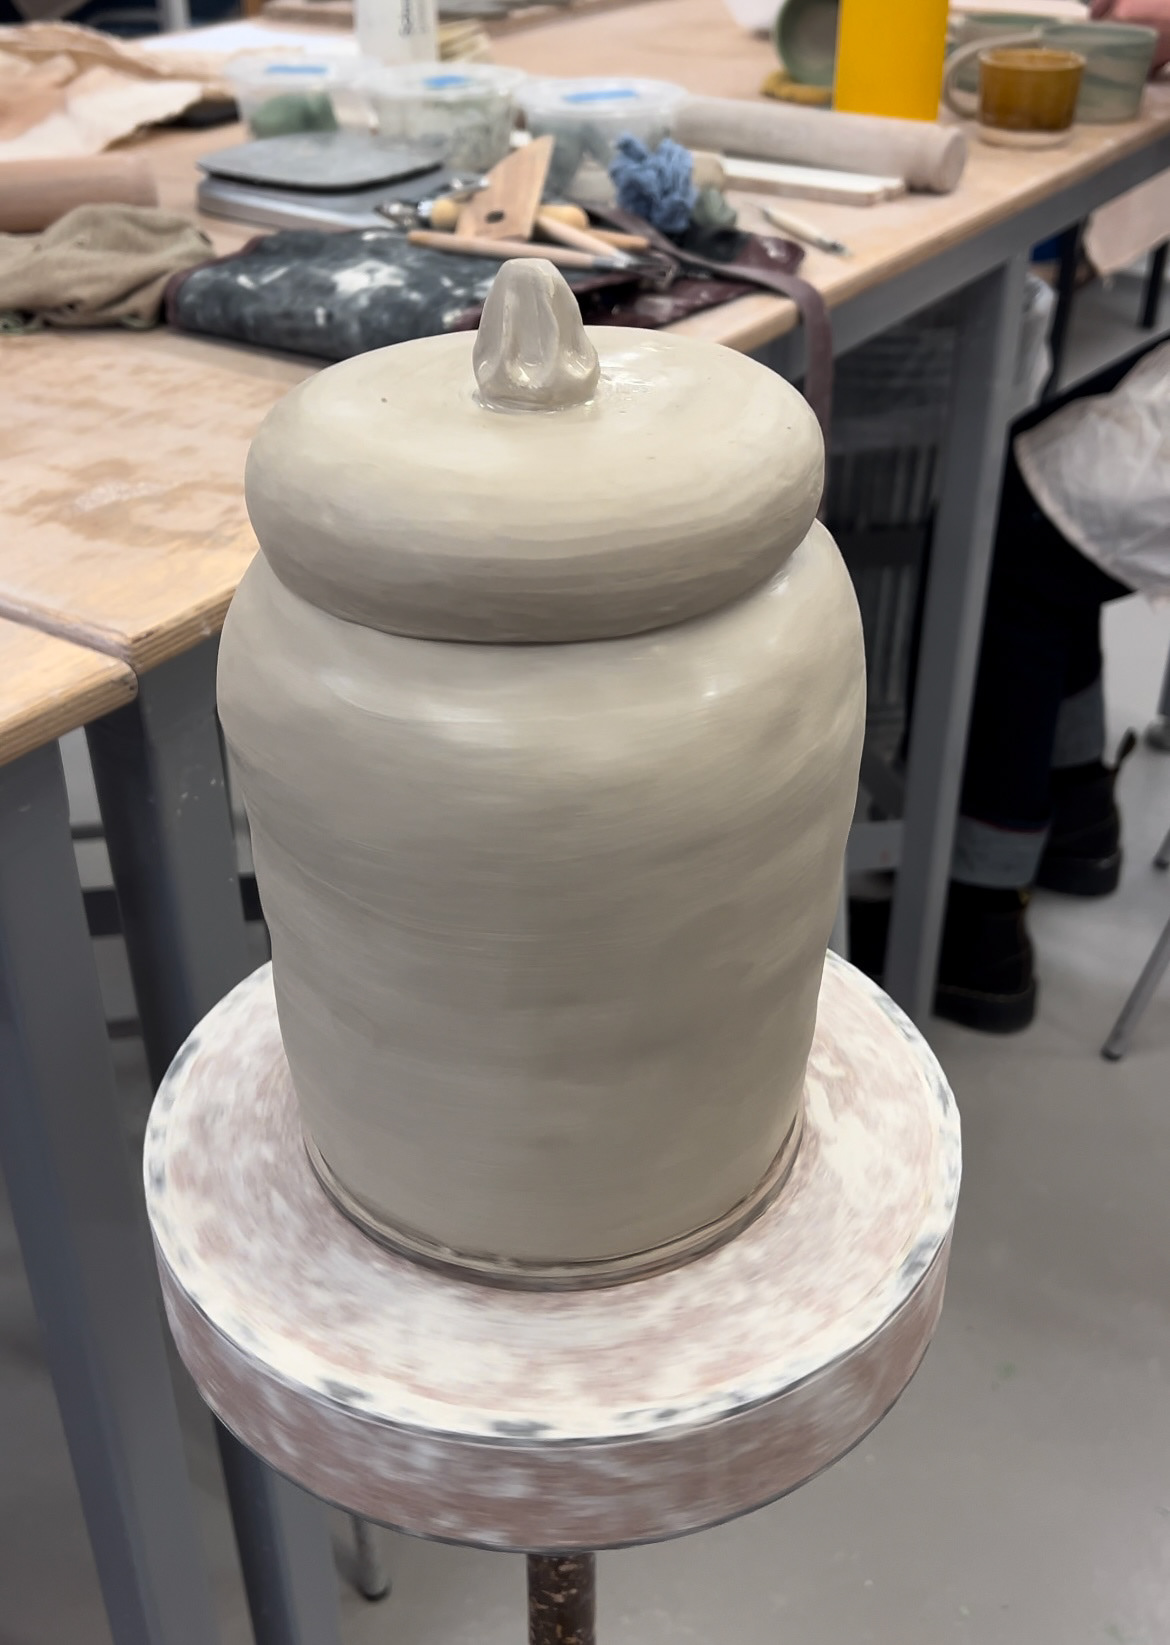
(pictures of finished build before drying and firing below).
Whilst making this pot, I learned a lot about construction moving forward. I learned that using smaller coils was more time consuming however easier to manage as I could create longer coils with the same amount of clay I used making thicker coils, this meant that I could use less coil joins so the piece was more structurally sound and relied on less joins that could come apart if not constructed properly. I also learnt a lot more about the hydration of clay and how my pot had to be a certain hardness to carry out certain processes such as using the wooden paddle. another thing about using the paddle that I learnt was that it was not only for smoothing out imperfections, but also just as much about forming the overall shape. Also that a gradual technique of doming over the pot was the way to go.
Now that I had completed this build, I felt a lot more equipped to carry on with my larger scale project. Whilst I had been constructing the smaller version, I had been simultaneously learning a lot about clay hydration while in storage. Every couple of days I would unwrap my large piece and spray it with water generously before wrapping it back in plastic and storing it again. I learnt how to carry out regular checks and effective re-hydration.
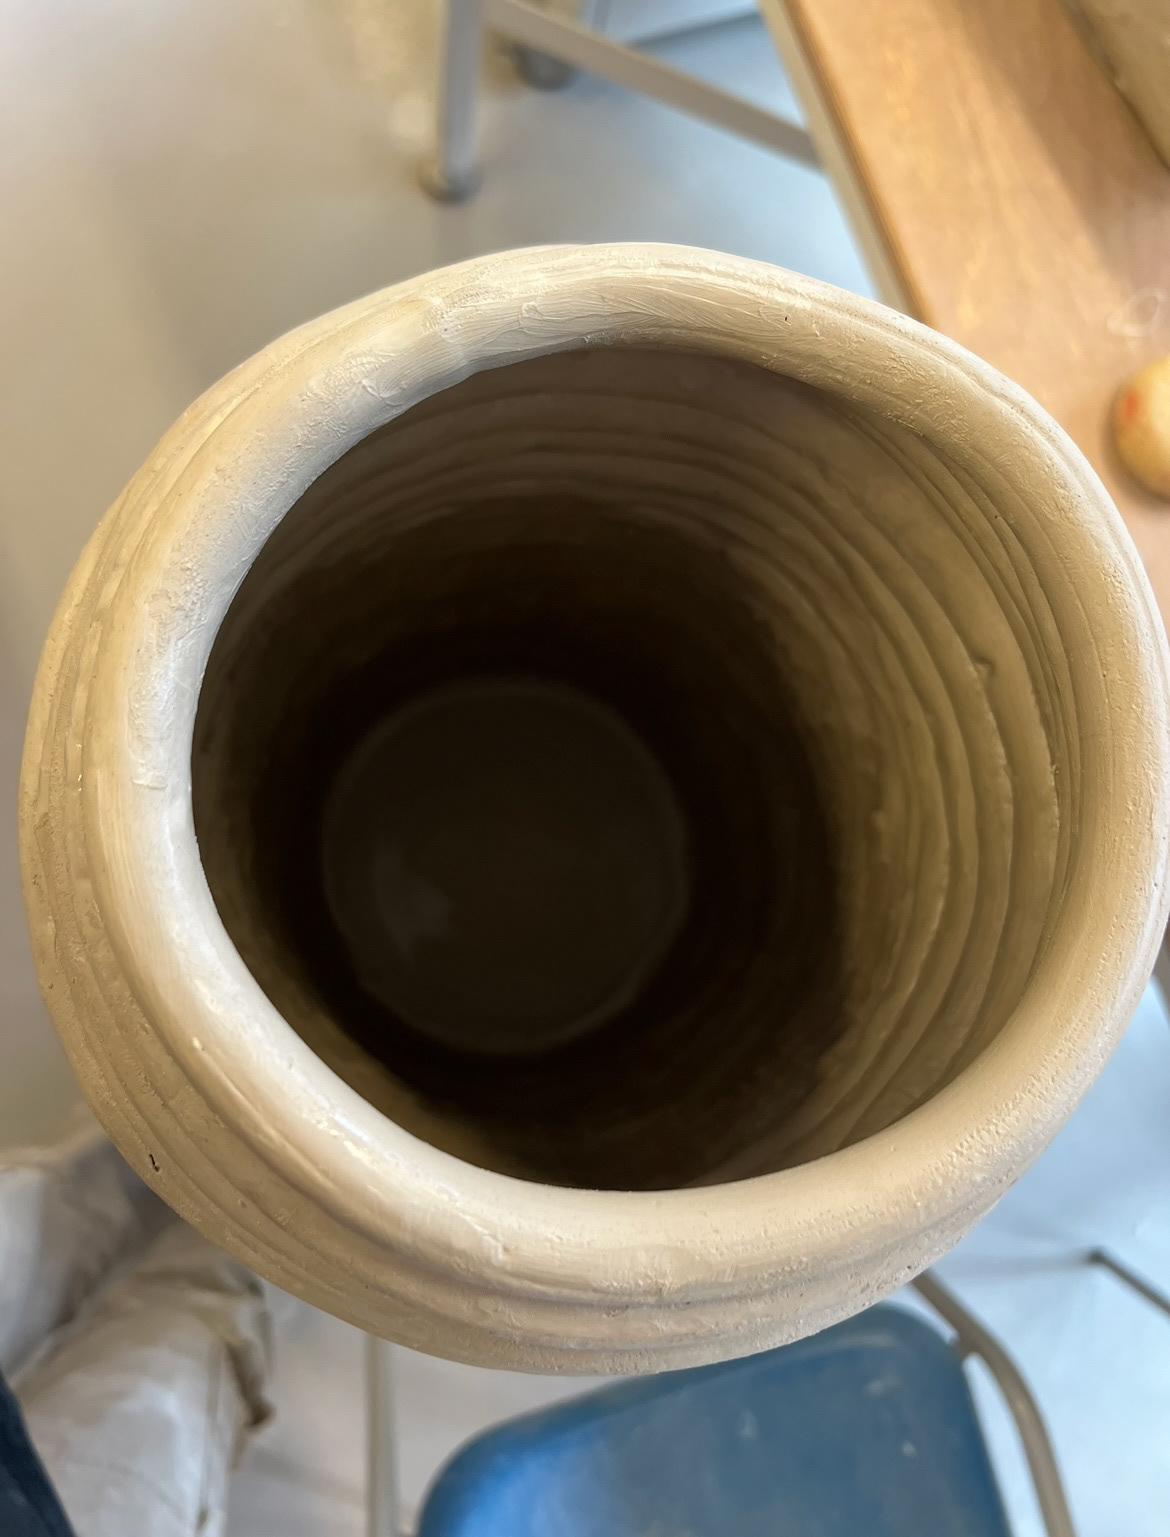
I recommenced building again using extruder die number 2, which was the larger die I was using so that I could gain hight faster than using a smaller one (die number 4 which I had used on my smaller pot). As the base layers of my pot had hardened slightly over time, to leather hard, I was no longer worried about the base layers buckling under the weight of the above layers so I decided, because my pot had grown to be very heavy, to scoop out some of the clay from the base layers to remove some of the excess weight, this turned out to be a good decision as although it was a risky move, removed a lot of the weight which then meant that now I could move the pot around more freely from place to place. I added two more large coils to the height of the piece and then switched back to using die number 4 coils for the process of doming over the pot. I did this as I was able to produce longer coils which would loop around as one coil rather than pieces attached together as I thought this would be more structurally sound and easier to work with. (pictures below of coiled pieces).
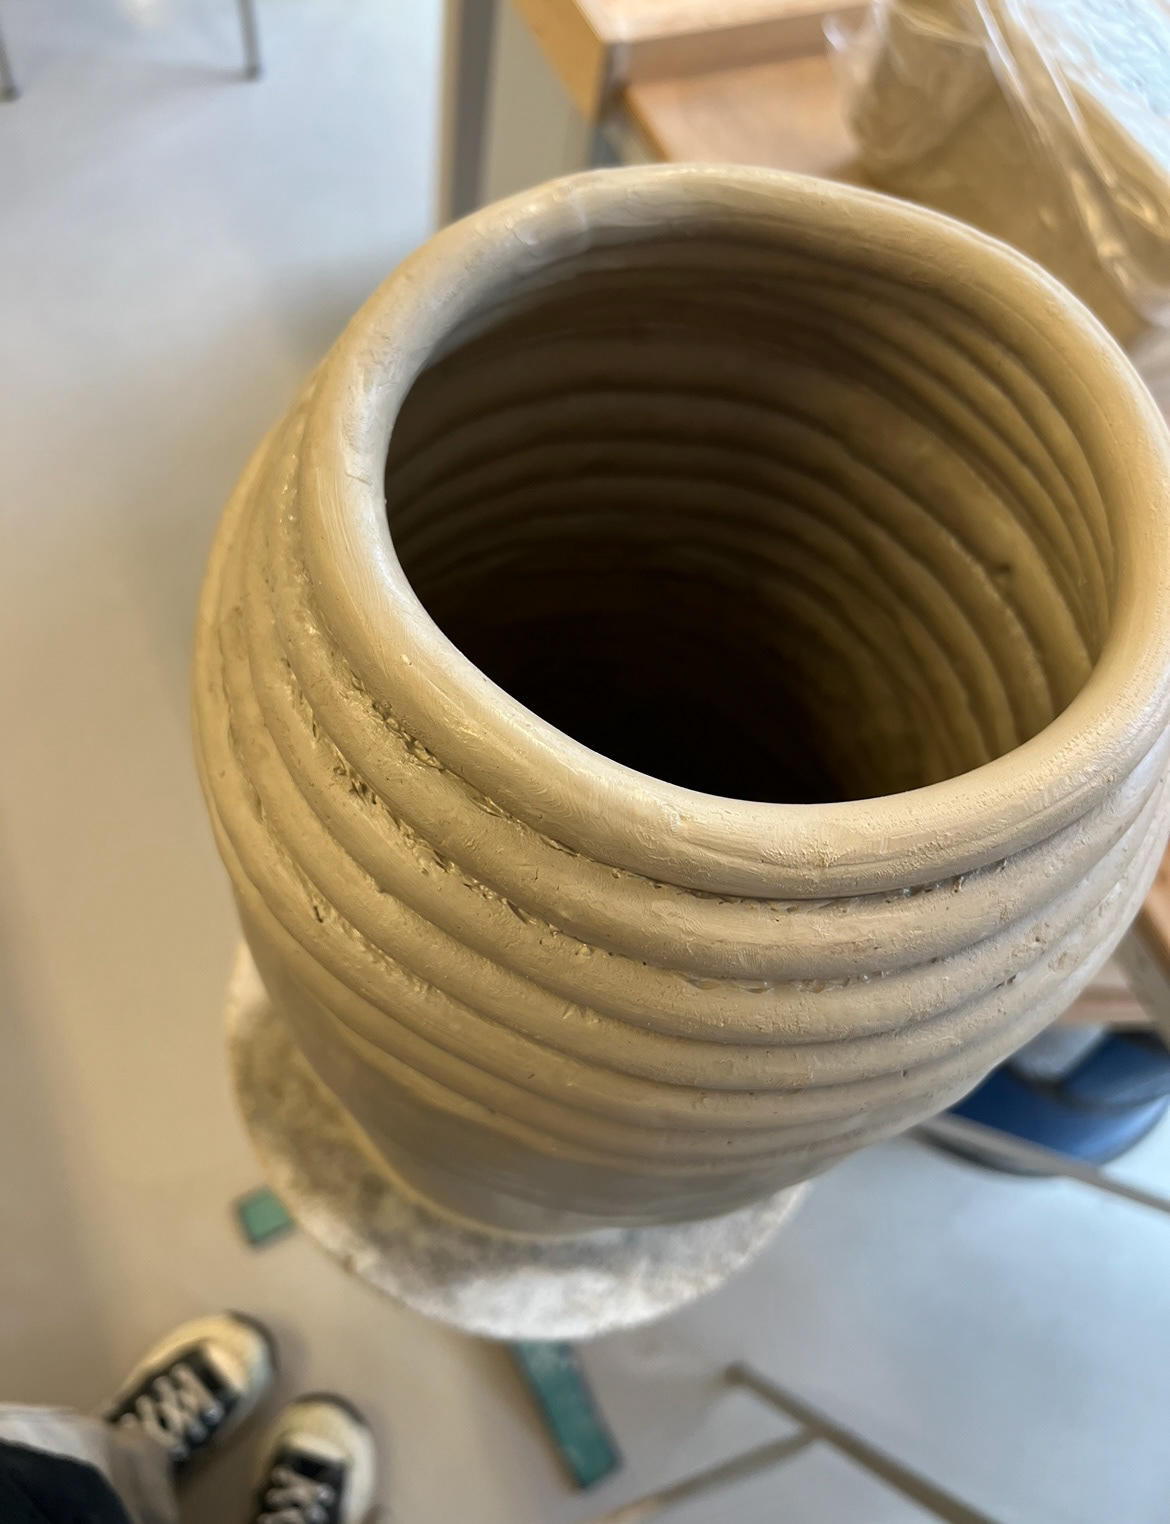
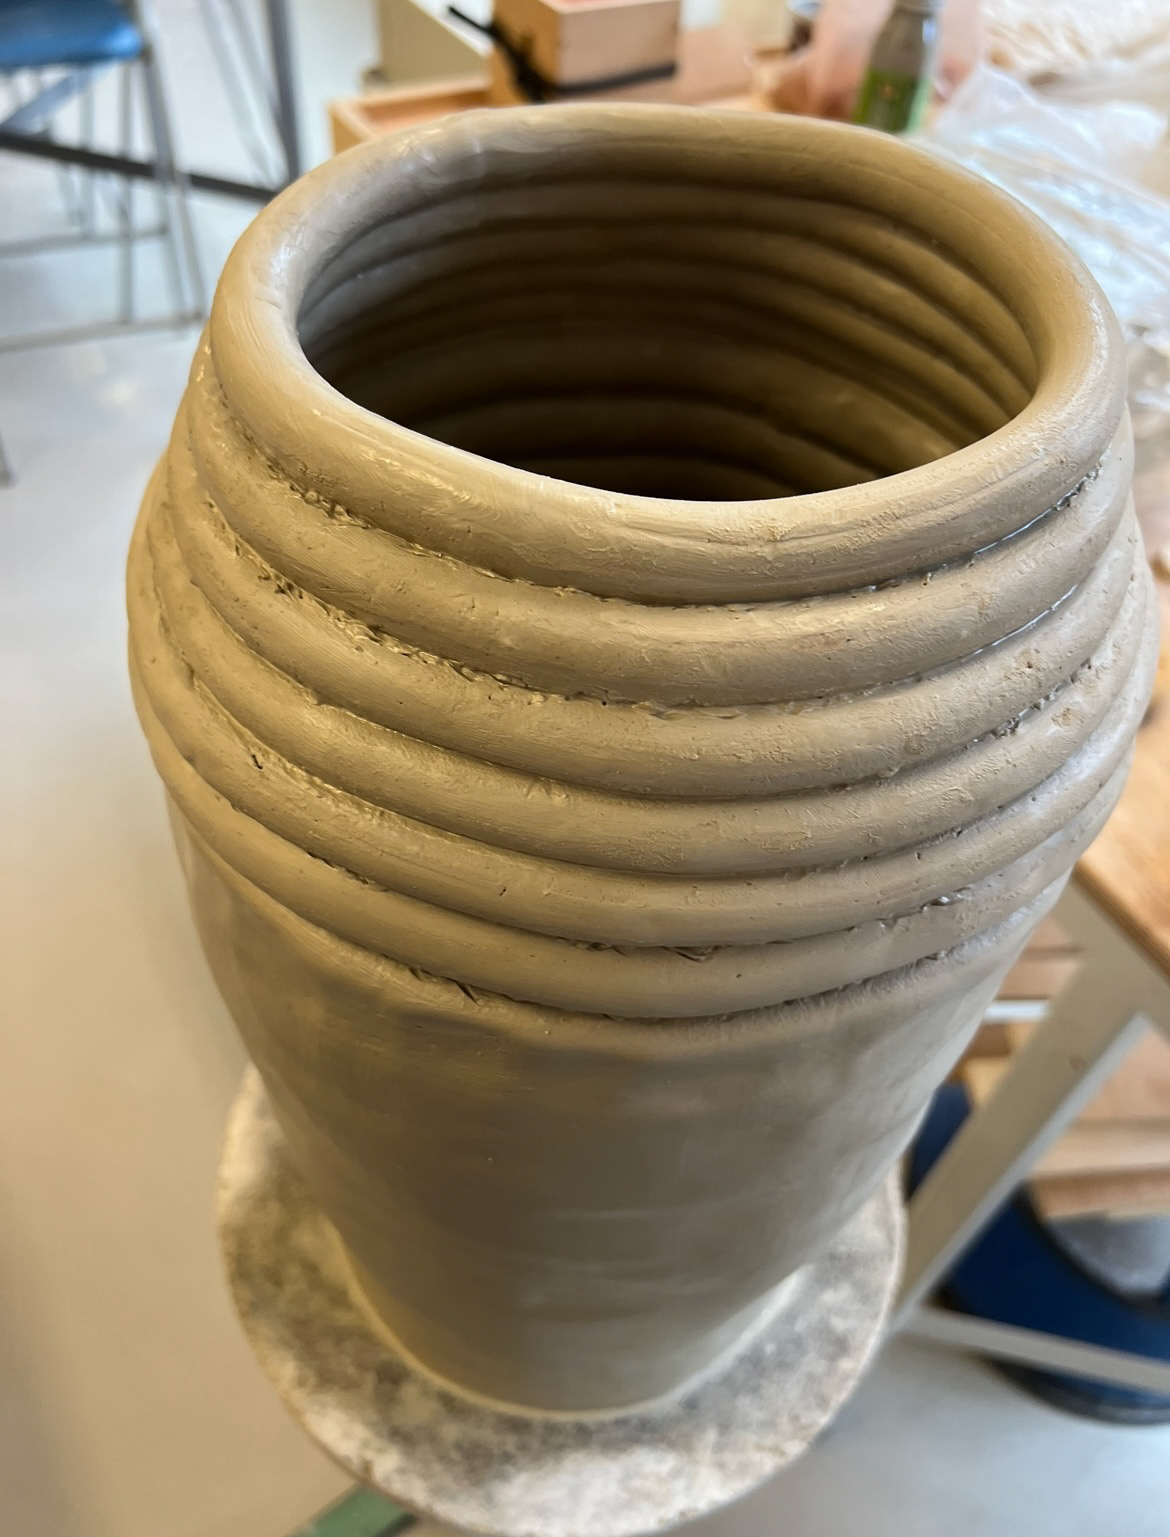
After this I could use a tool to smooth out the coils to integrate with the rest of the piece and shape the pot with my paddle (wooden spatula) I then flattened the top of my pot with the paddle so that I could apply the rim. (results below).

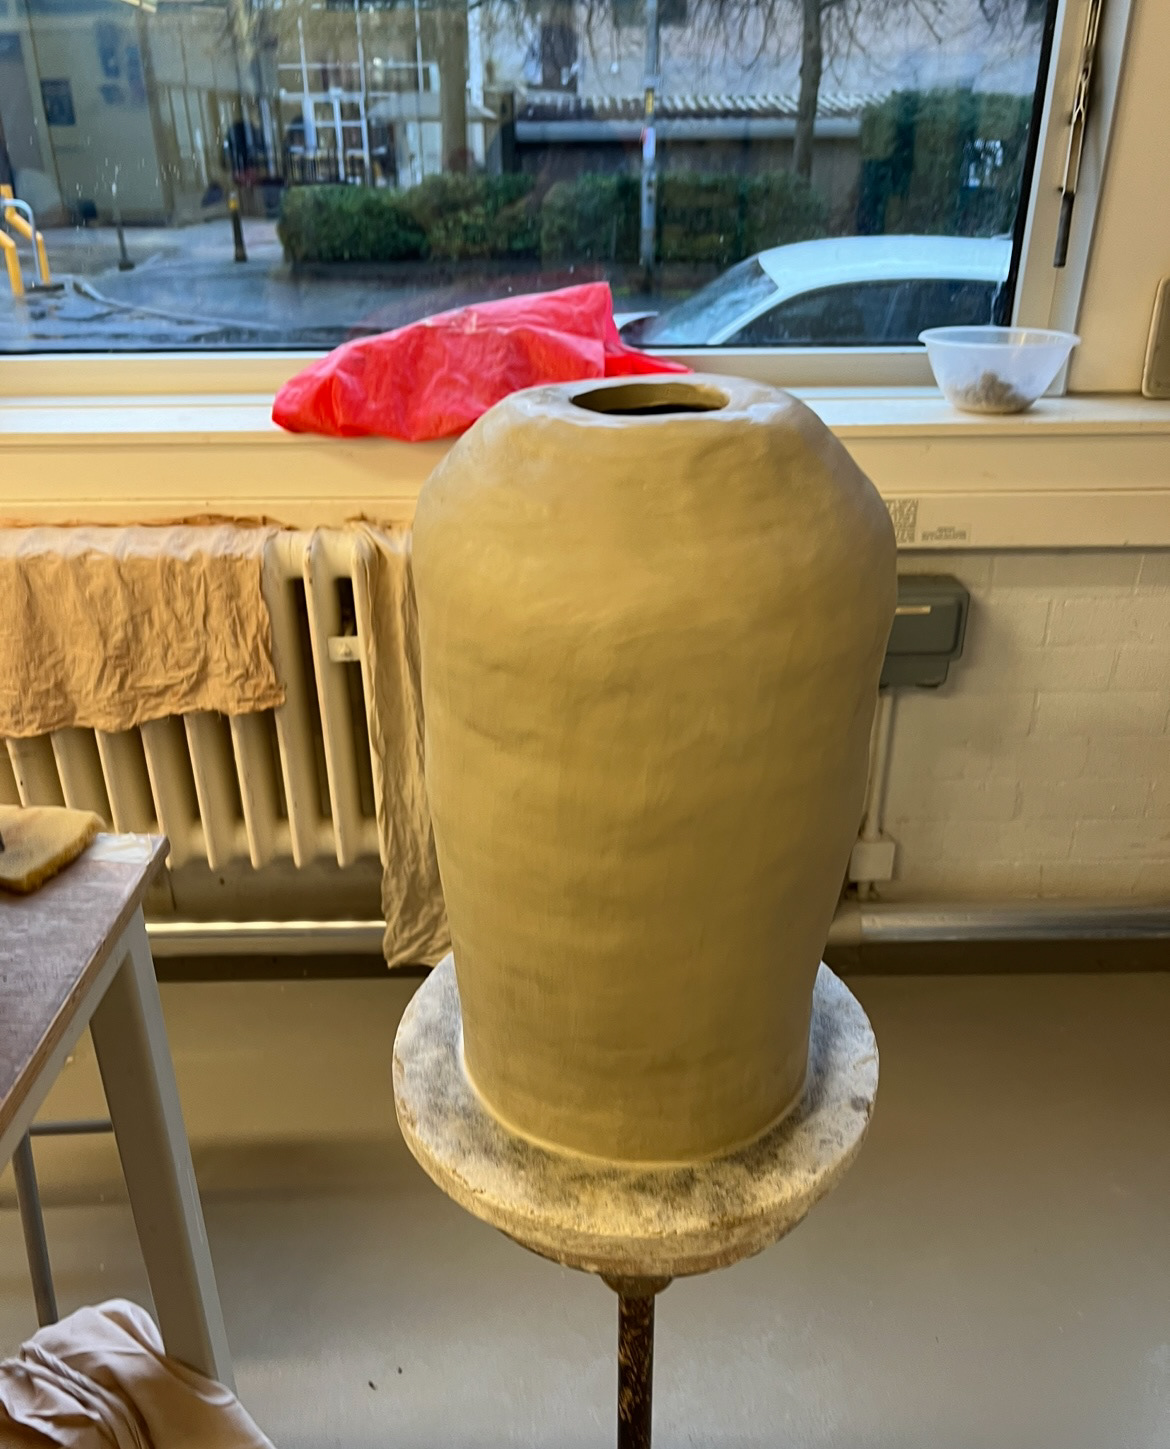
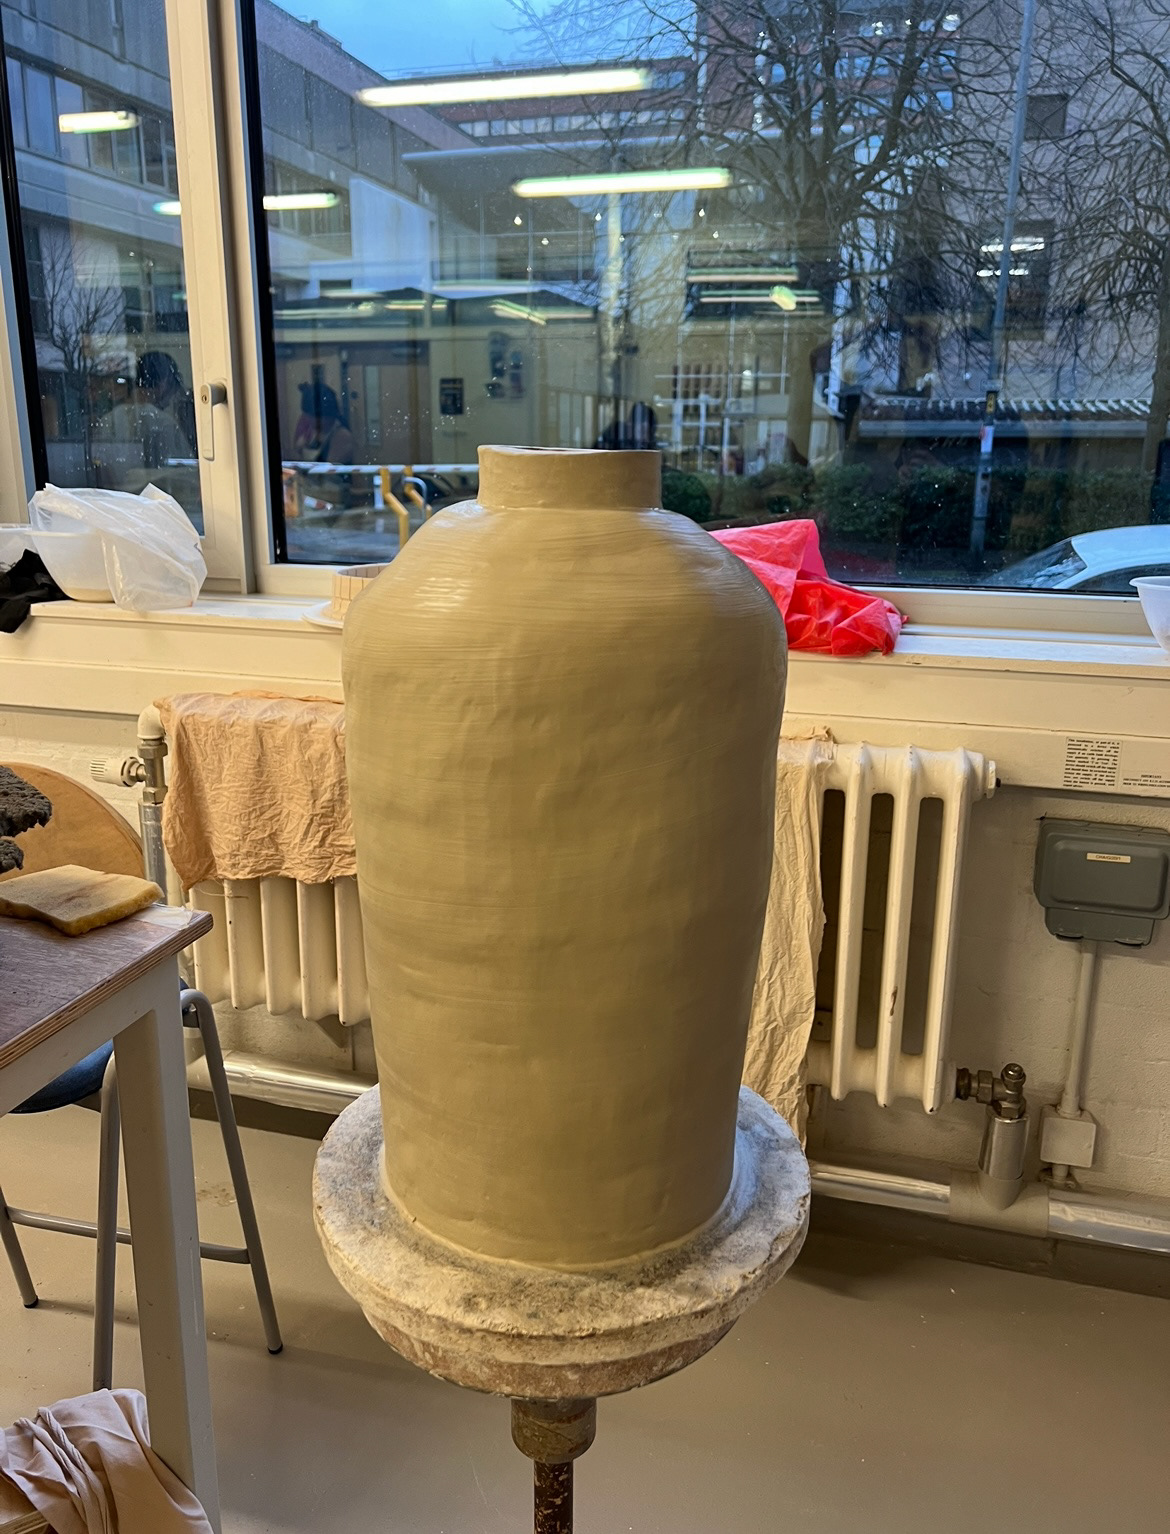
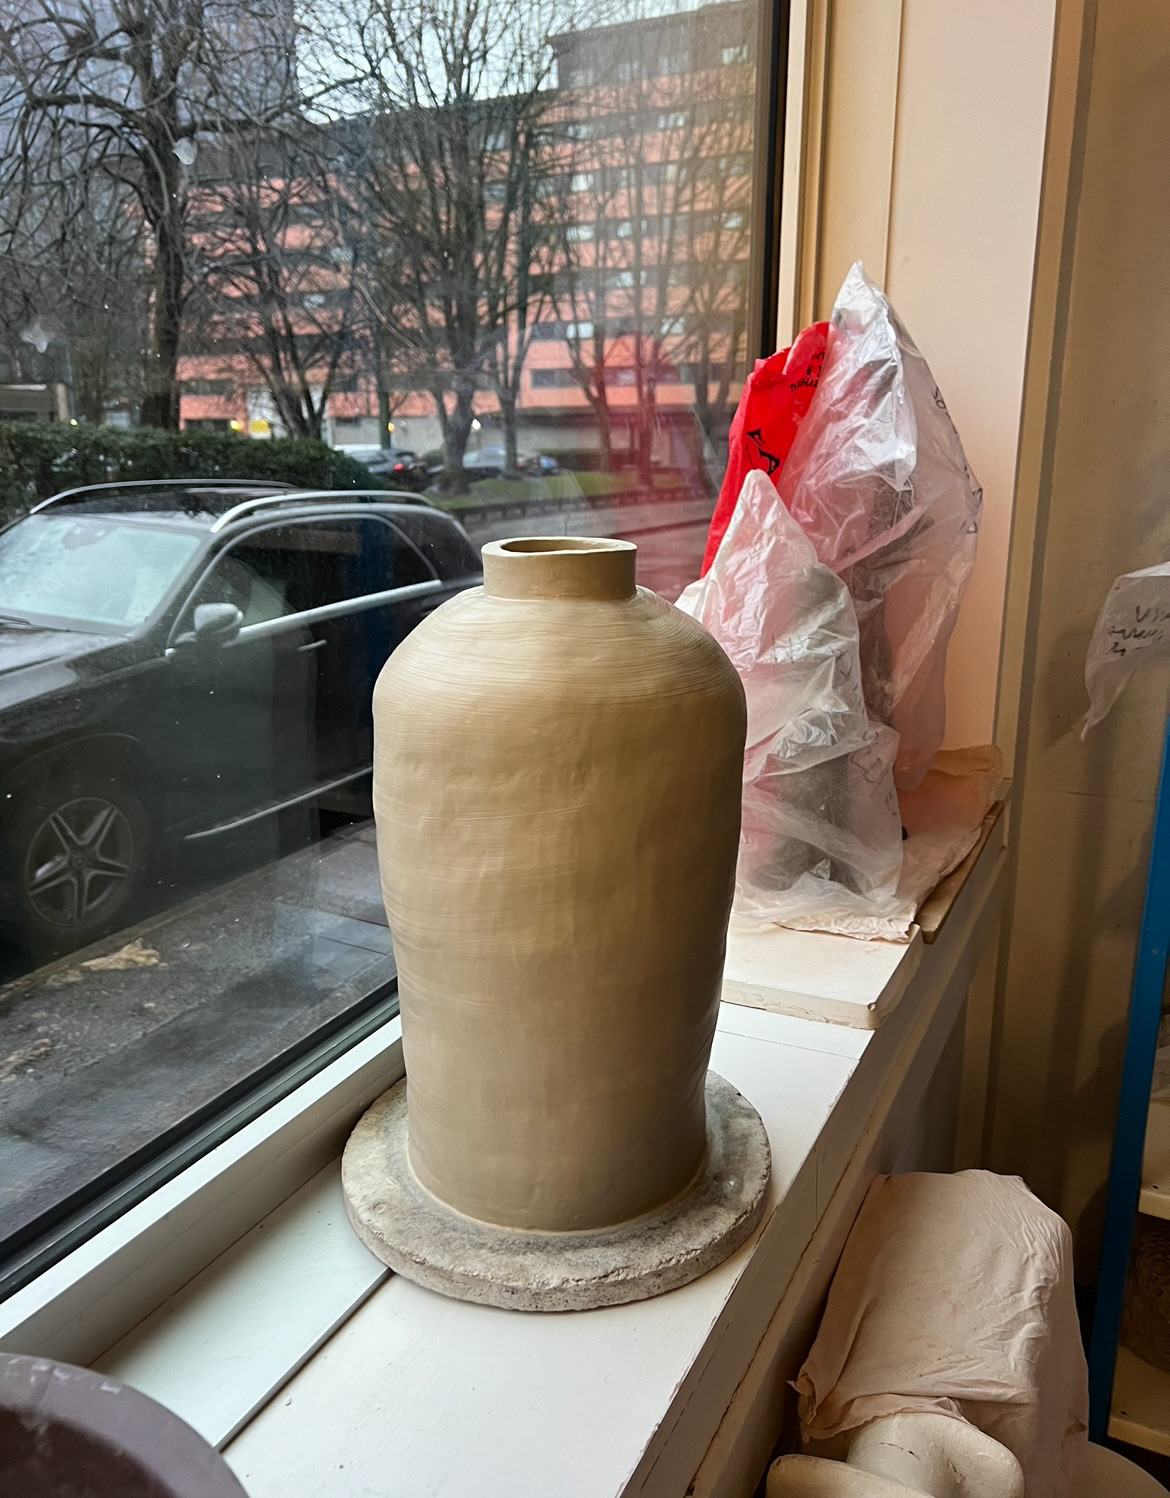
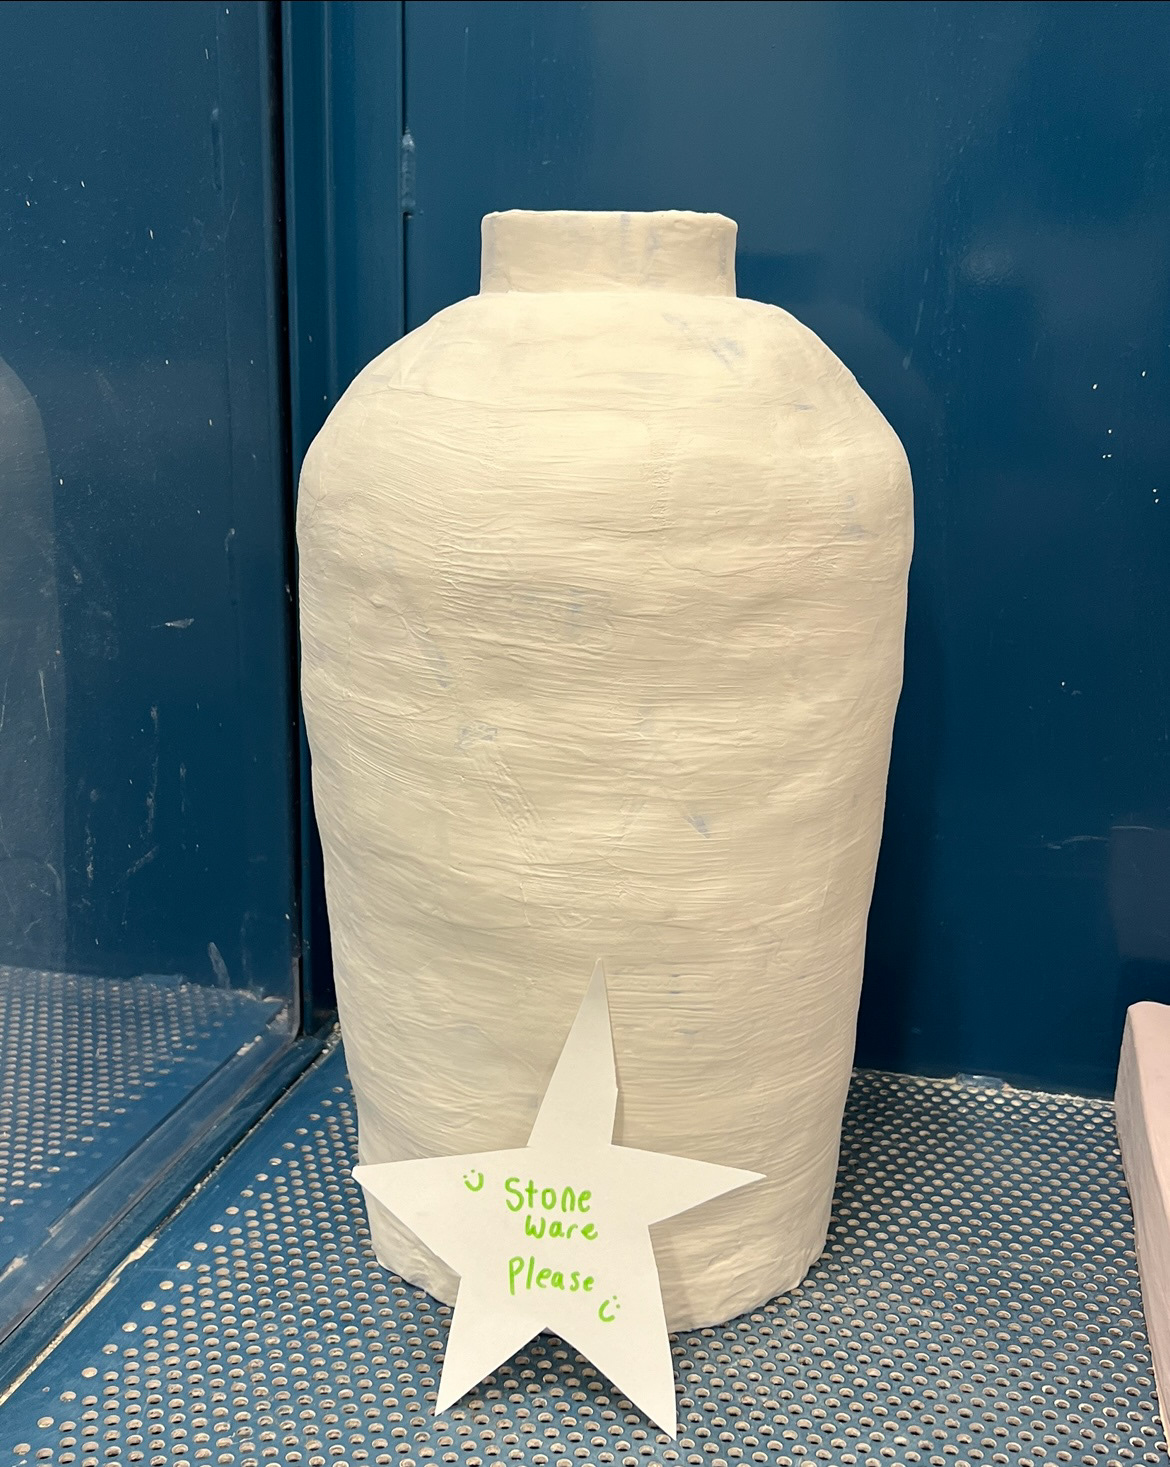
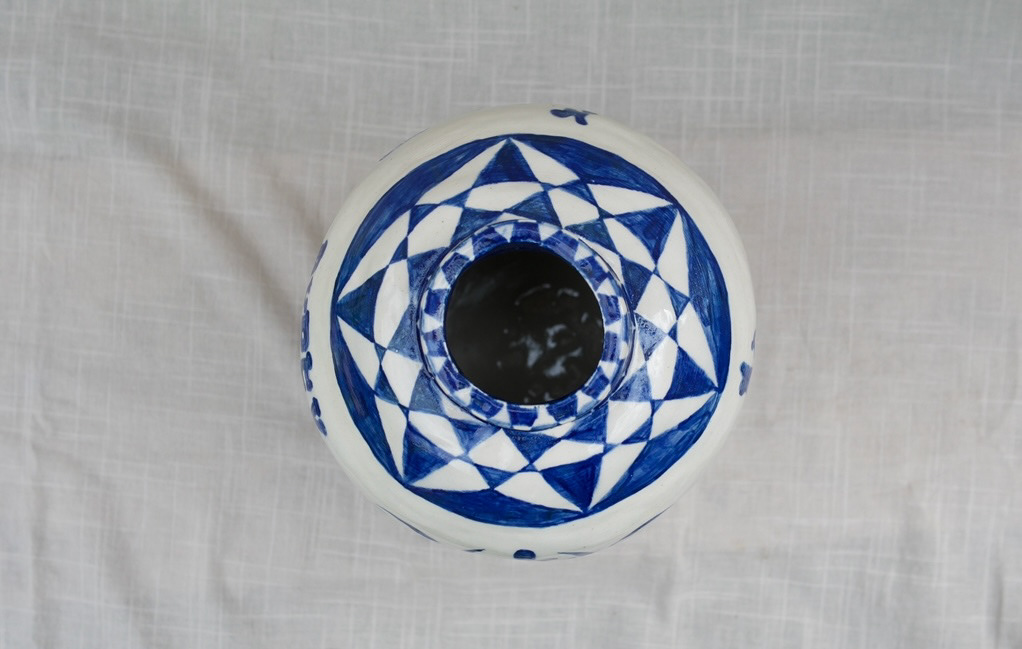
This time when making the rim from a slab rolled piece, I used a flat piece of wood as a template so that I could get an even uniform piece that I would then apply. Once this was applied, the main body of my pot was finished and I could let it dry while I decided on a shape for the lid piece I would then throw. (final result below).
(video of this process on UC2 videos page).
From building this pot I have learned a lot about the differences between building on a large scale vs a small scale. I have learnt that a building on a larger scale opens up a lot more possibilities for things to go wrong and how to effectively work with and potentially solve these problems. I've also leaned that it is much better to practice the desired form in small scale before moving to large scale as it has helped me anticipate problems before they happen in some cases and overall makes me feel more prepared.
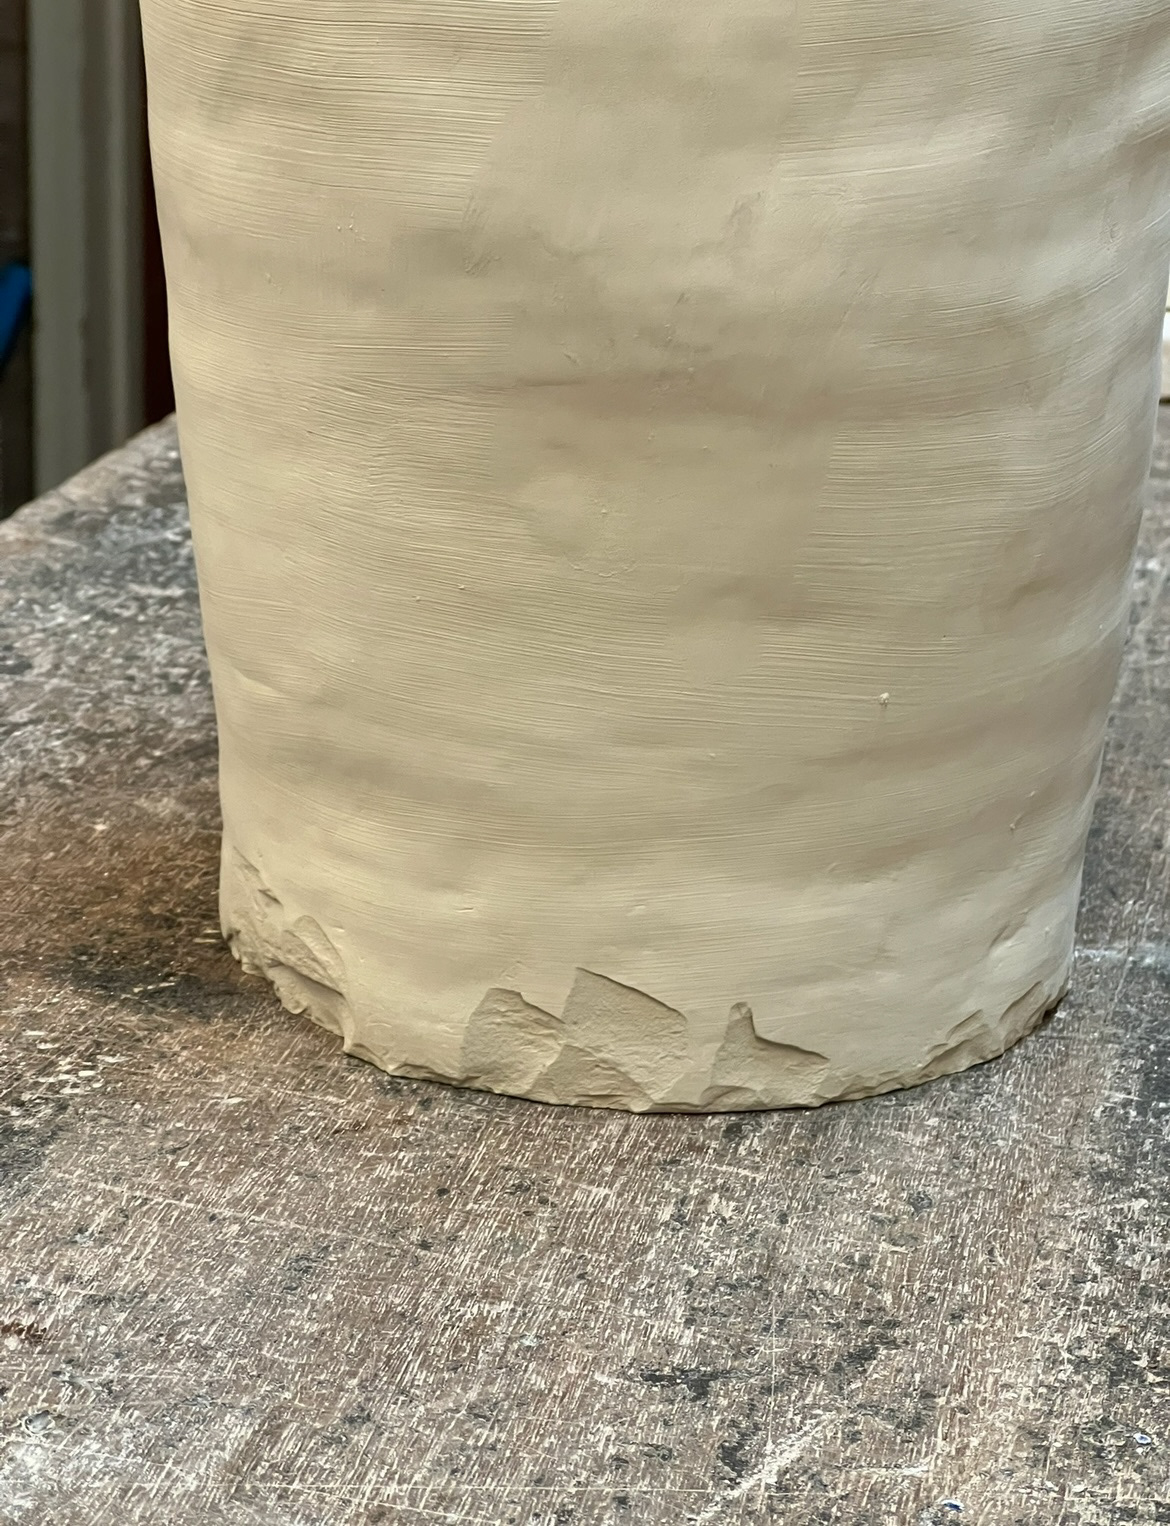
While my piece was drying, the clay contracted and unfortunately some areas around the bottom of the pot chipped on the hard surface it was placed on. In future I will avoid this issue by building my pot on a layer of newspaper so that as the pot dries and shrinks, the newspaper will move with it rather than against it. (picture below).
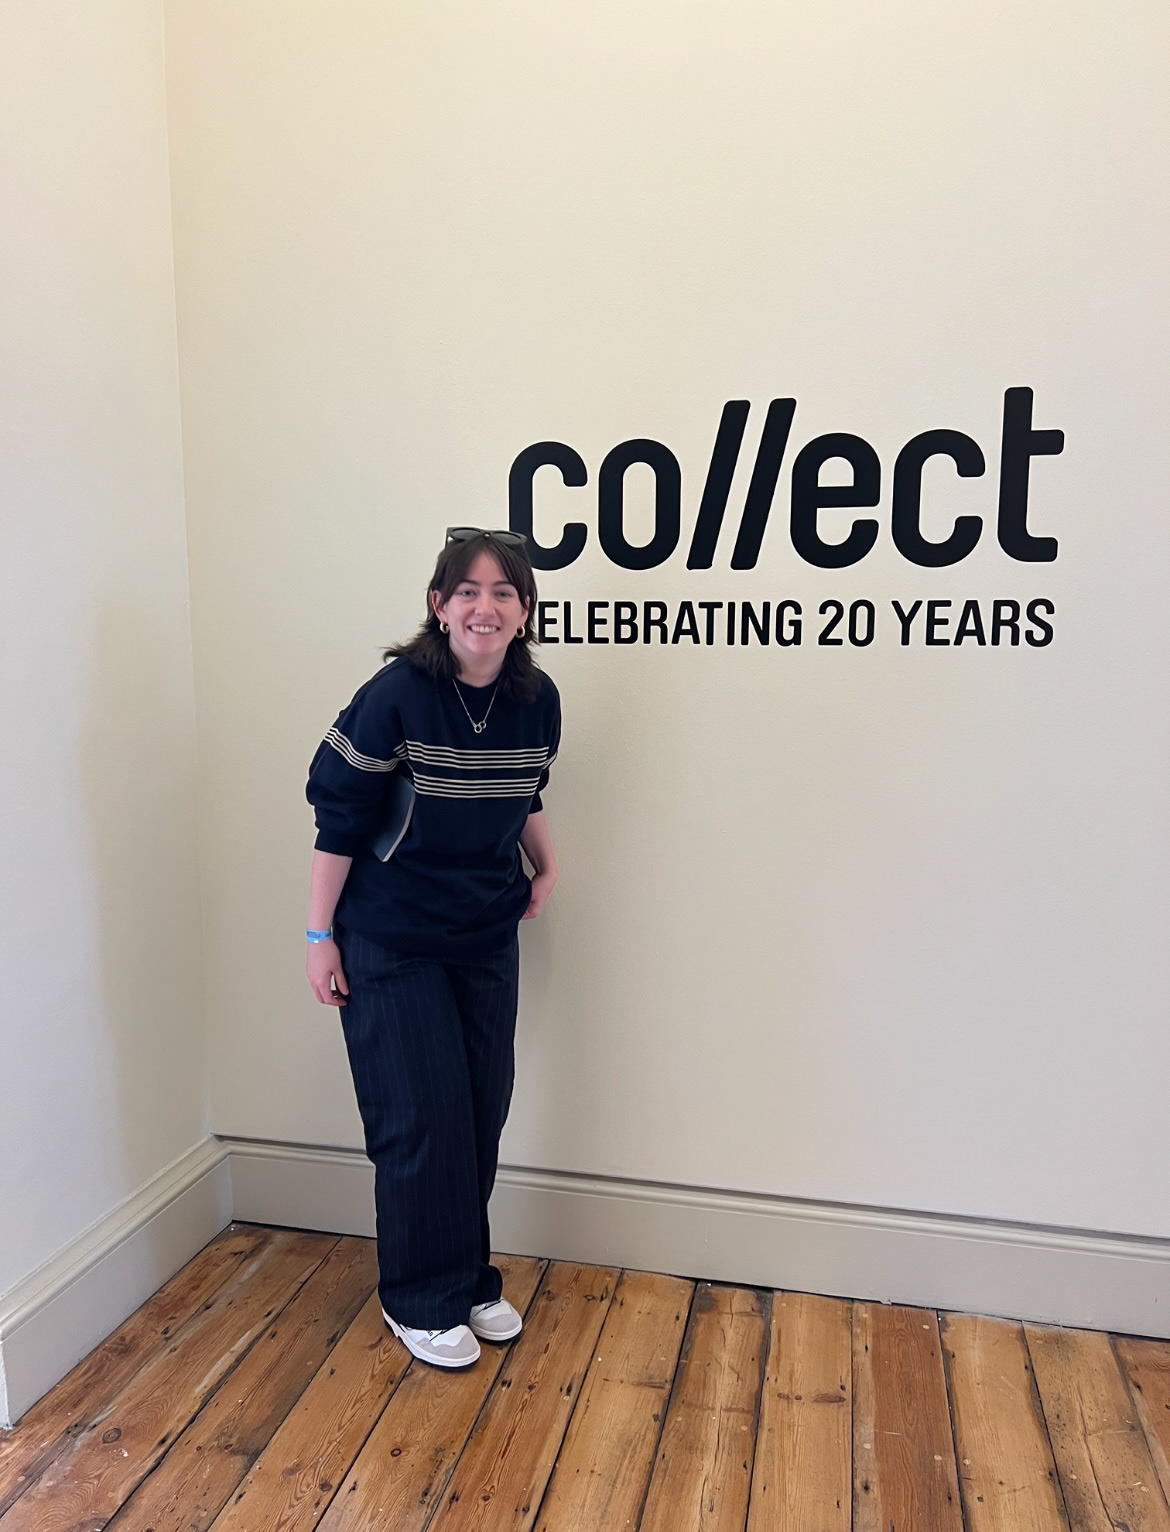
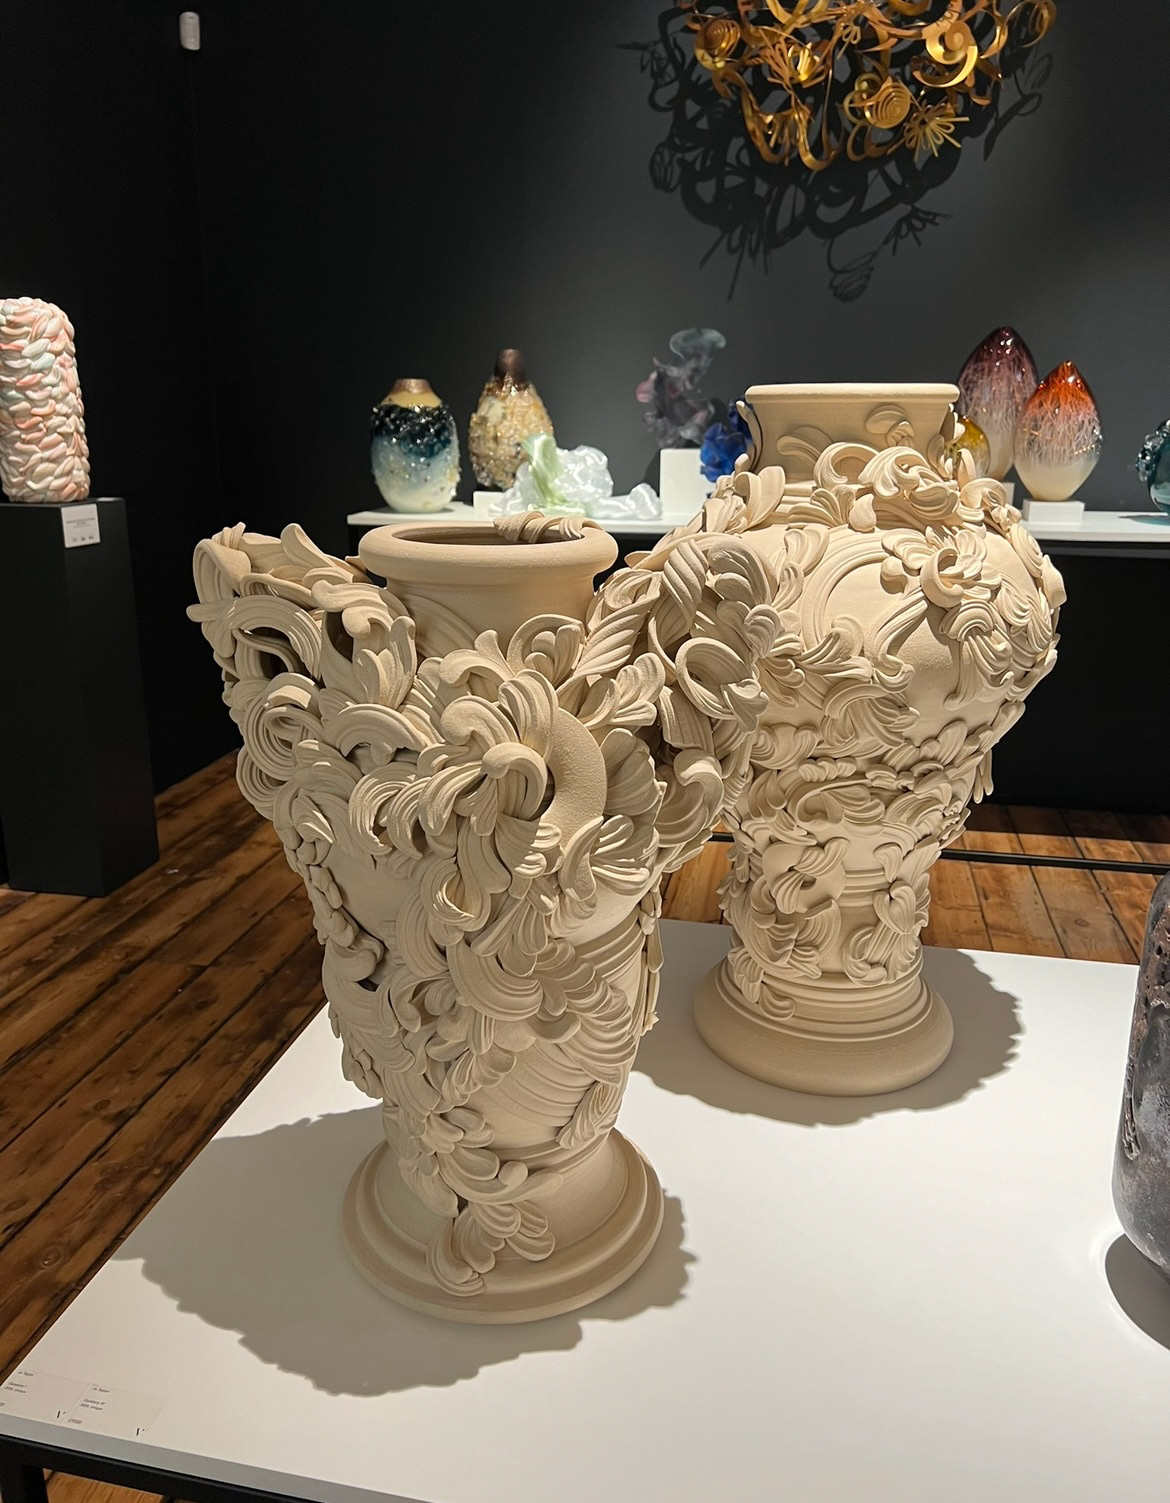
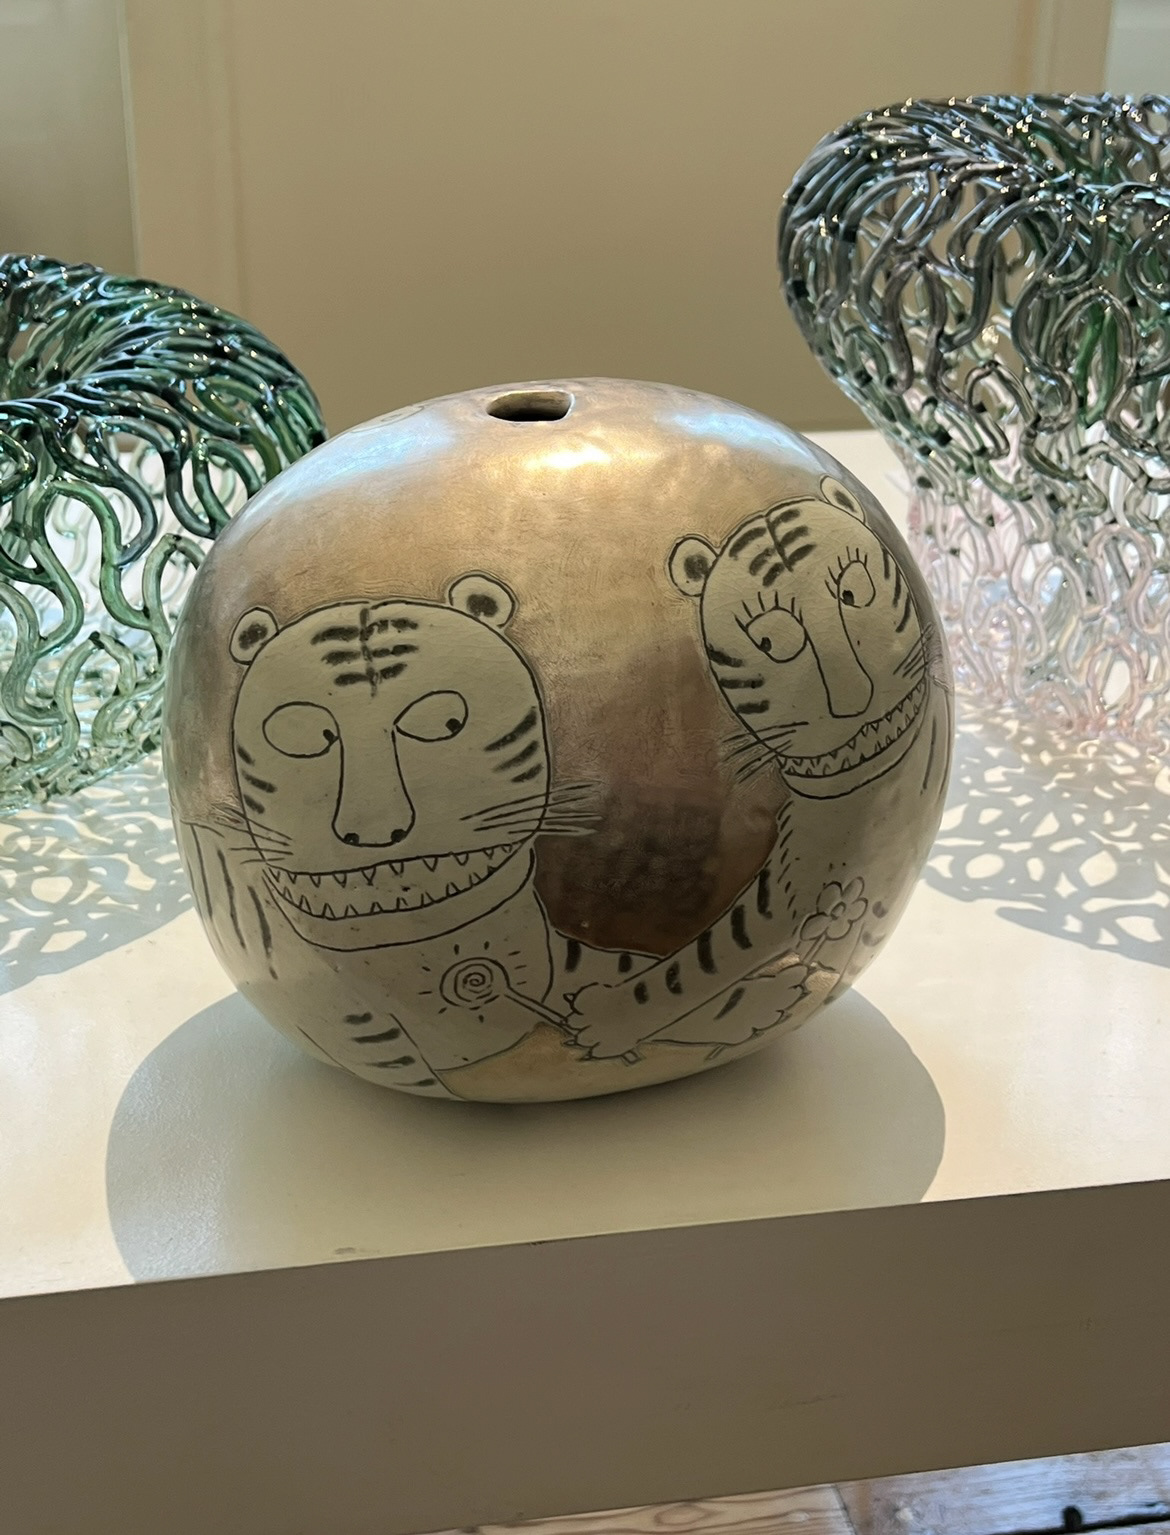
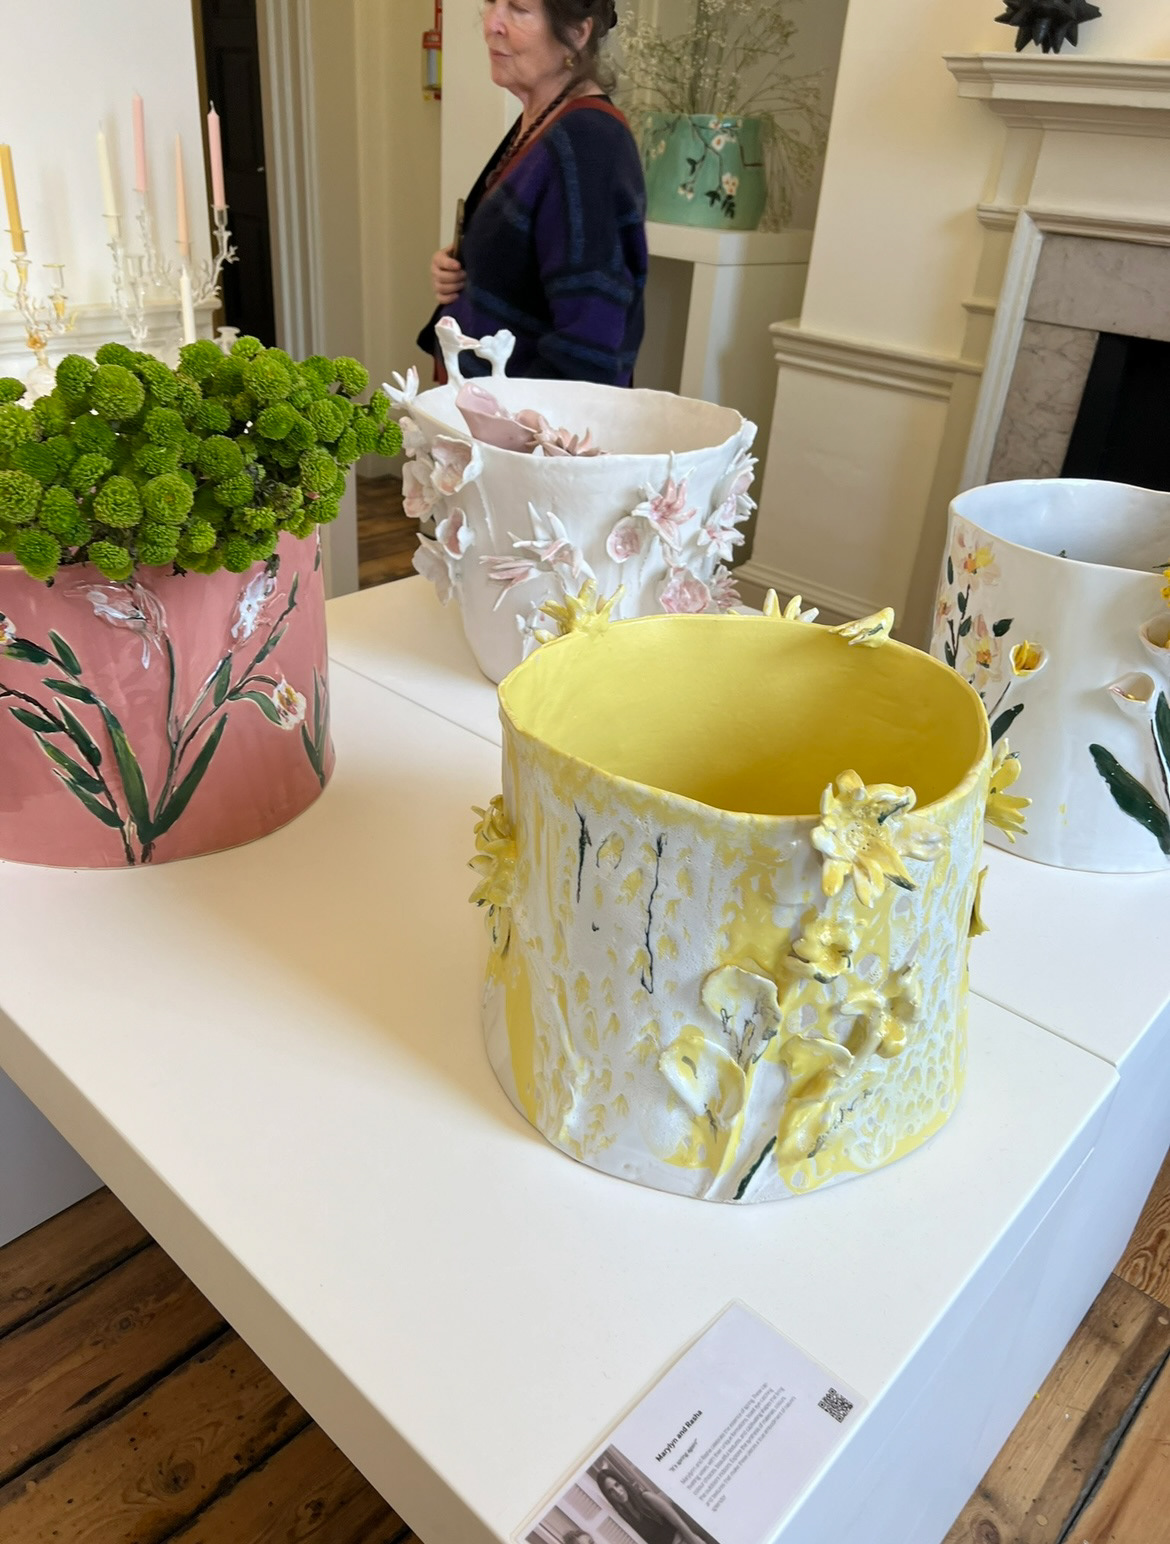
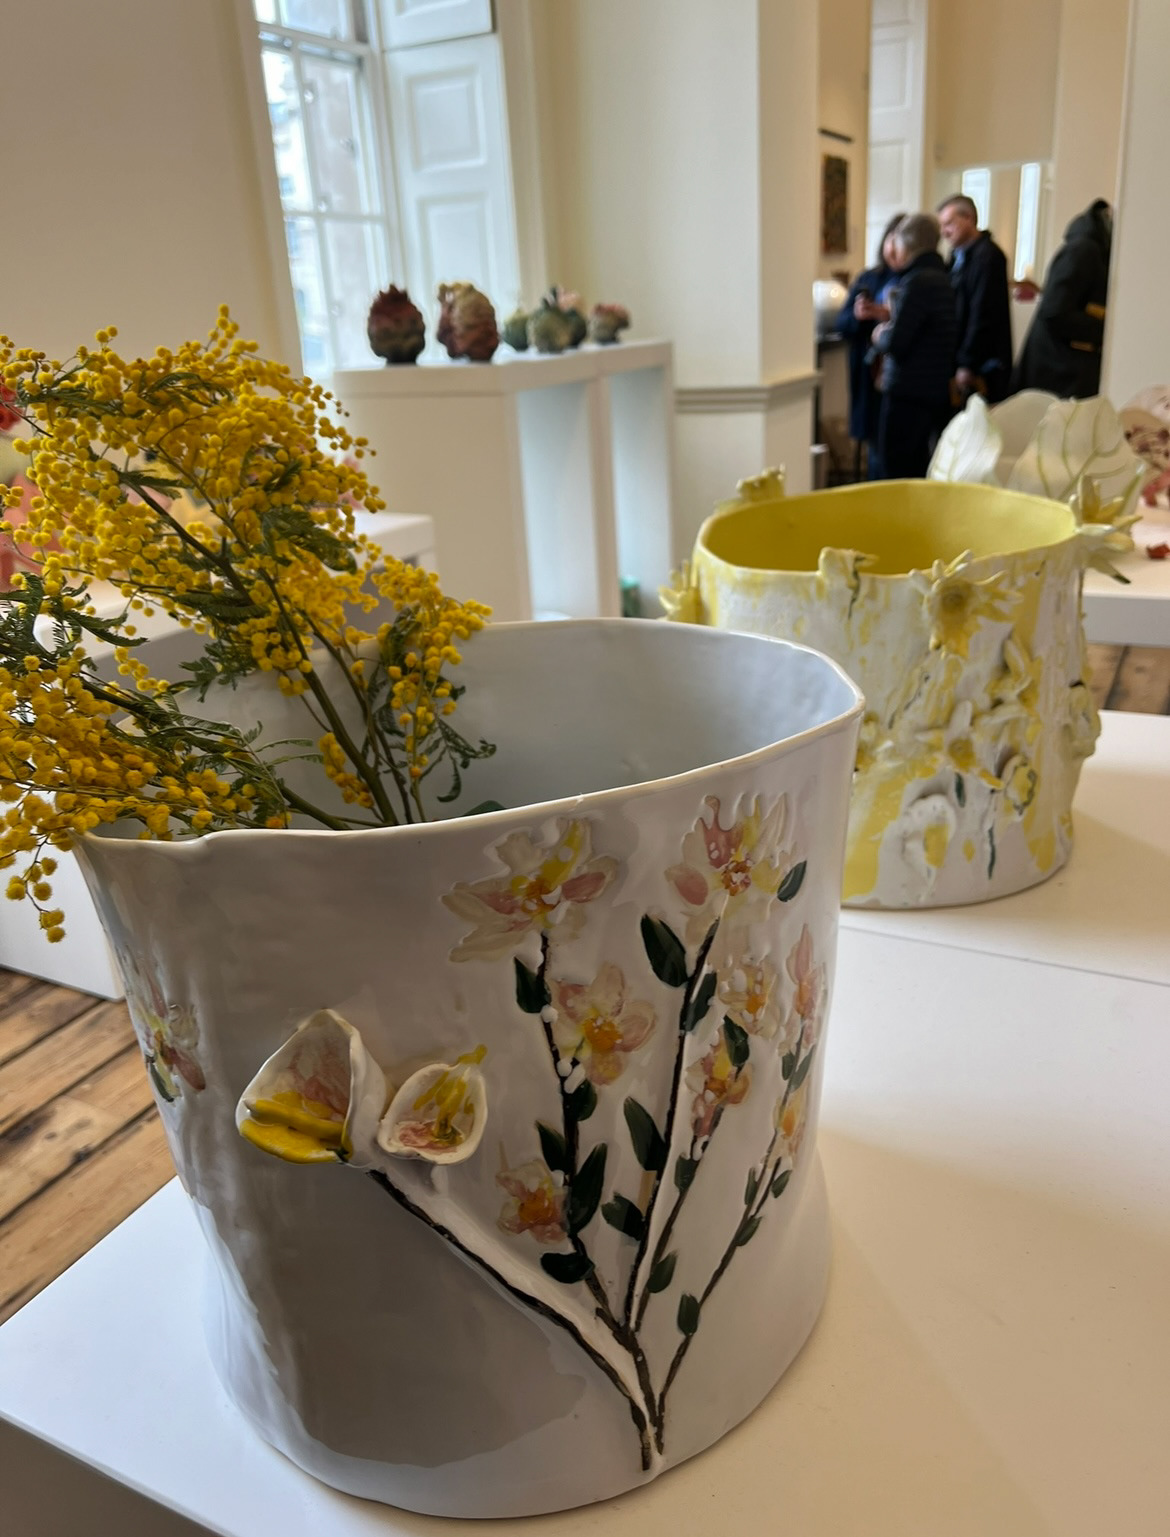
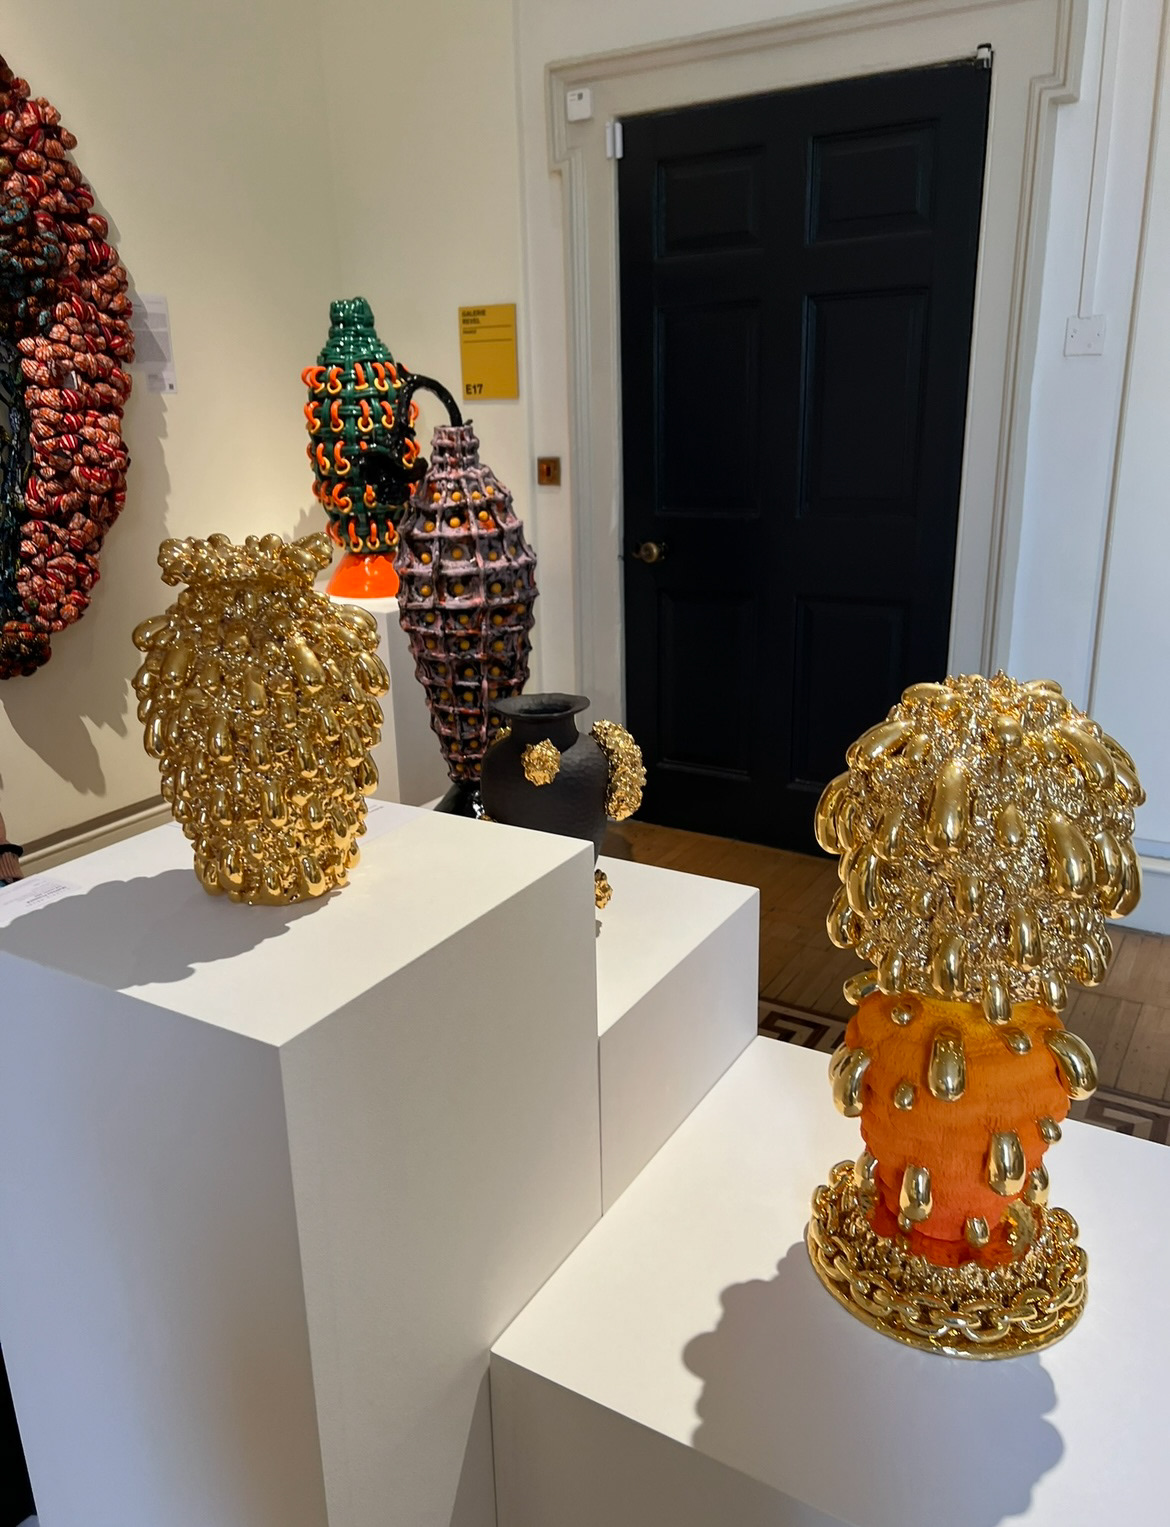
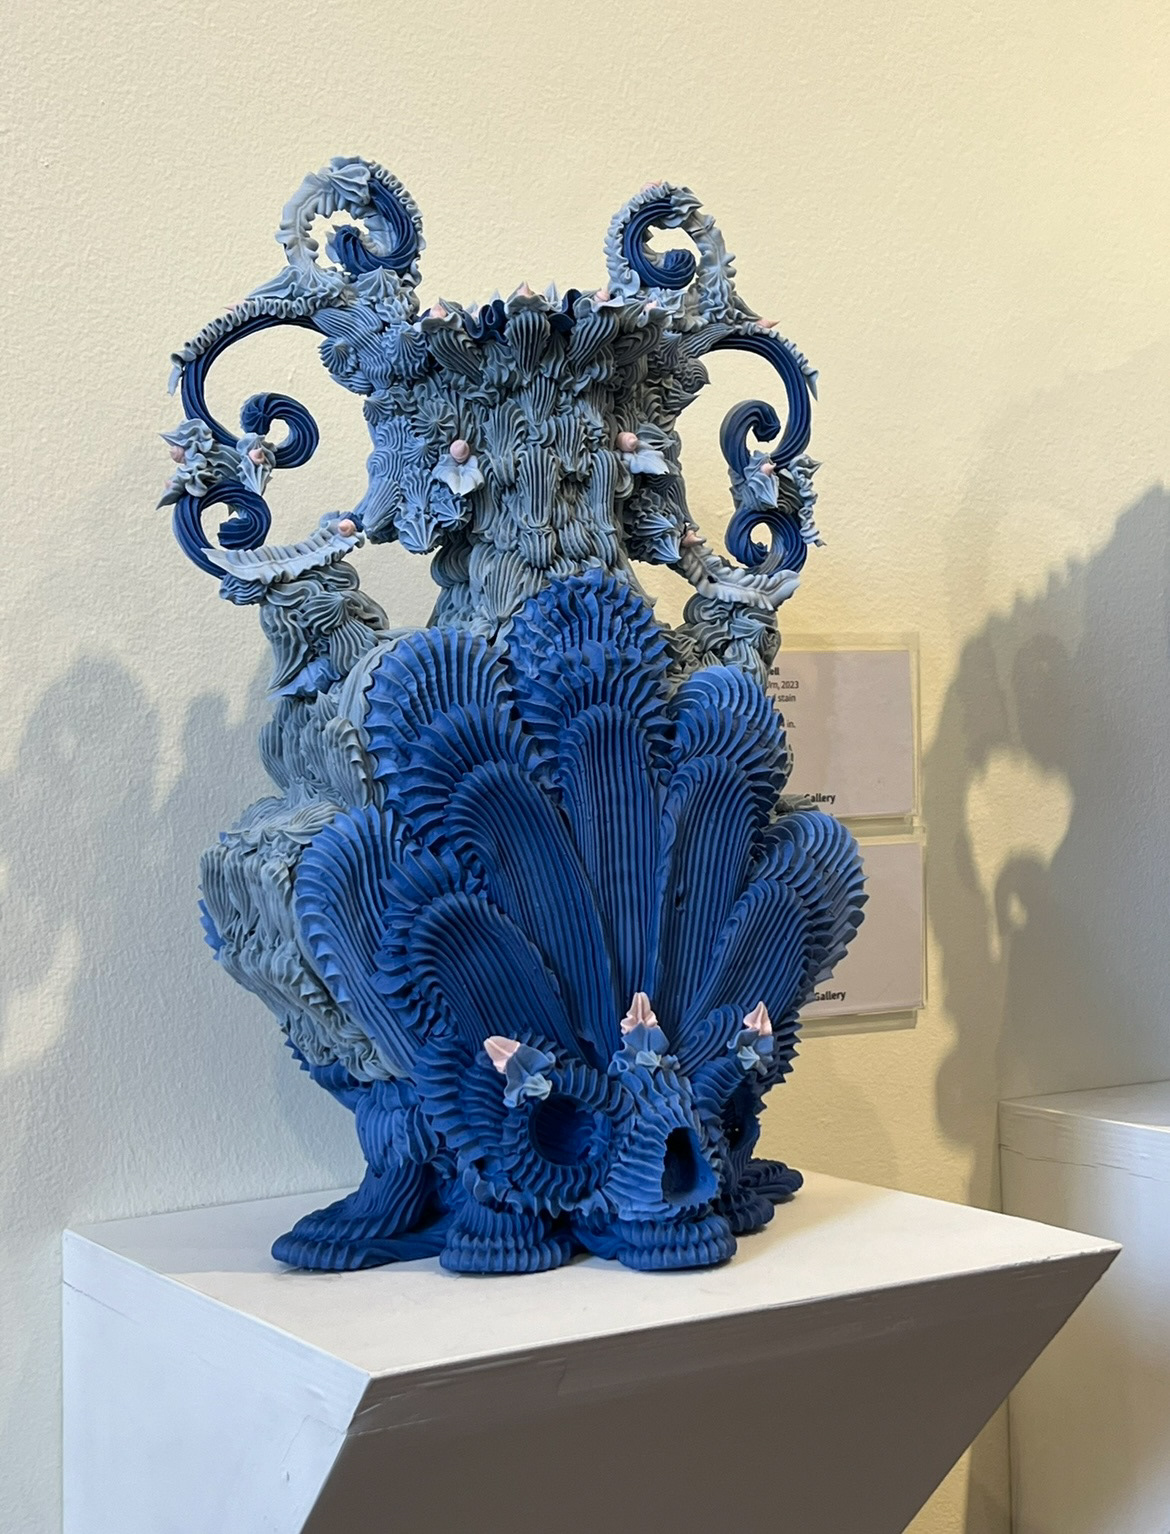
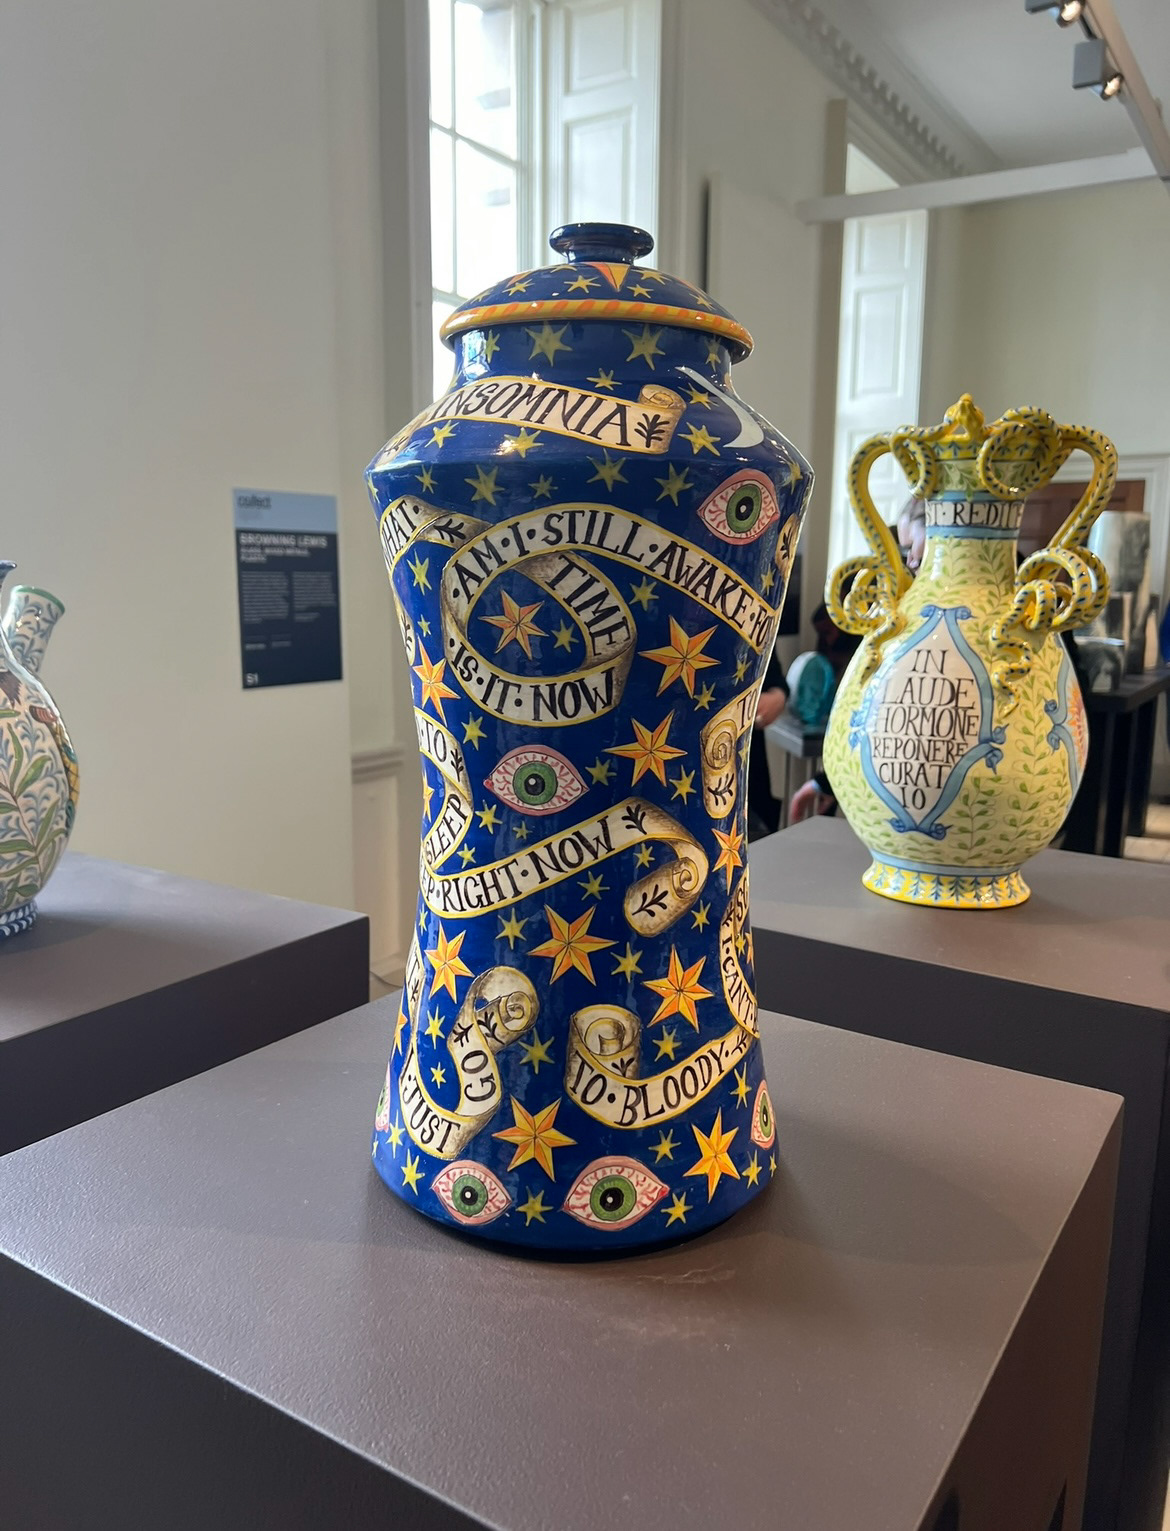
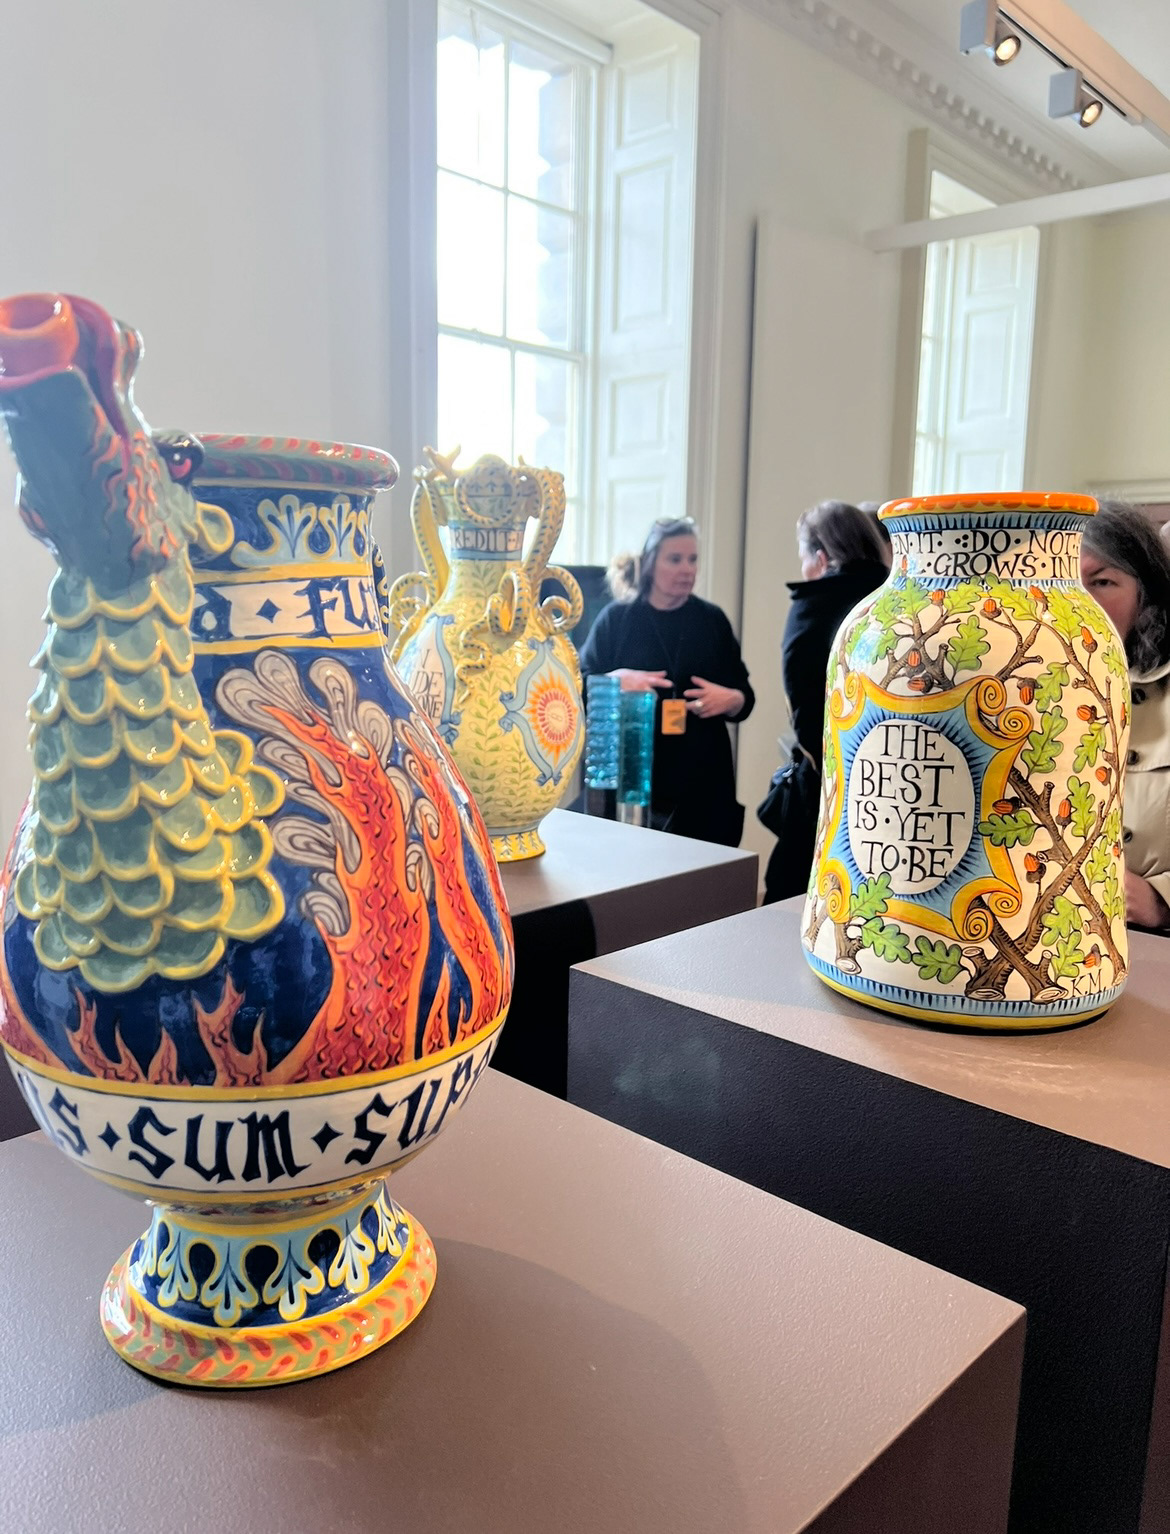
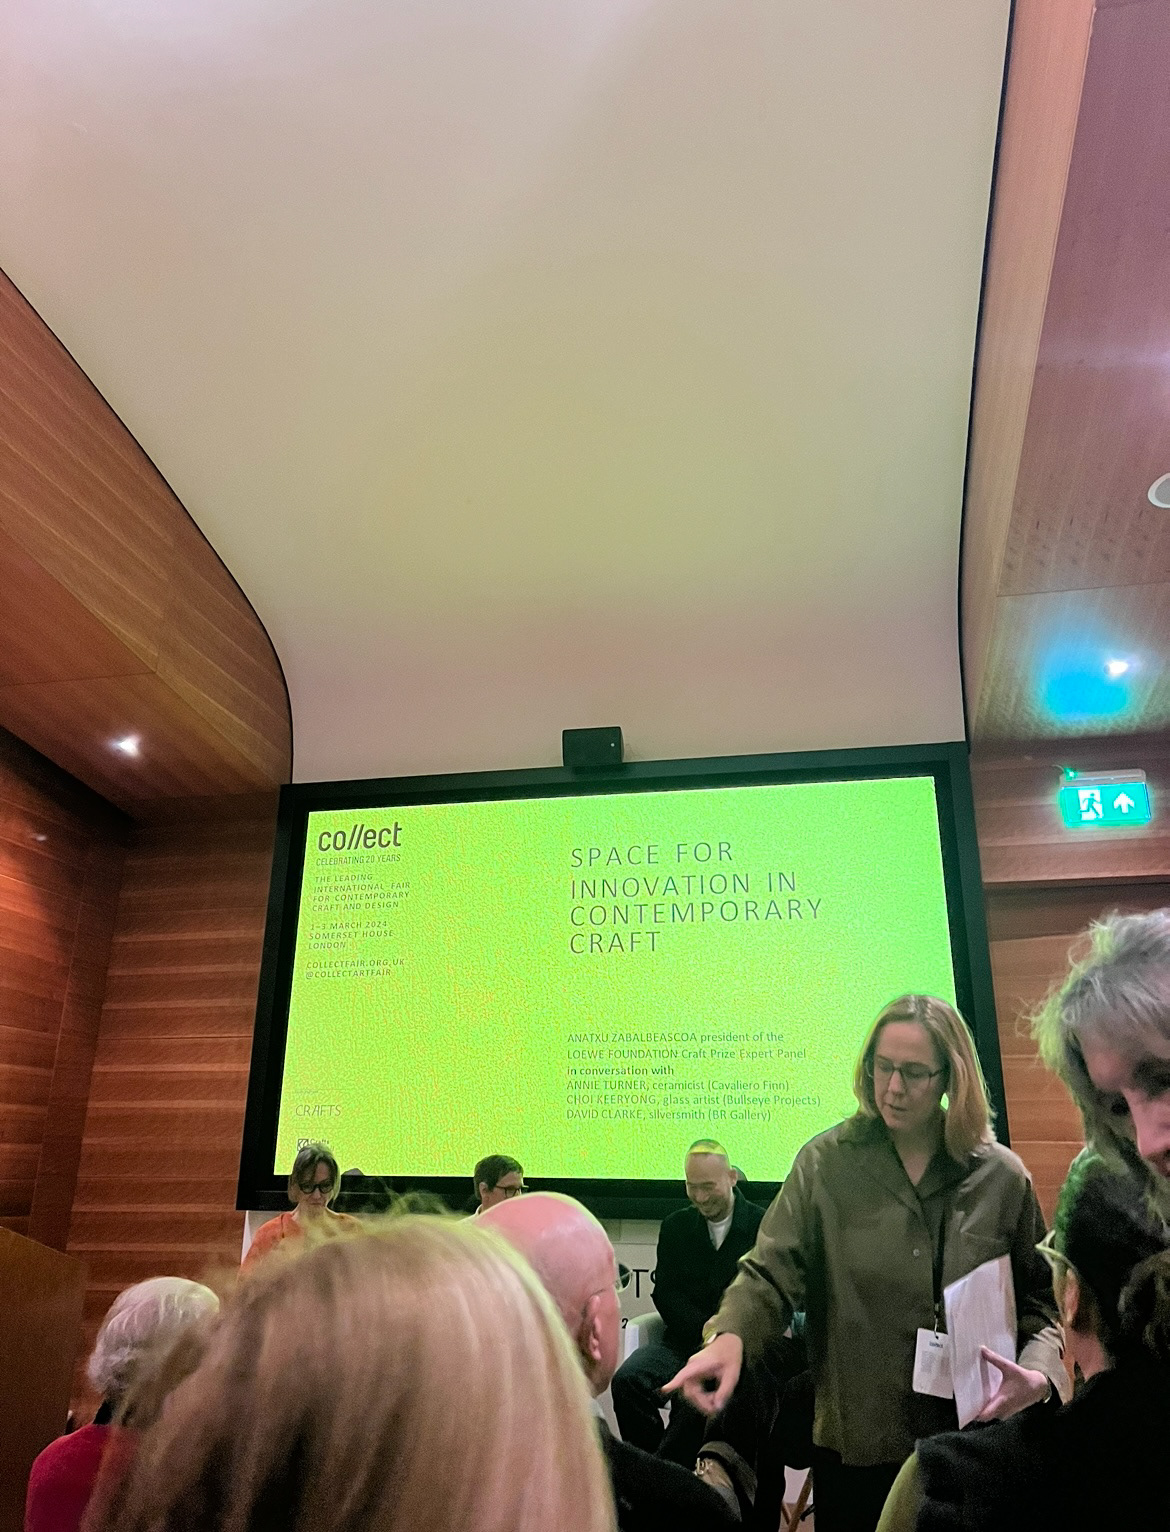
While my pot was in the kiln, I had the wonderful opportunity to attend Collect at Somerset House in London. This was a great experience as I could look around and understand the show that I was working towards better. (some of my favourite pieces I saw below).
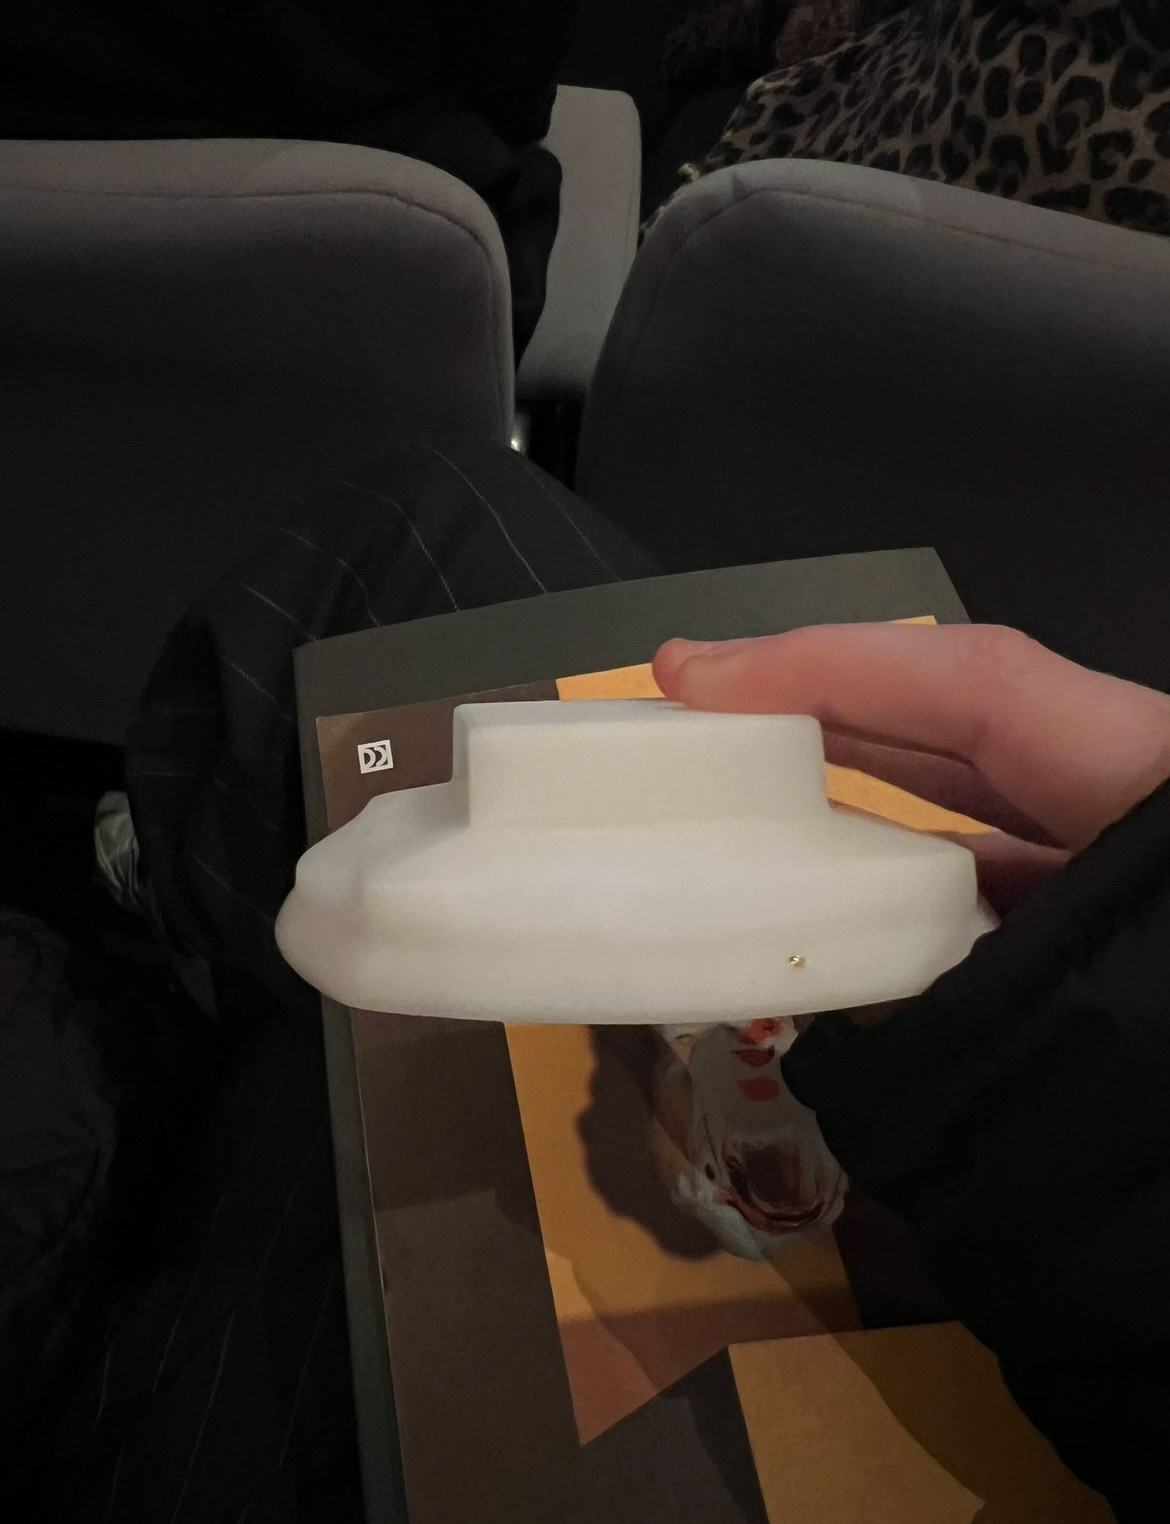
At collect I was able to attend a talk run by the Loewe foundation, this talk was interesting, however was again talking to Keeryong Choi and David Clarke, so not as much new information as I had thought, however I was able to hold a lid of one of Chois pots as it was being handed around the audience which was a privilege as I also got to see one of his pieces in person ate the exhibition. This talk was useful however as I was able to put some names to faces in the case of the president of the Loewe foundation, Sheila Loewe.
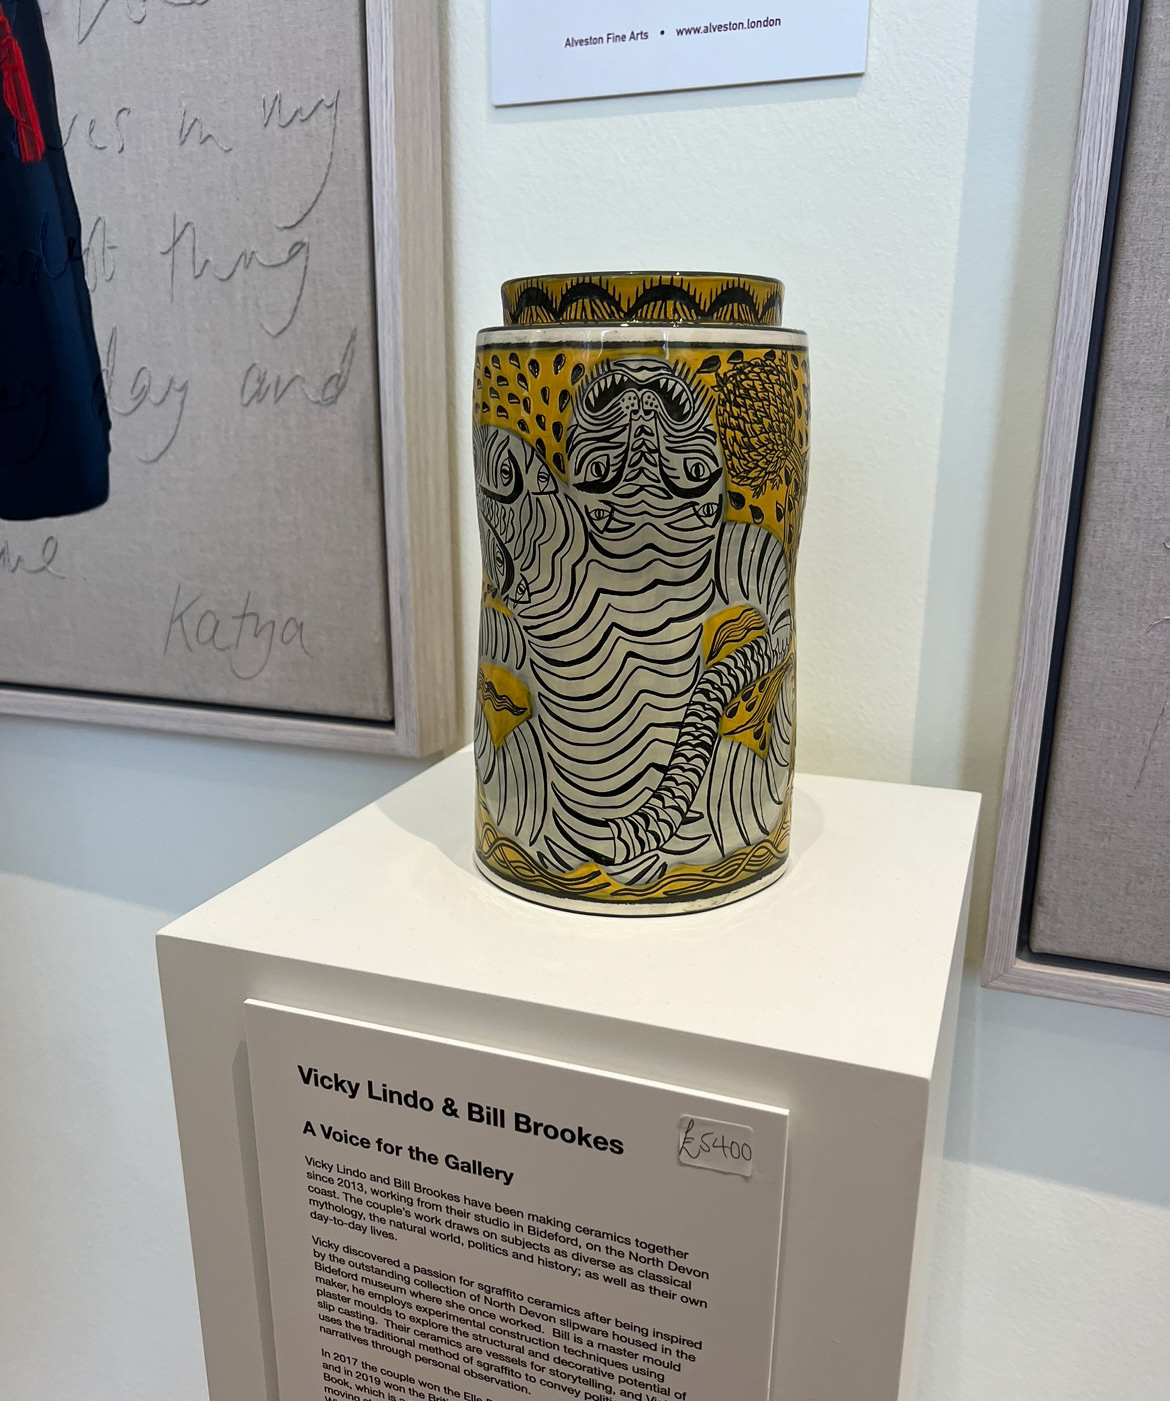
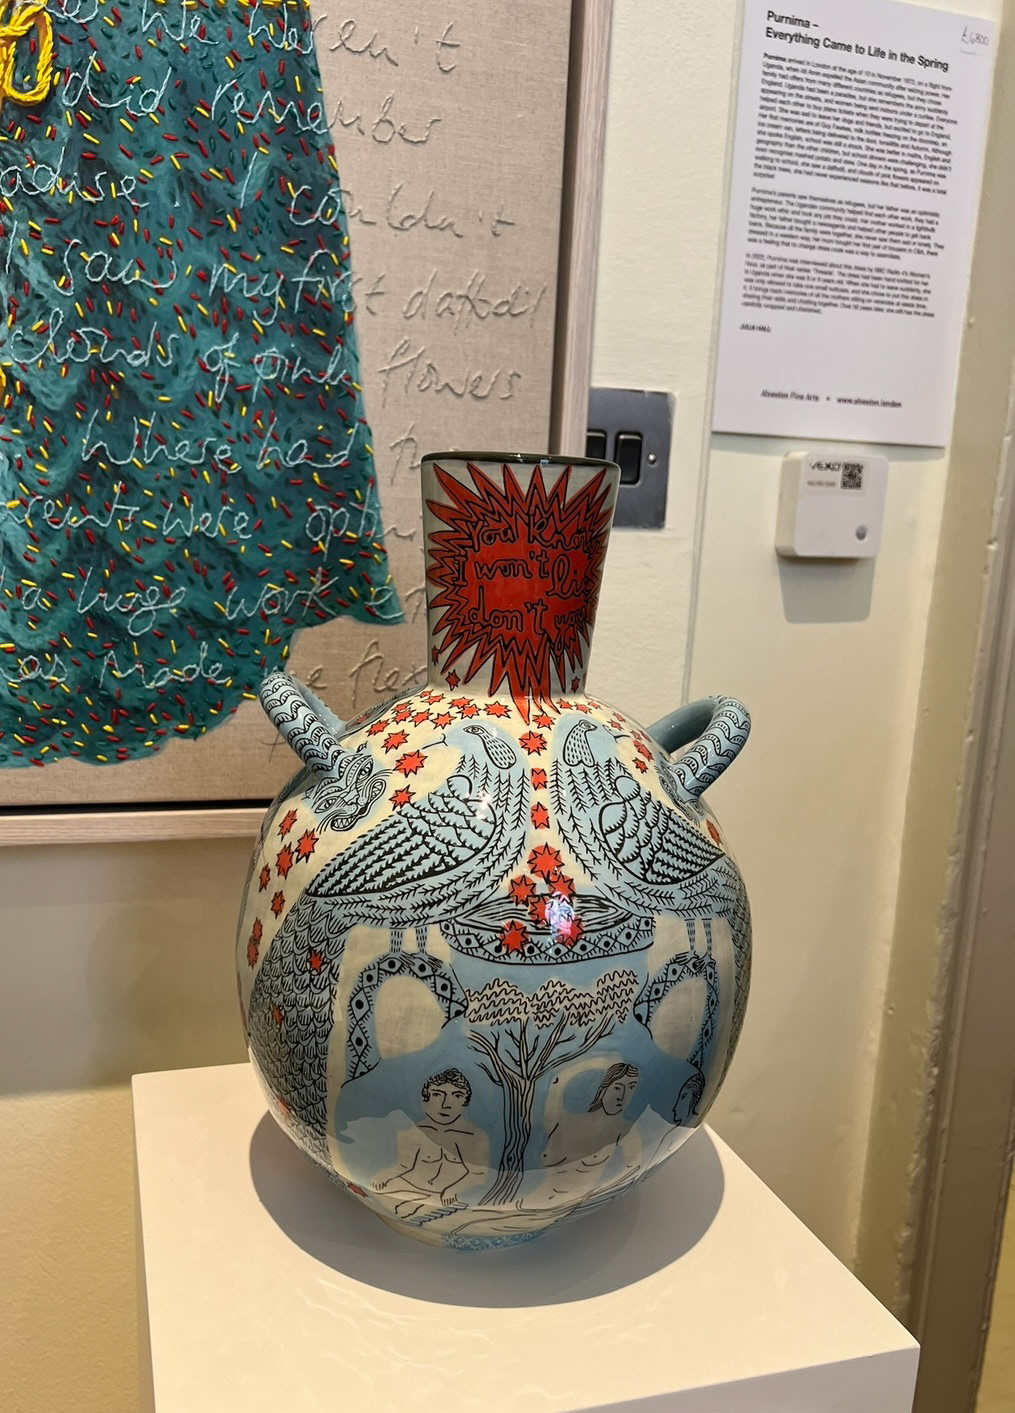
Part of my reason for attending Collect was to suss out the galleries that were exhibiting there, I found one that I really liked called Alveston fine arts, based in Notting Hill, I talked to the curator for a little bit before joining their mailing list. I really liked the art that they were displaying as well as the kind attitude of the people there, I think I would like to work towards perhaps being represented by them in future.
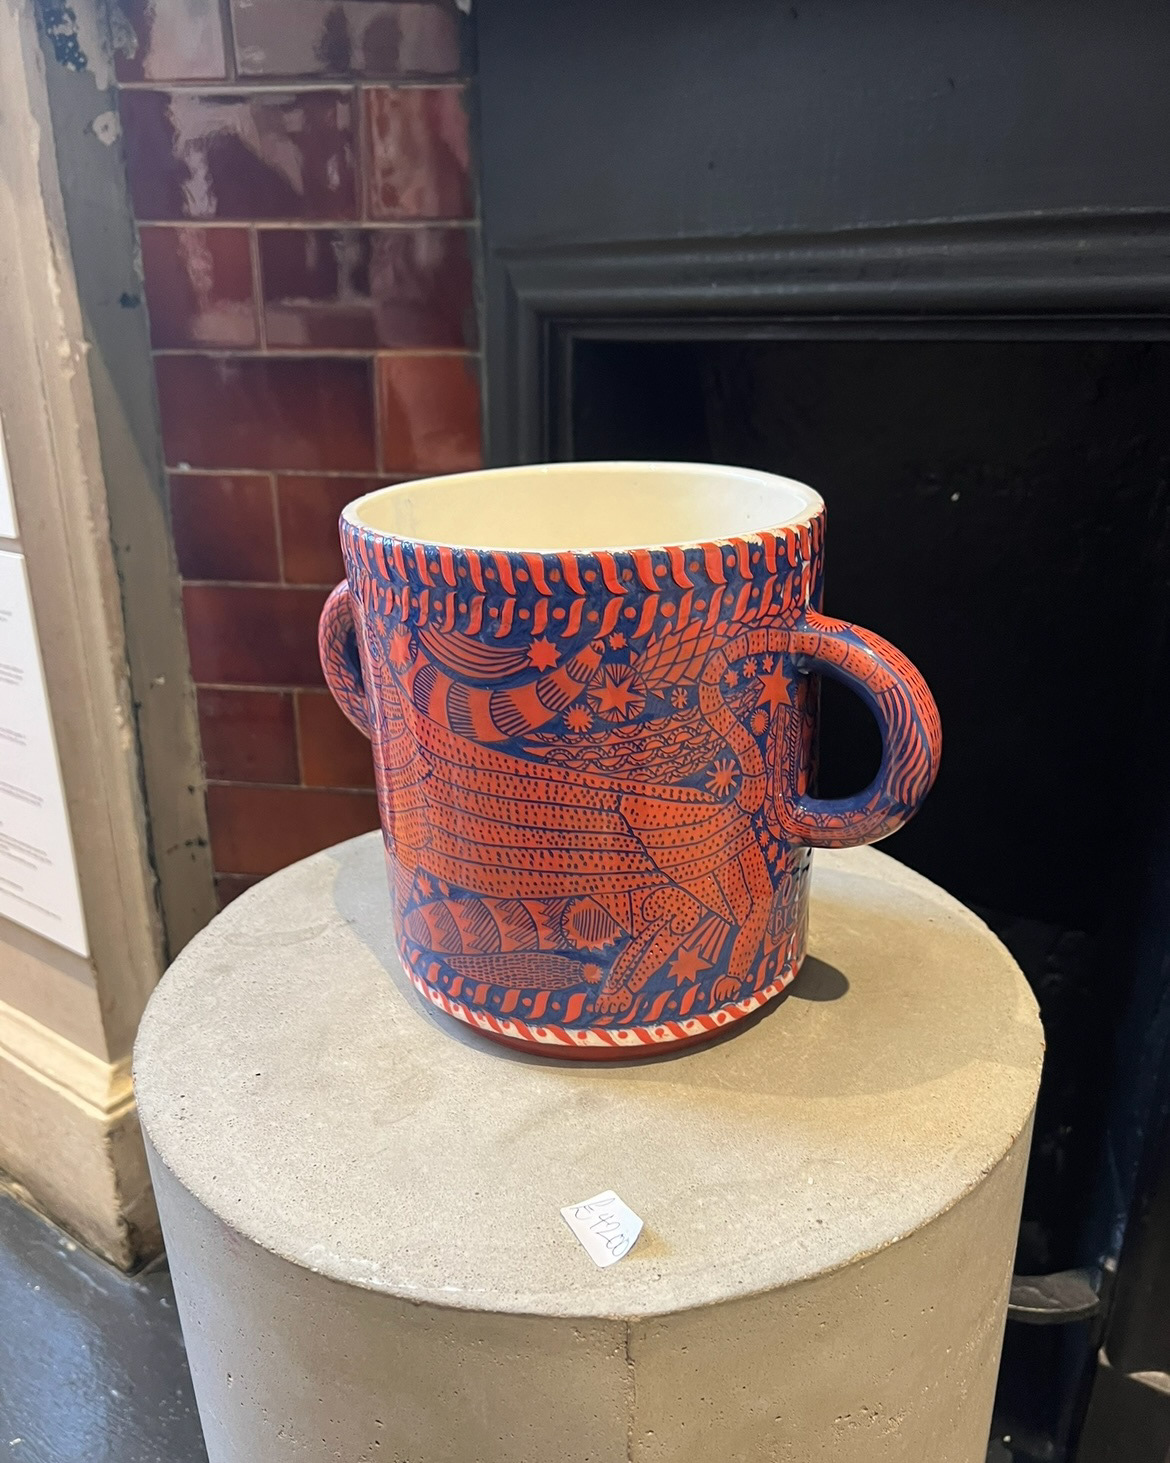
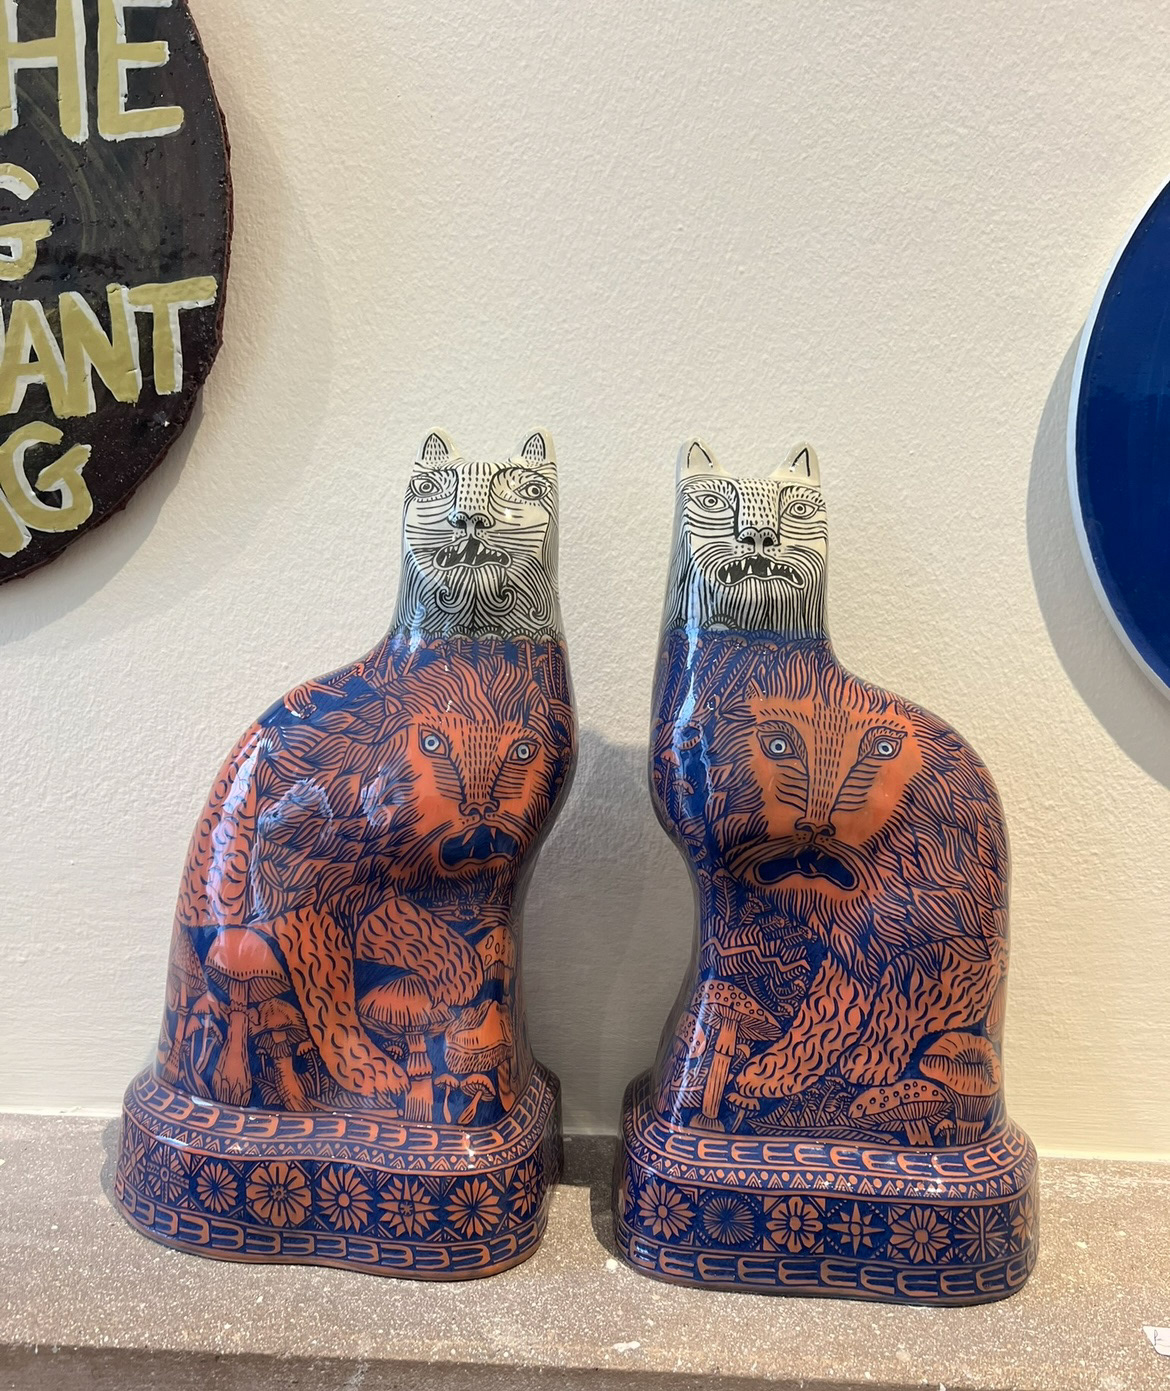
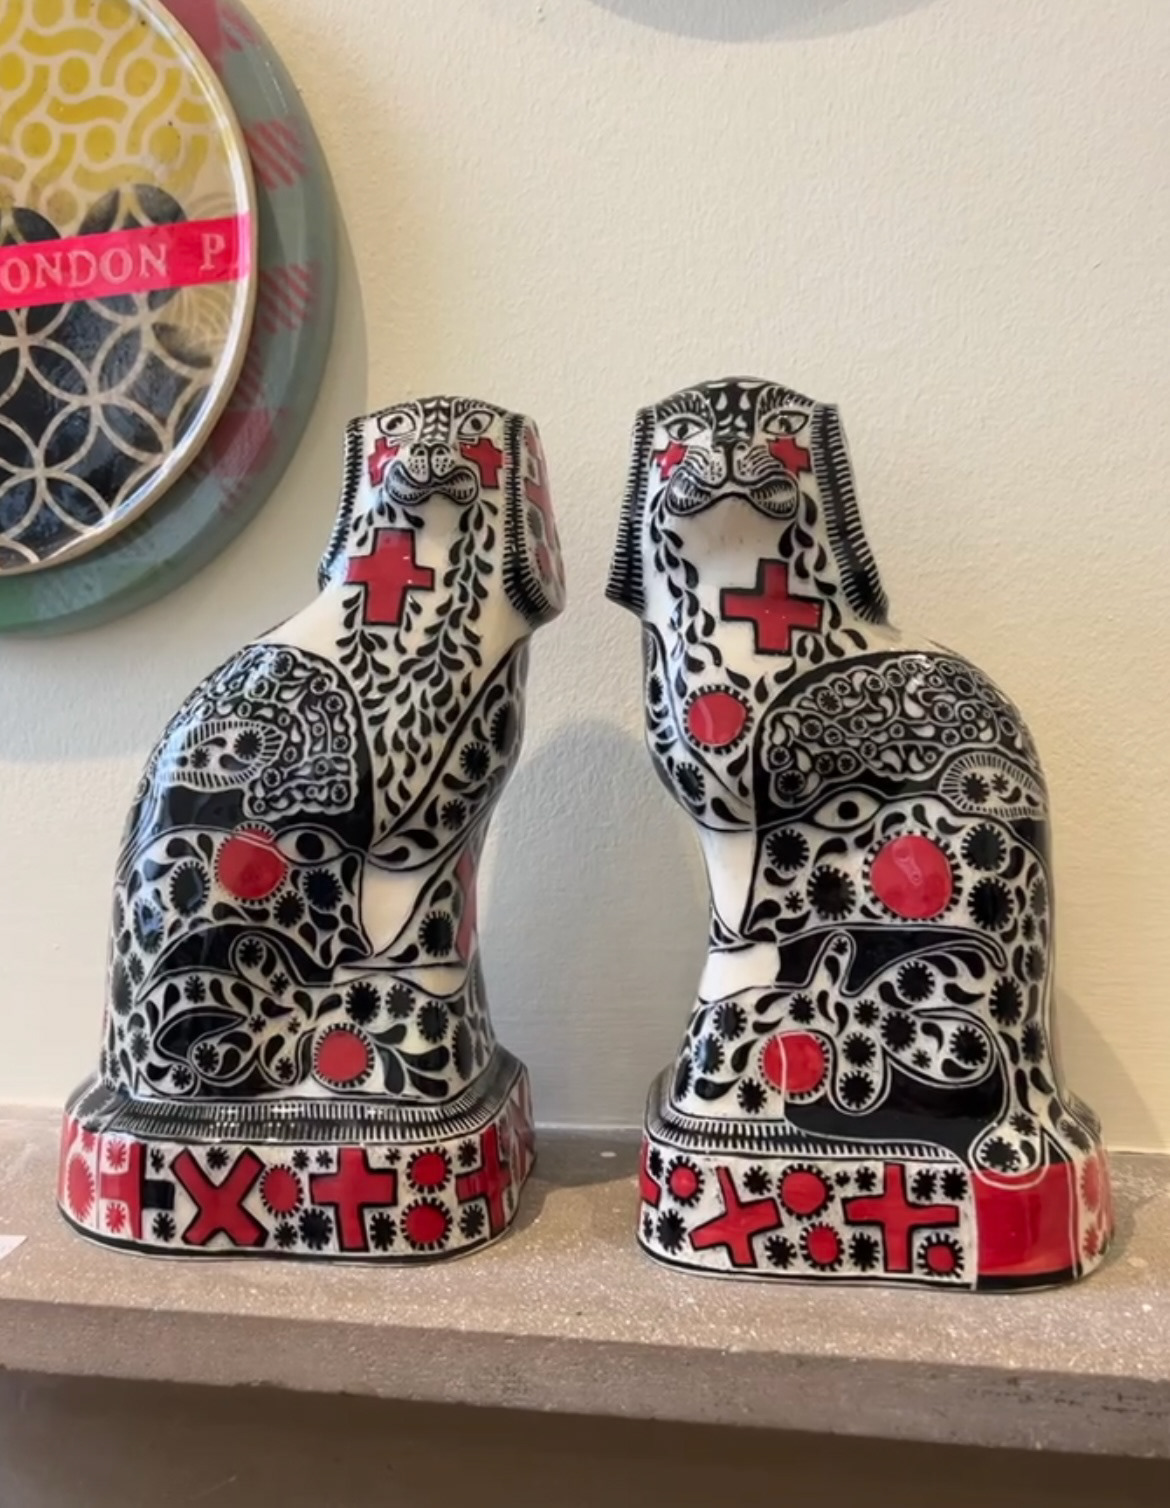
Alveston represents an illustrative ceramics artist called Vicky Lindo. Lindos work really inspired me as she takes often recognised, historically influenced forms and re vitalises them with colourful imagery and often modern themes. I really love her style of illustration and found a lot of inspiration for moving forward on to the glazing of my pot.
While in London, to gain further inspiration, I attended the V&As vast ceramic collection as well as a current exhibition called Henry Willett's collection of popular pottery. I was extremely pleasantly surprised to enter the V&A collection and find a treasure trove of blue and white pottery.
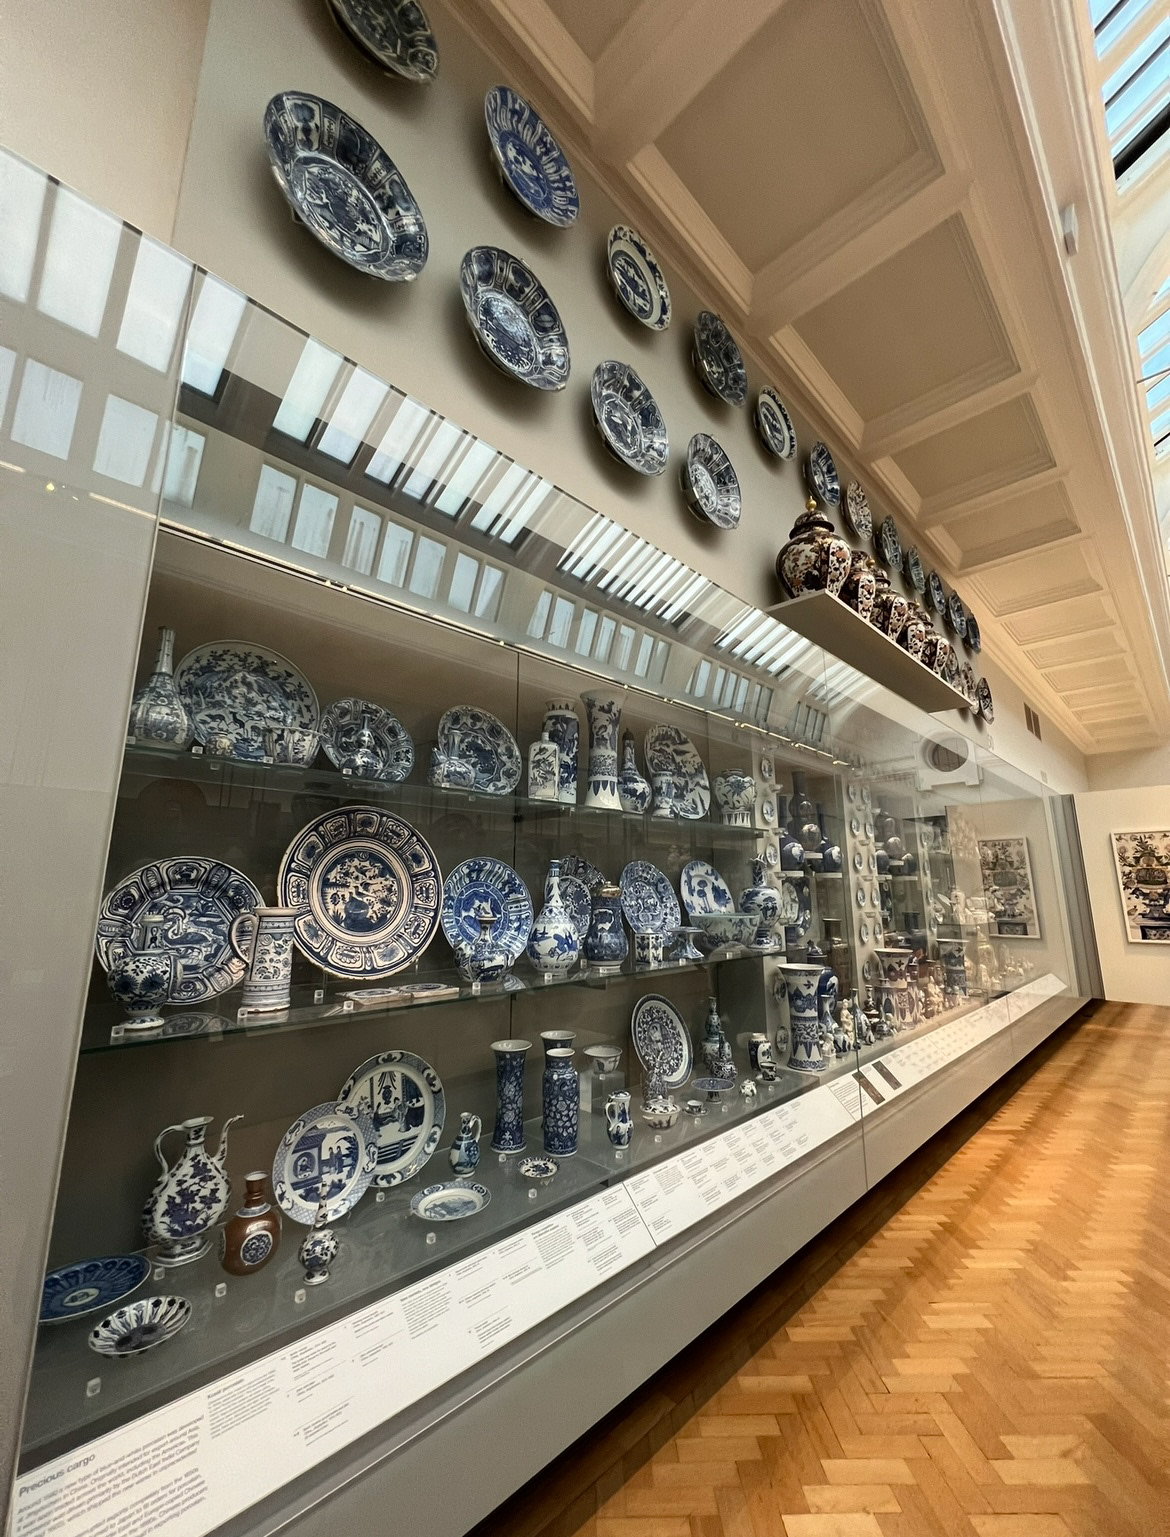
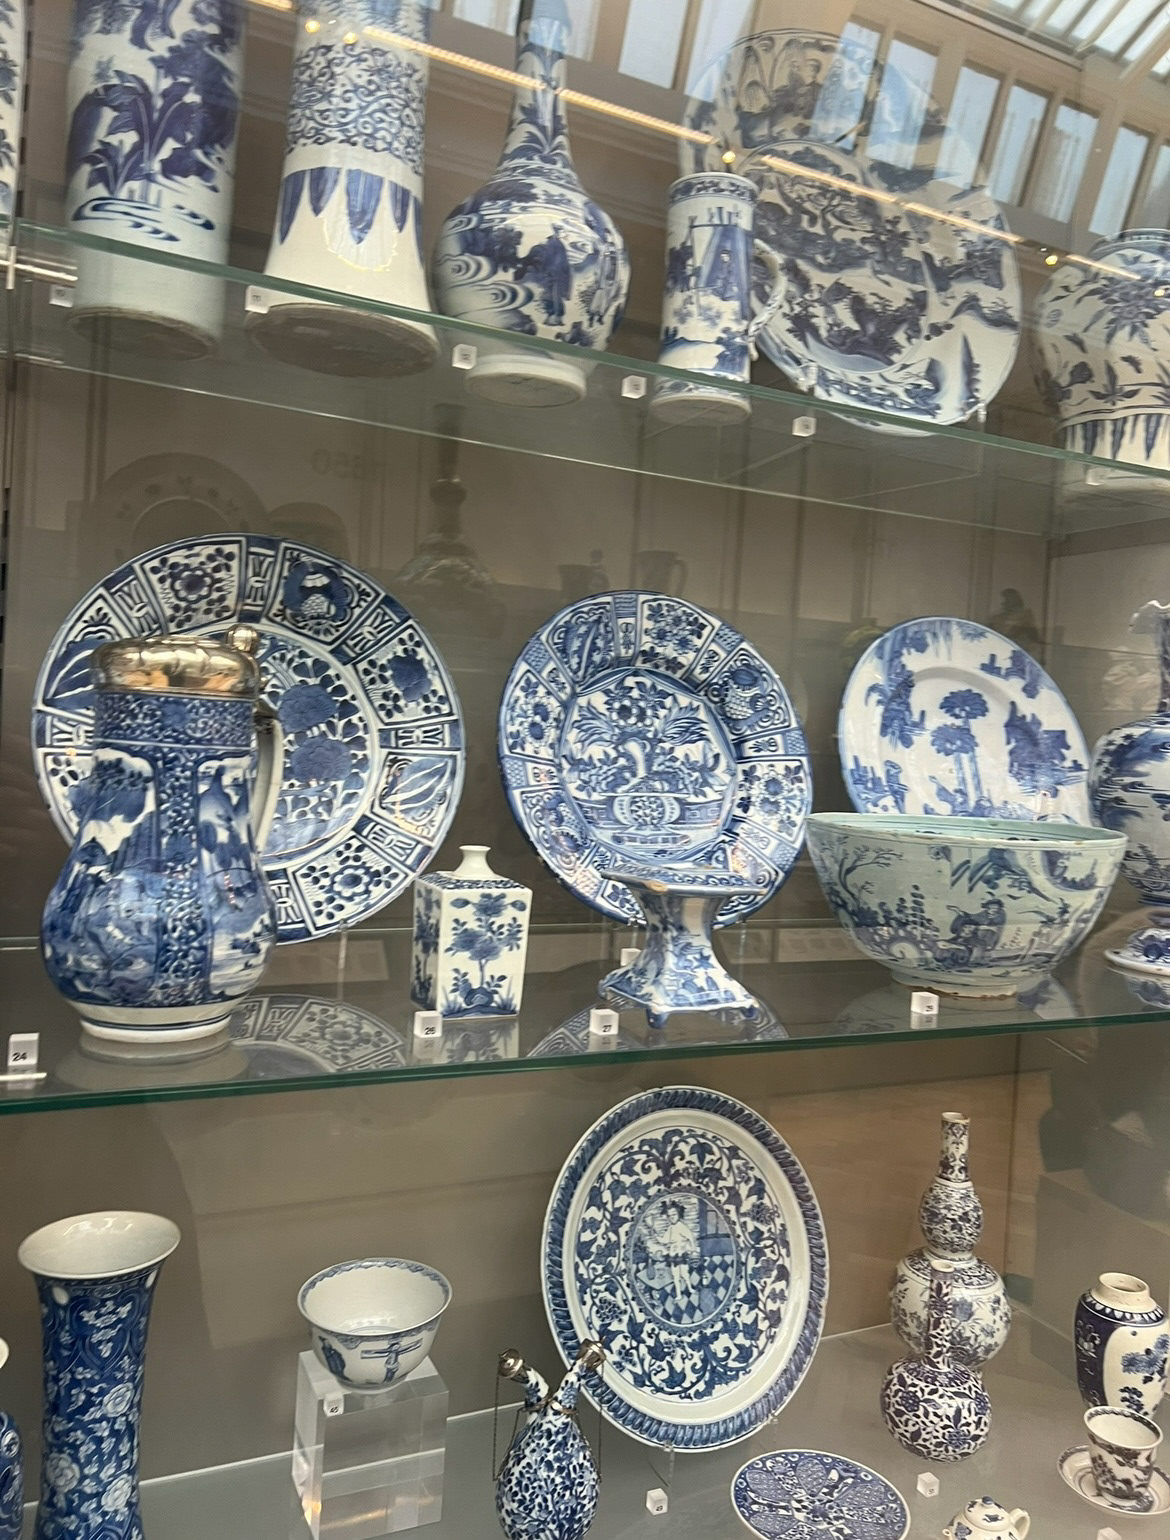
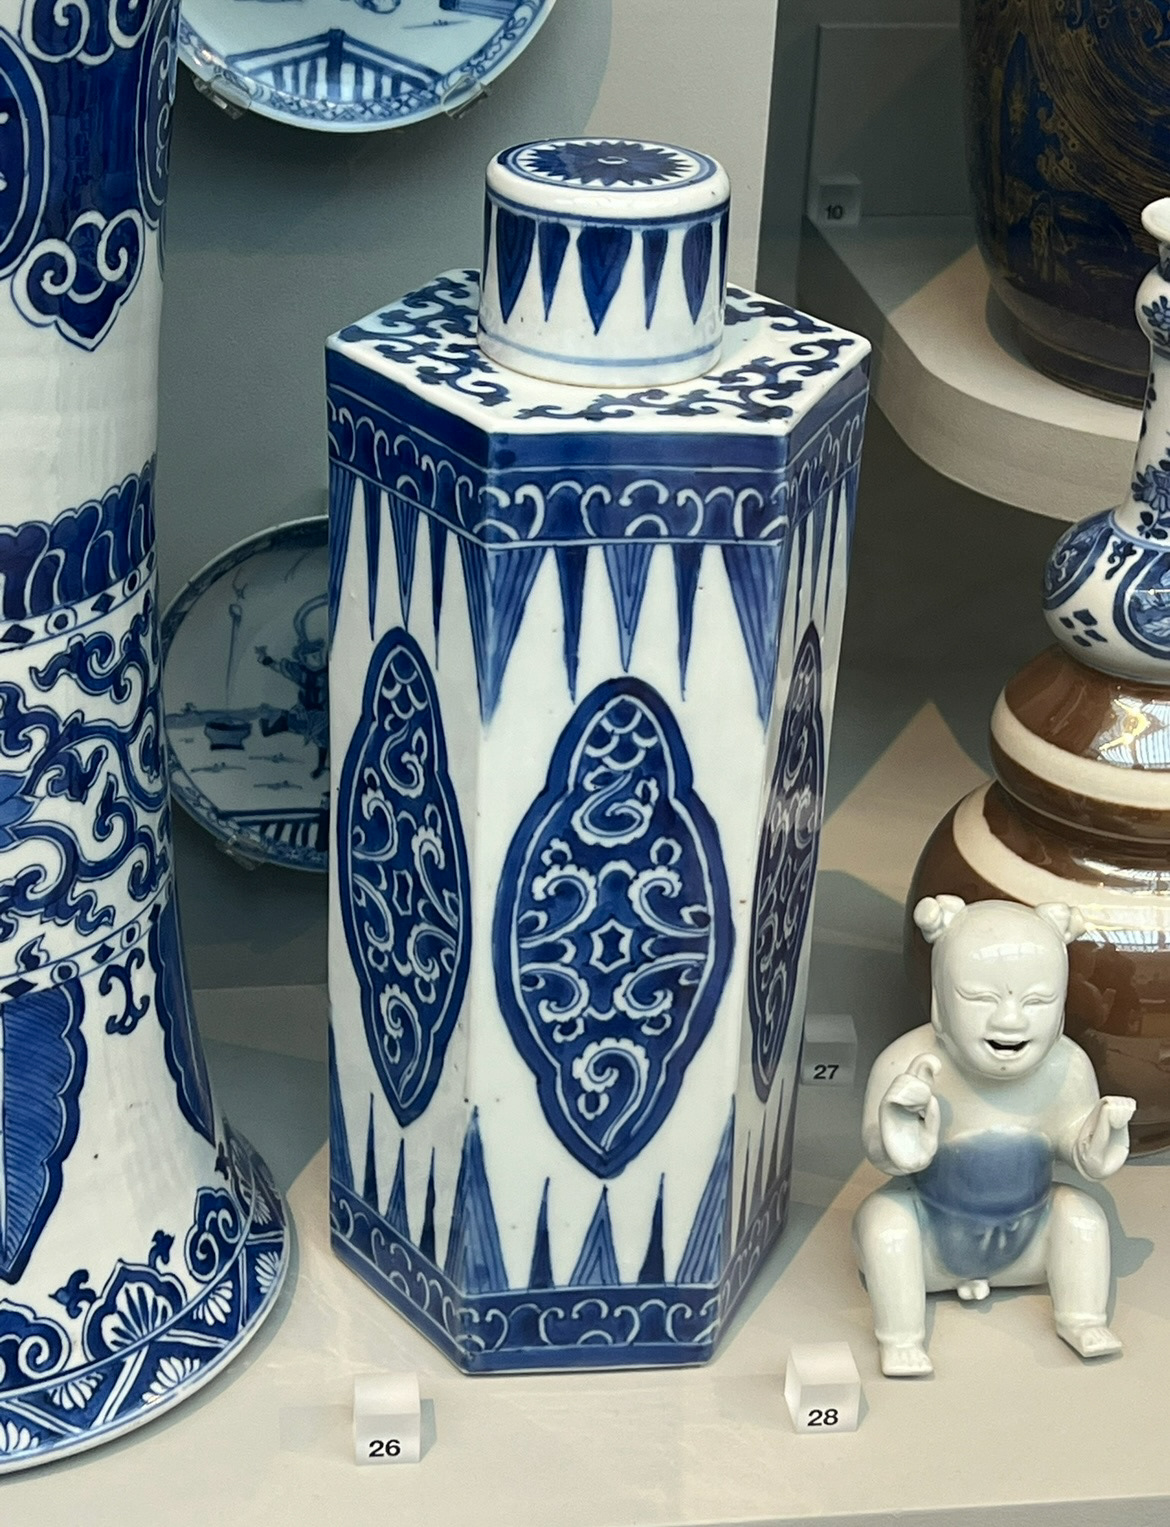
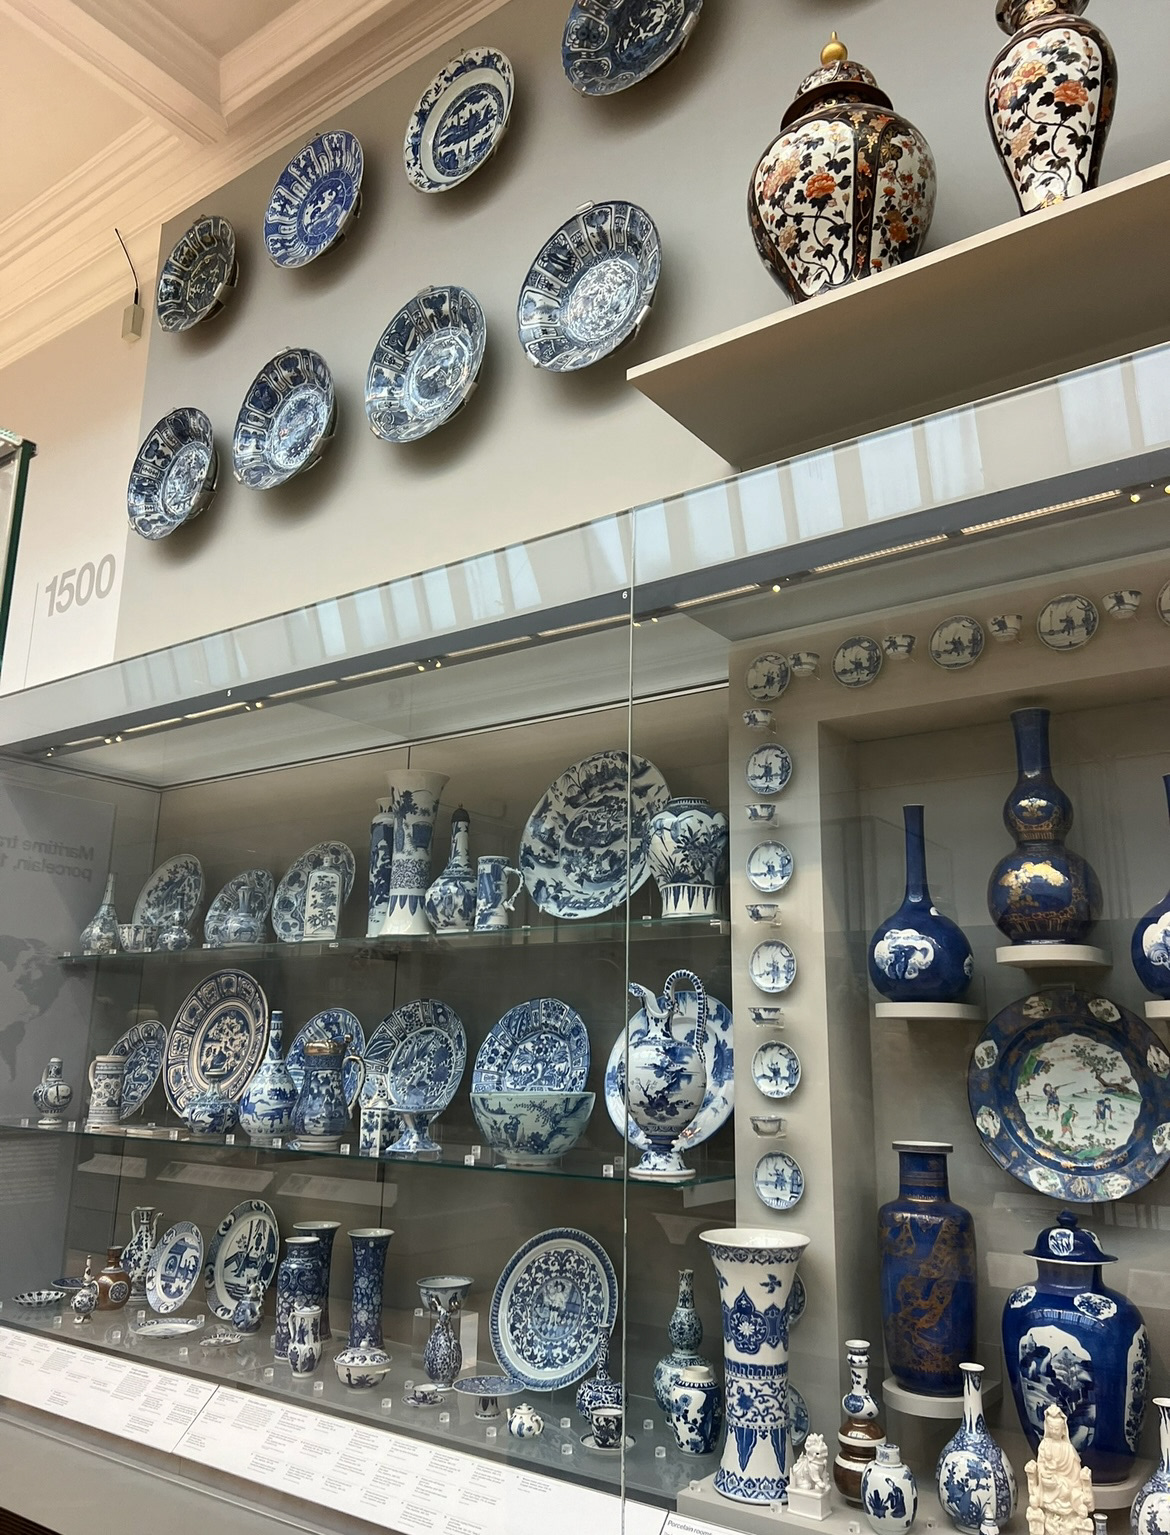
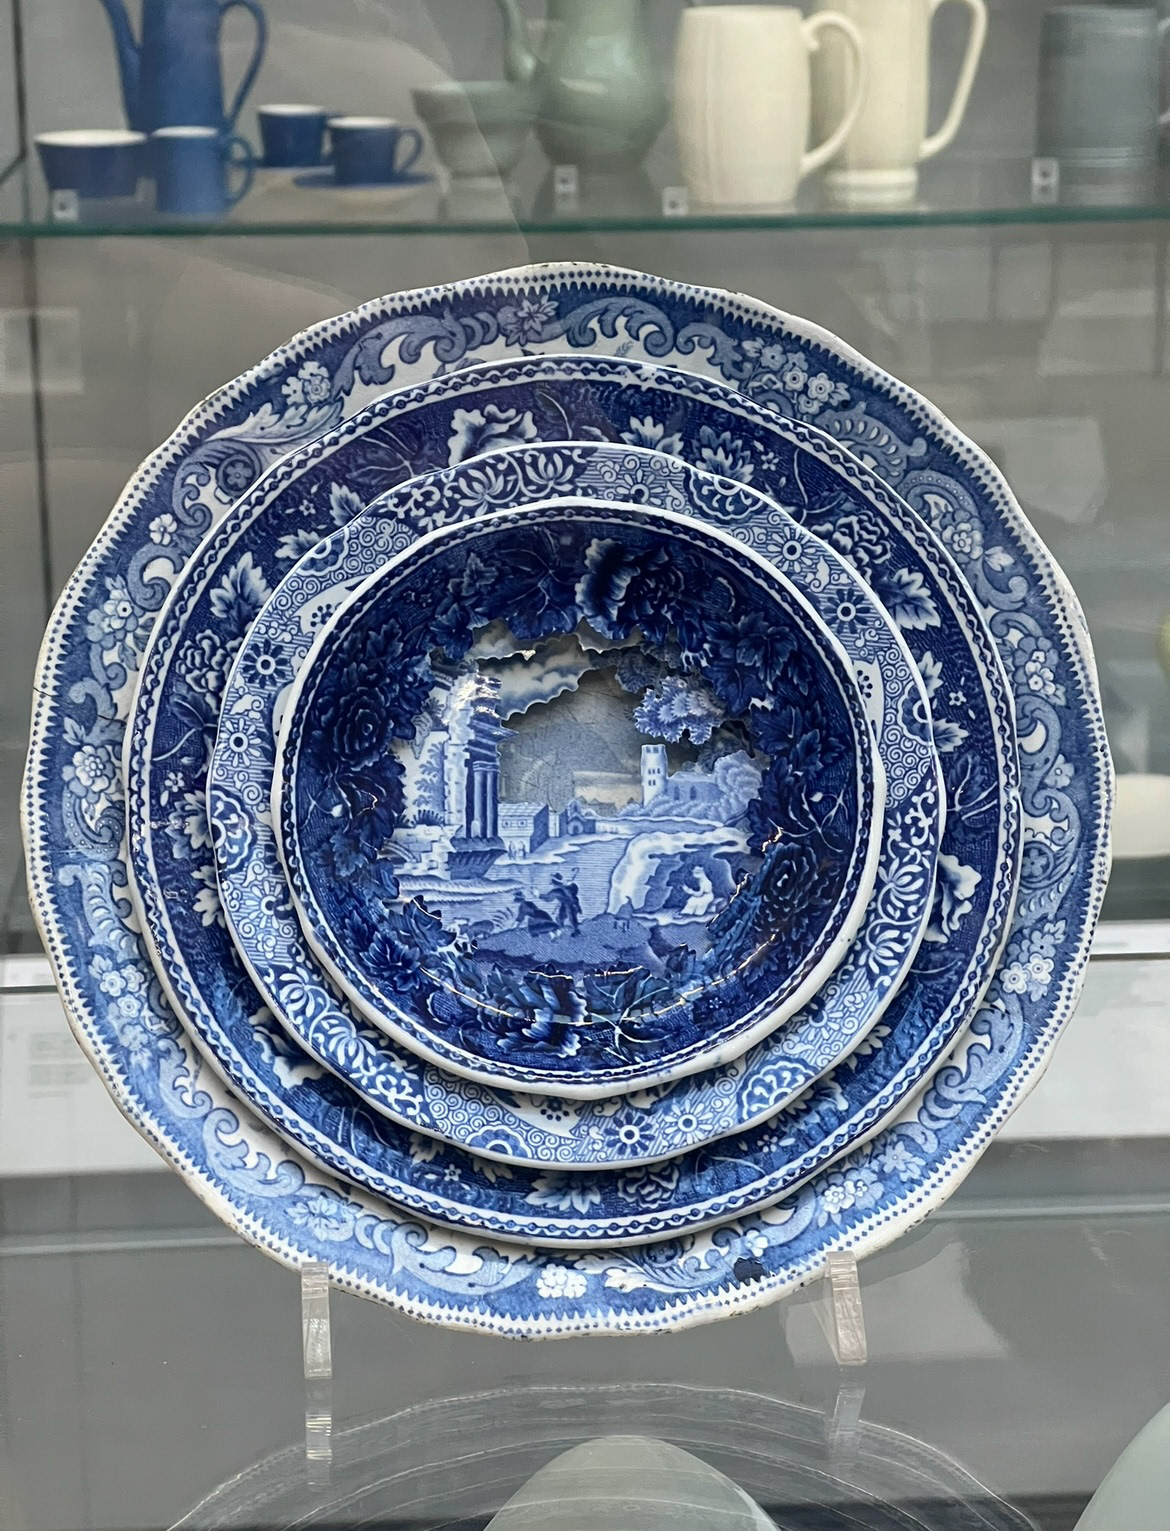
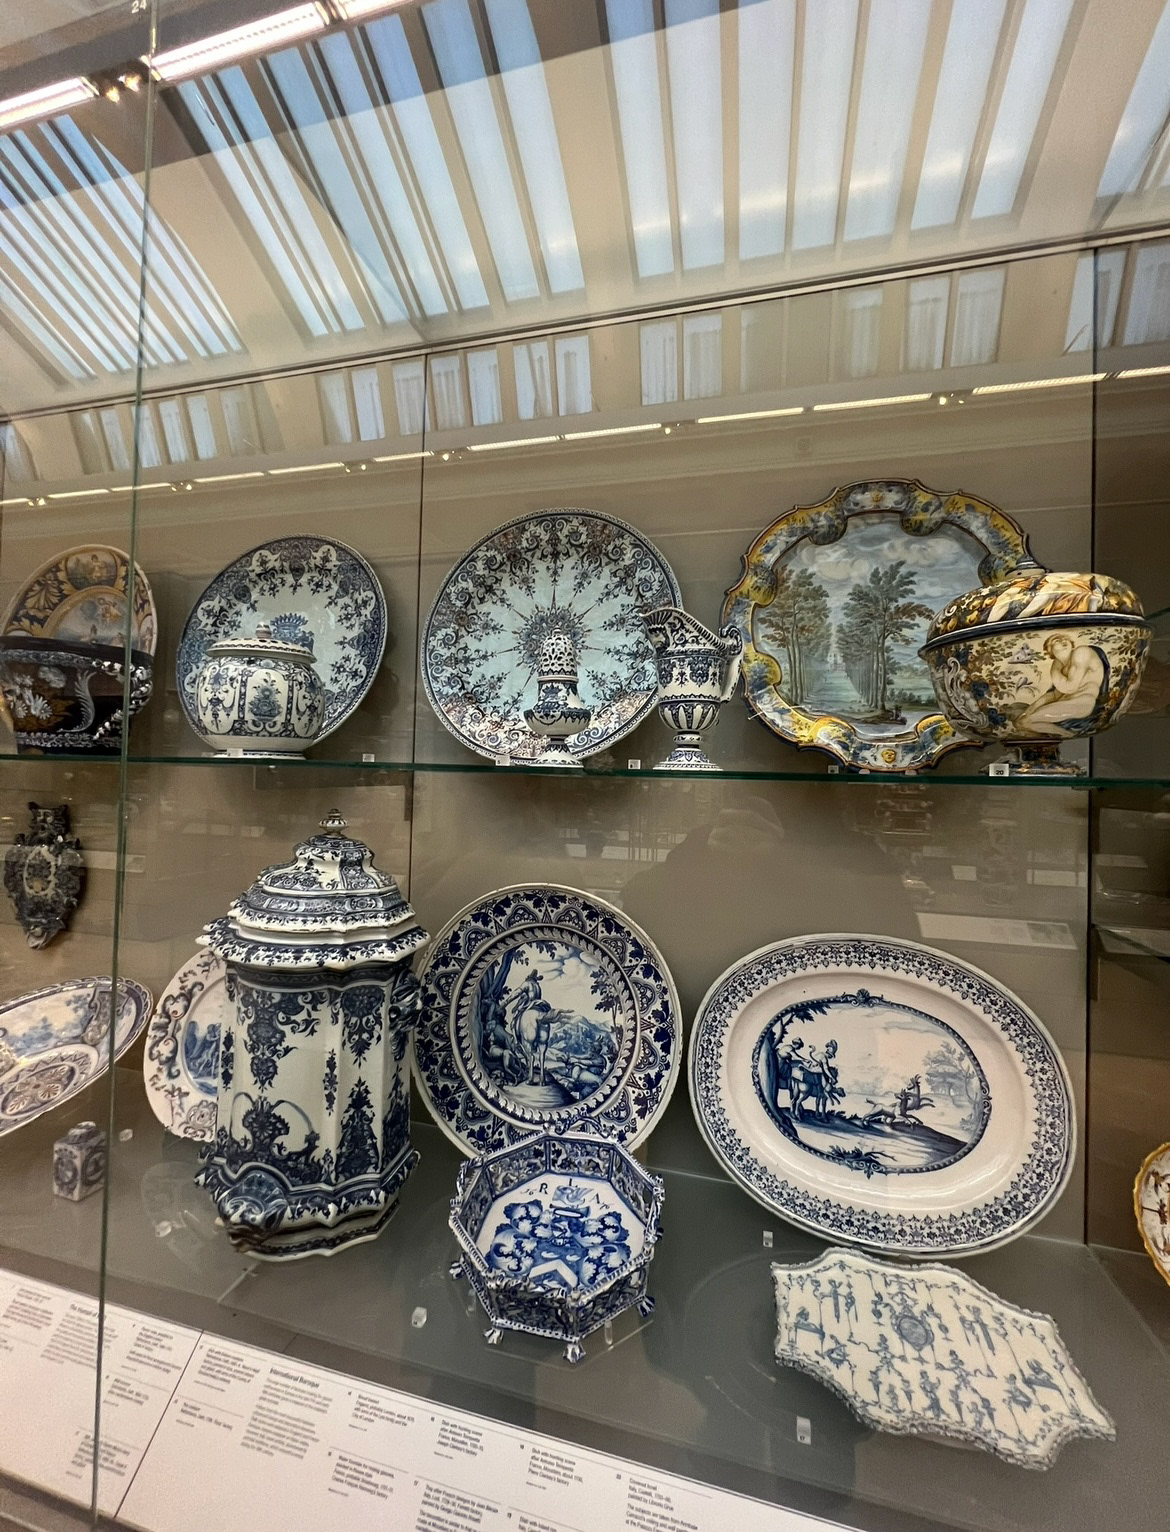
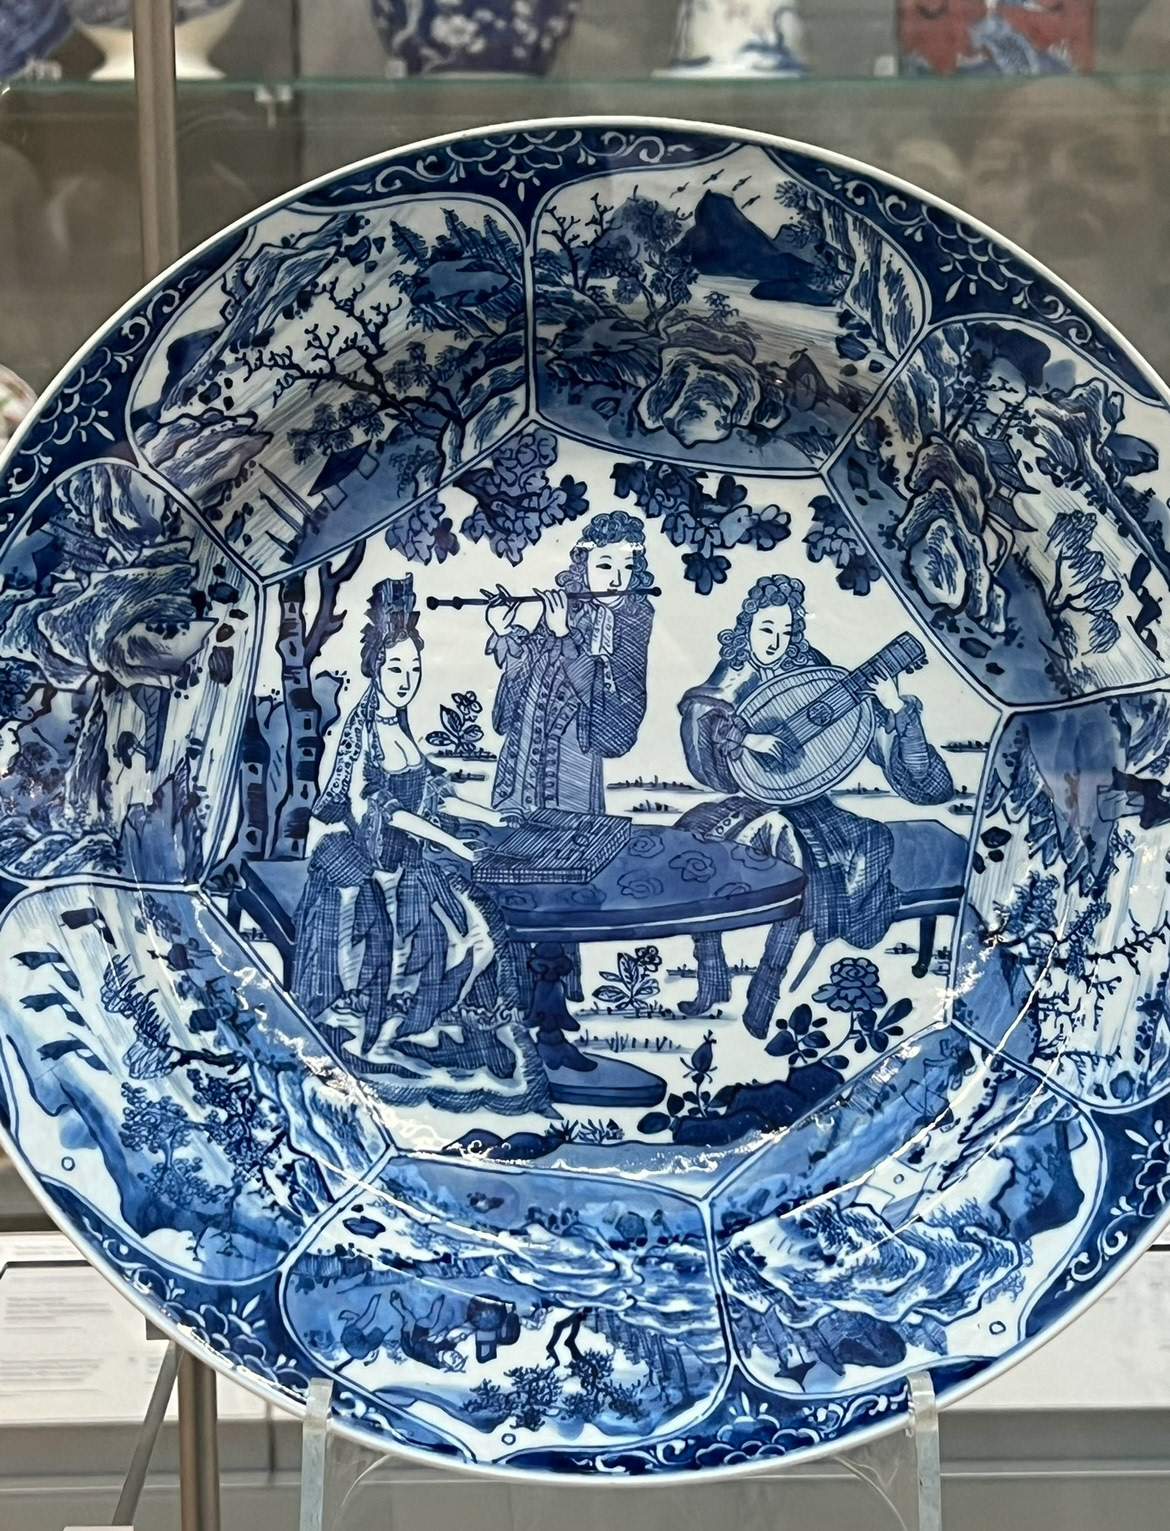
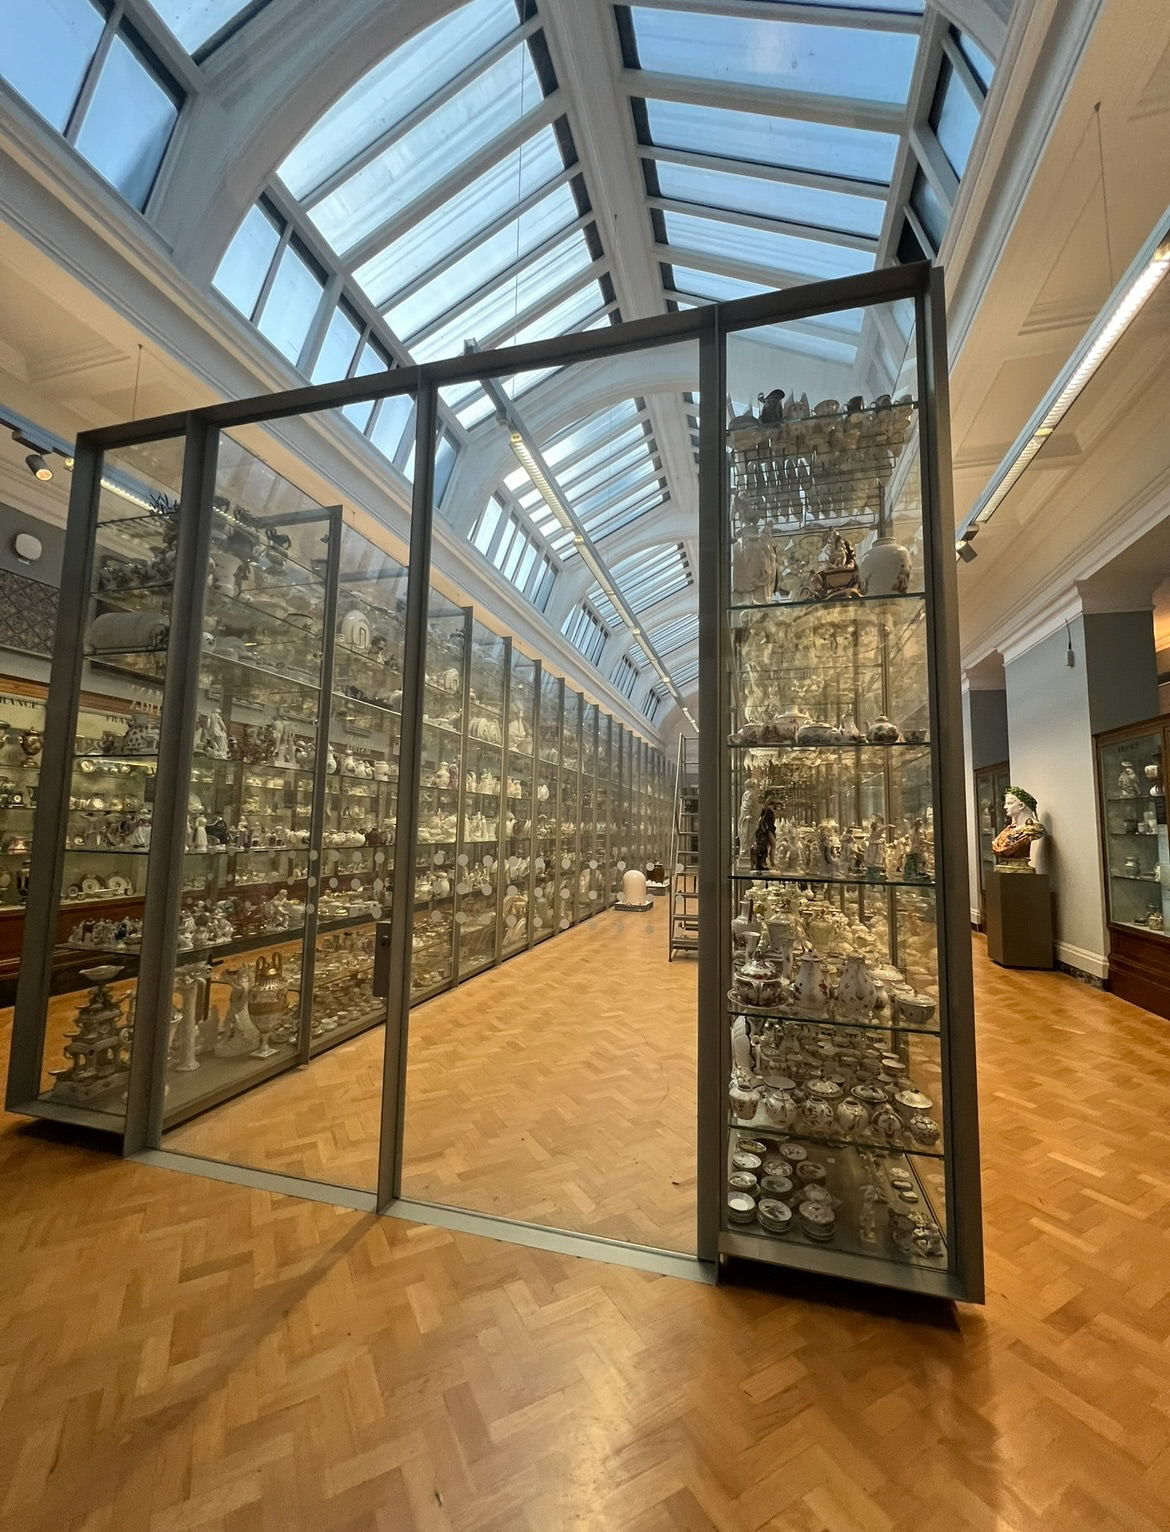
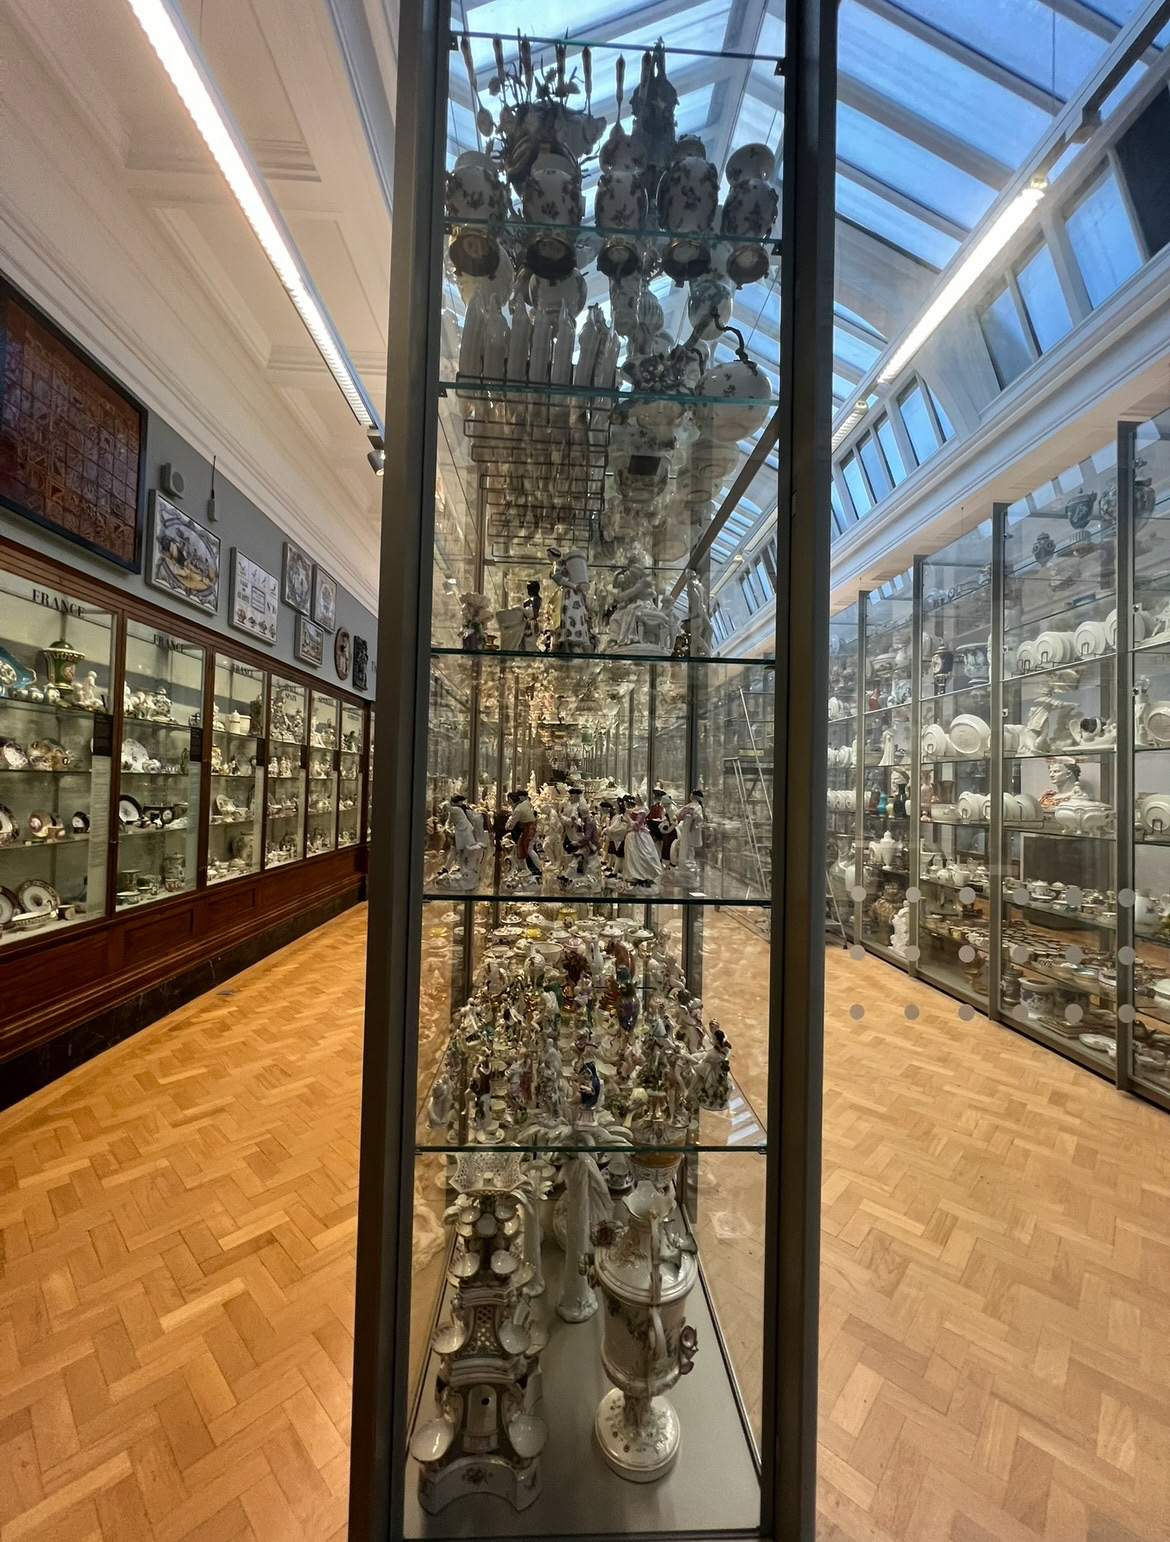
Again, as I was now looking forward to the glazing of my pot, going to look at this collection was immensely useful and inspiring, especially as I could observe many examples of both historical and contemporary takes on blue and white and chinoiserie ceramics.
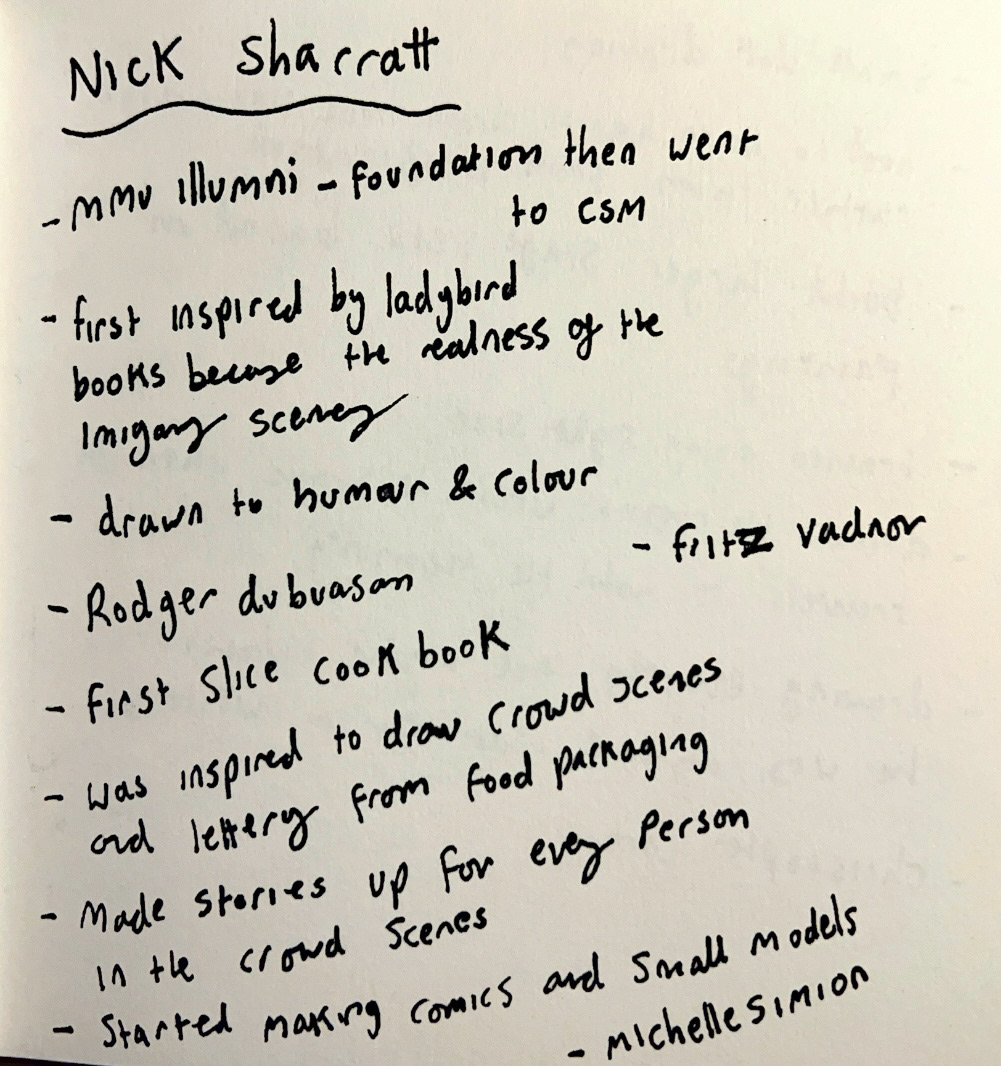
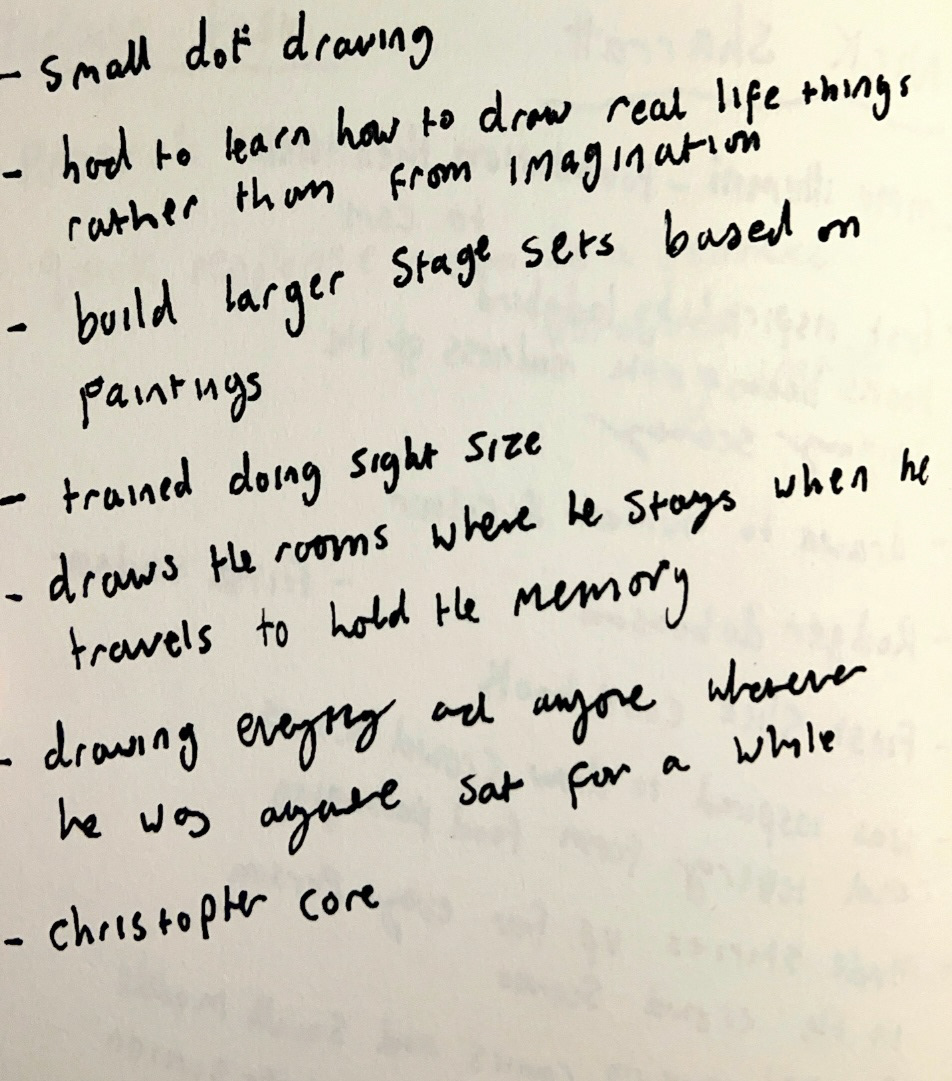
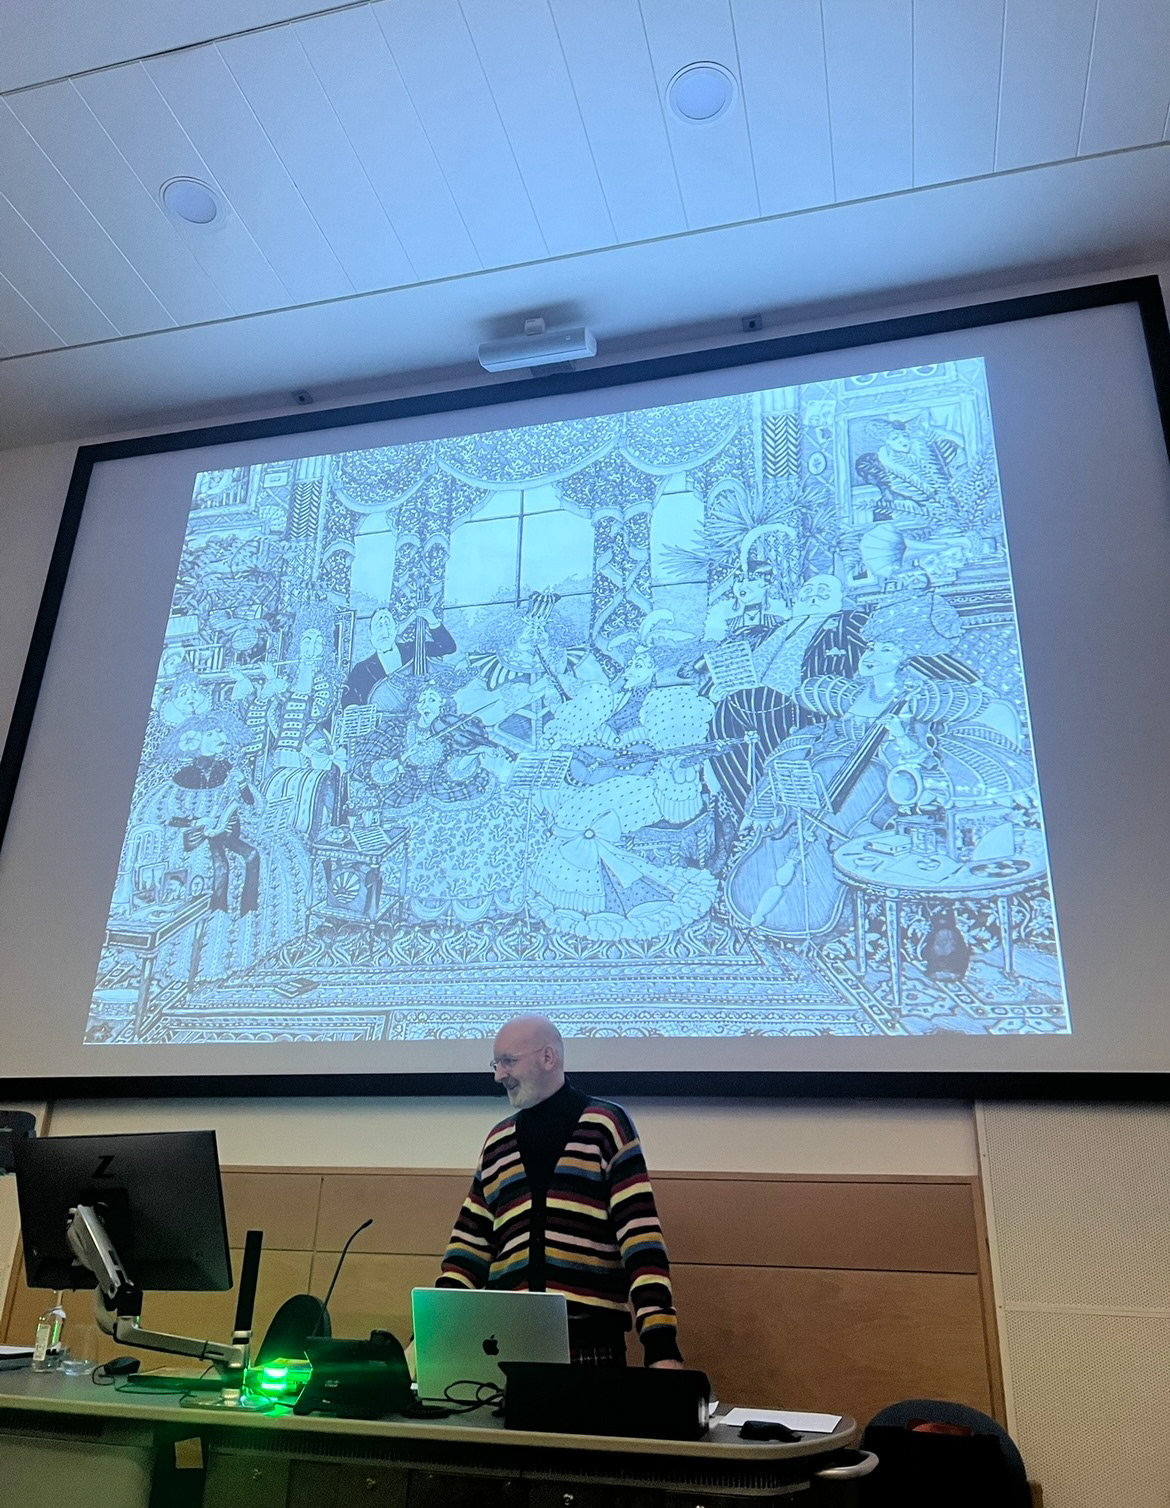
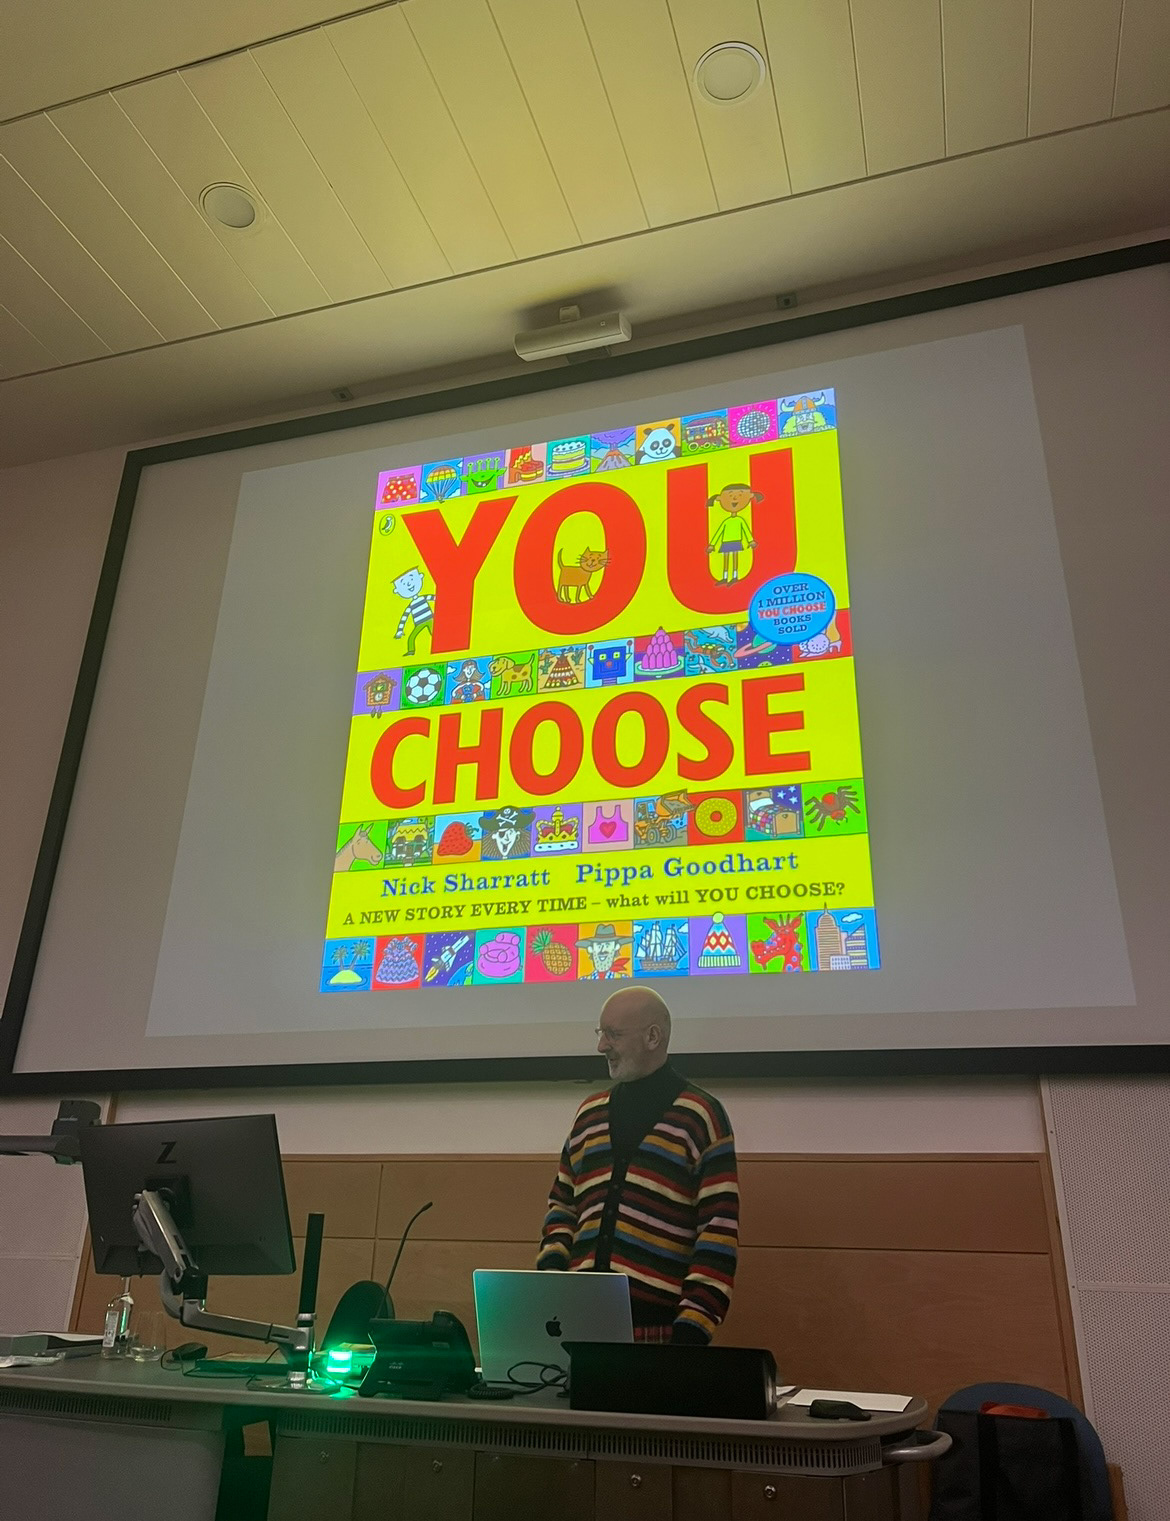
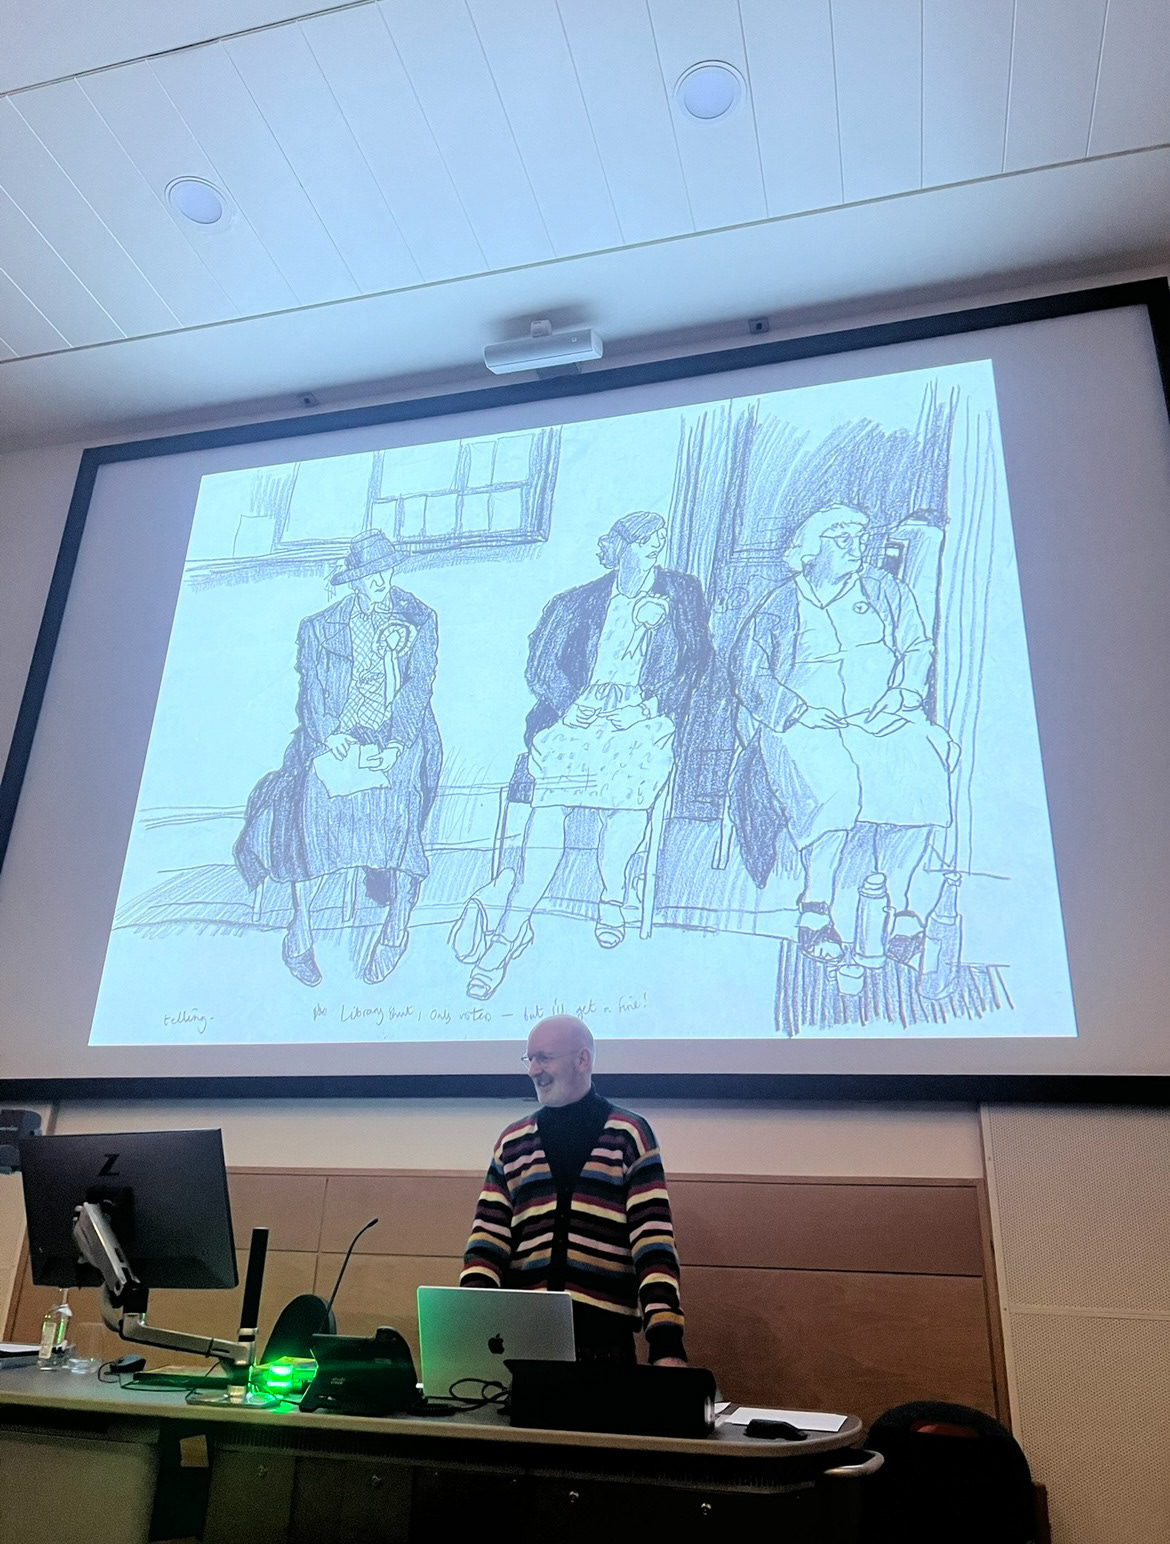
Once I got back to Manchester I knew it was time to work on my subject matter and drawing my illustrations that would tell my story. luckily the week I set out drawing, there was a lecture being held by the illustrator Nick Sharratt. I am a huge fan of his work and was interested to hear about his process before setting off on my drawing process. (pictures and notes from this talk below).

The subject matter of my pot is the crafting heritage of the north east through a familiar lens. I had been researching the crafting heritage in my family alongside my grandma, who is a member of the Sunderland antiquarian society. She provided me with a number of family pictures as well as some found in the archives of the antiquarian society.
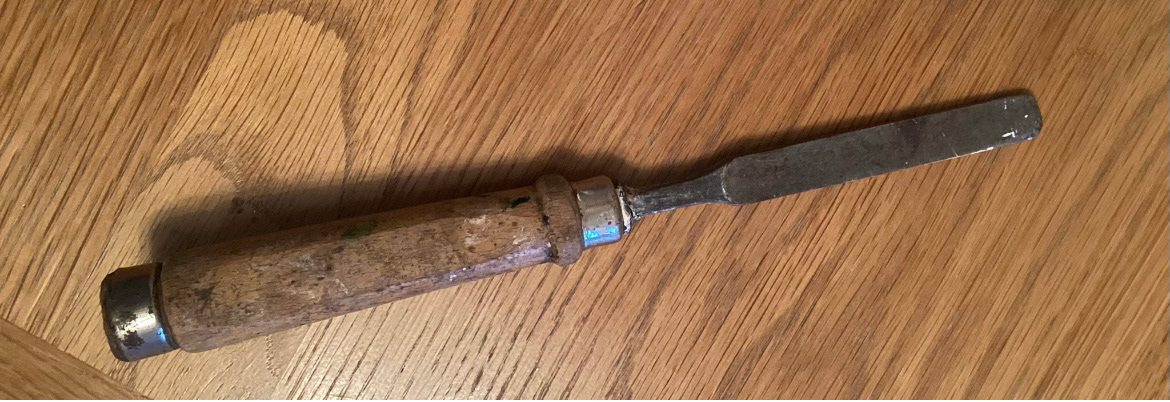
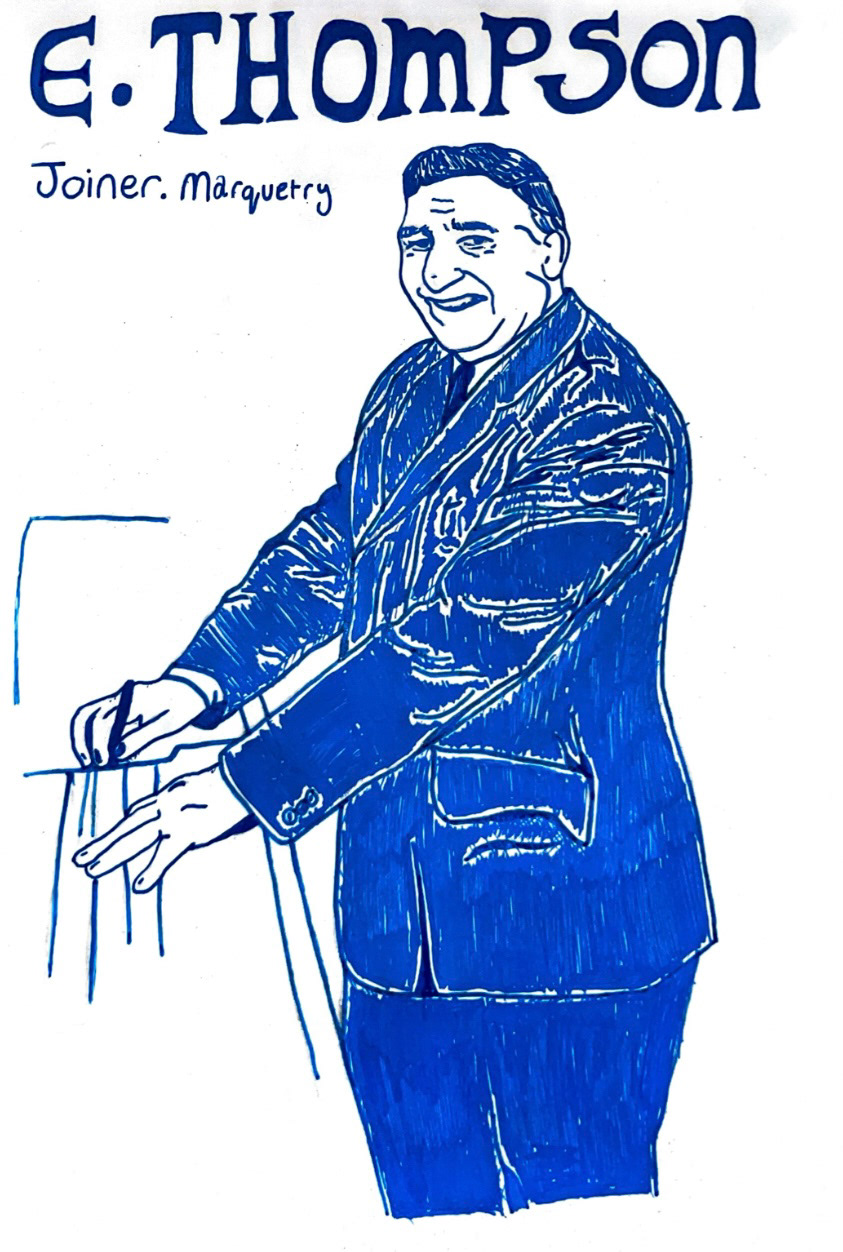
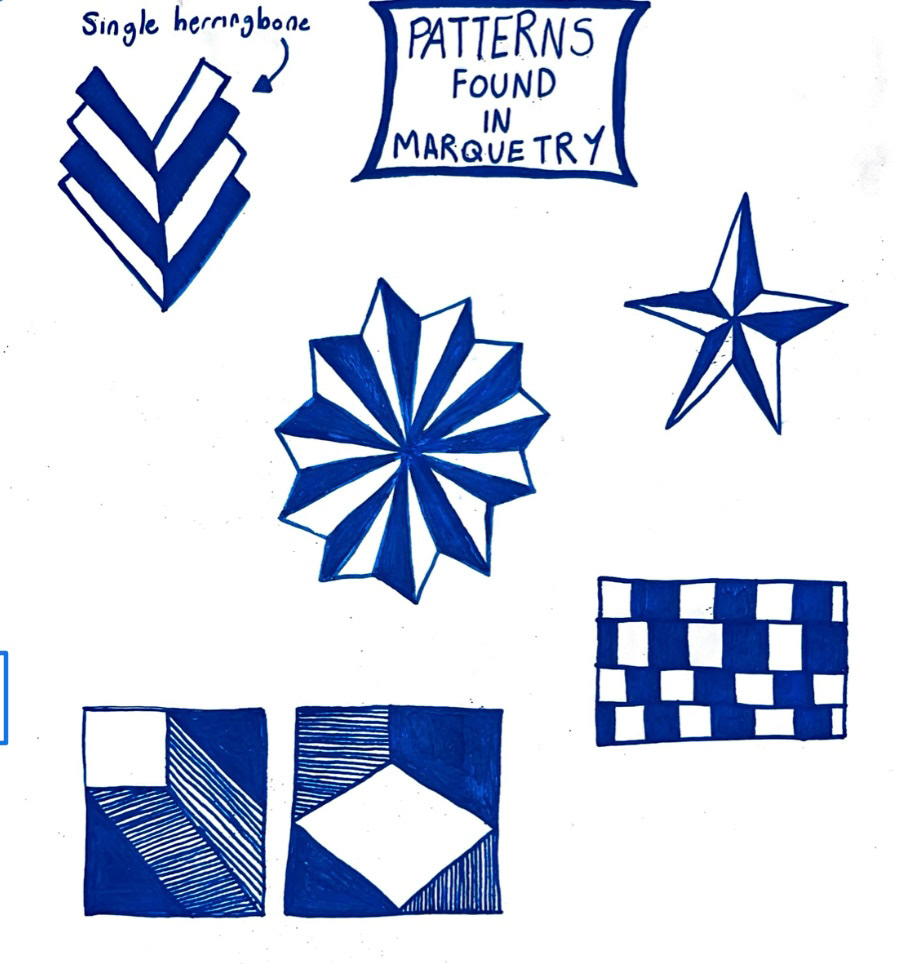
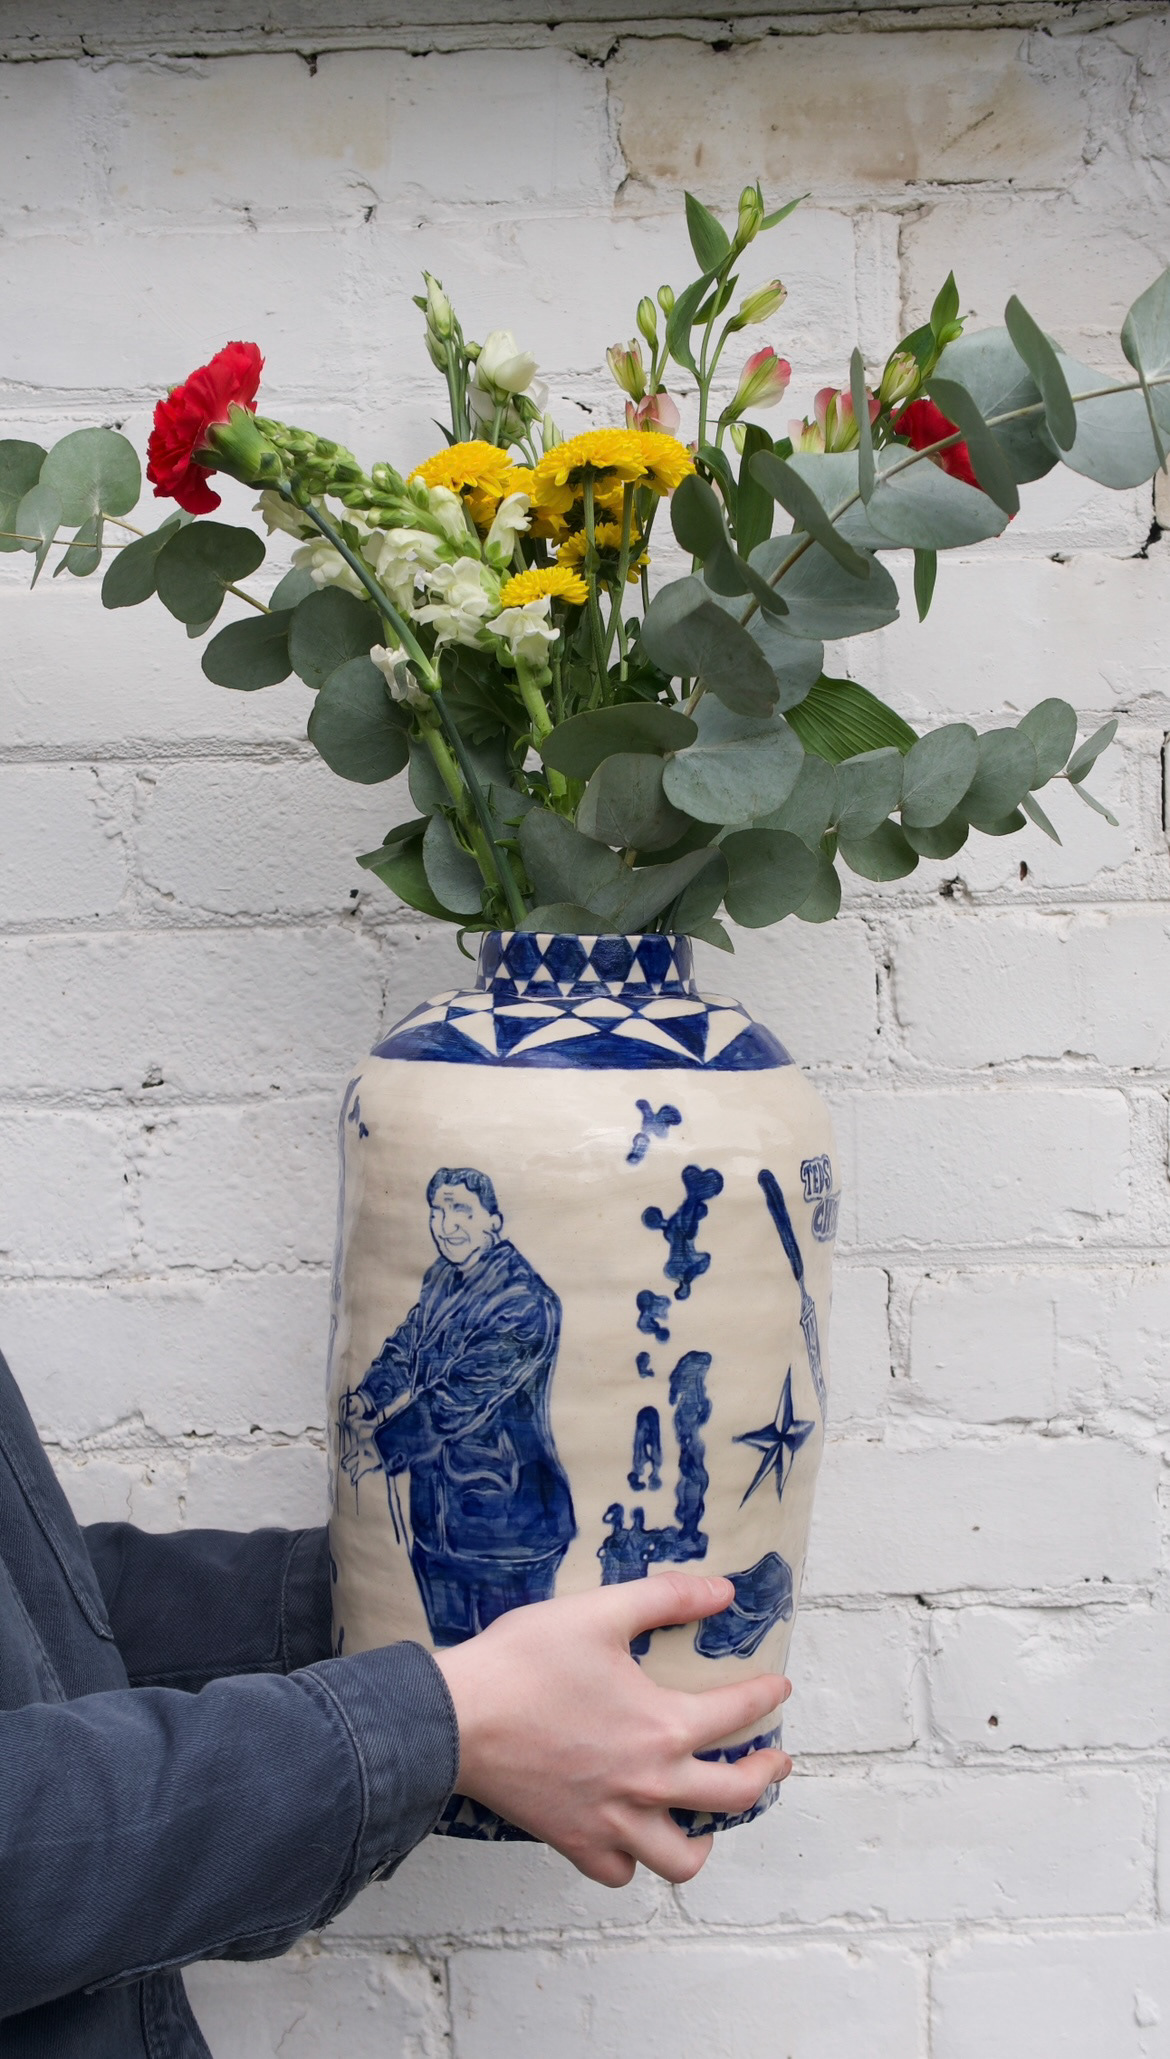
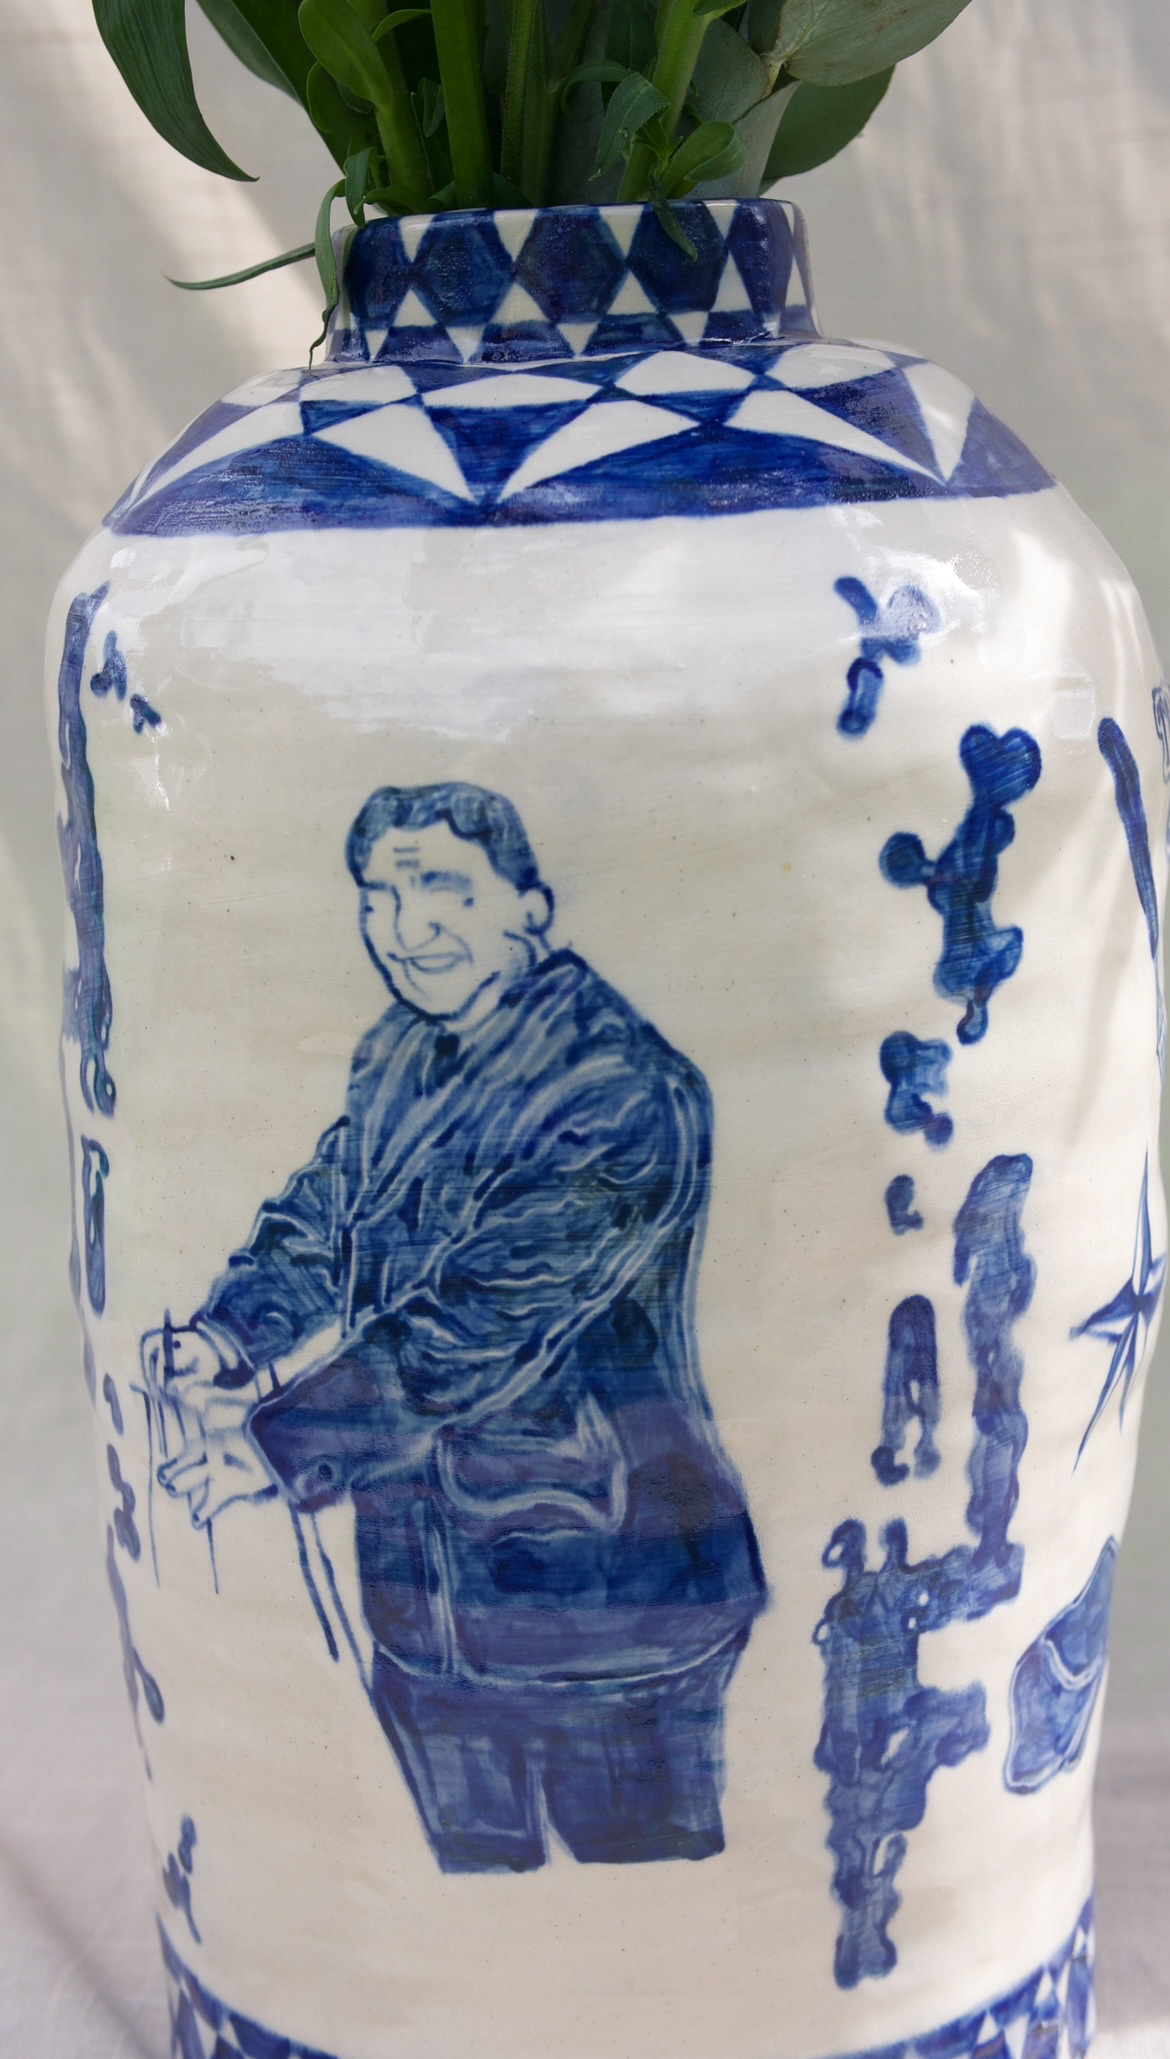
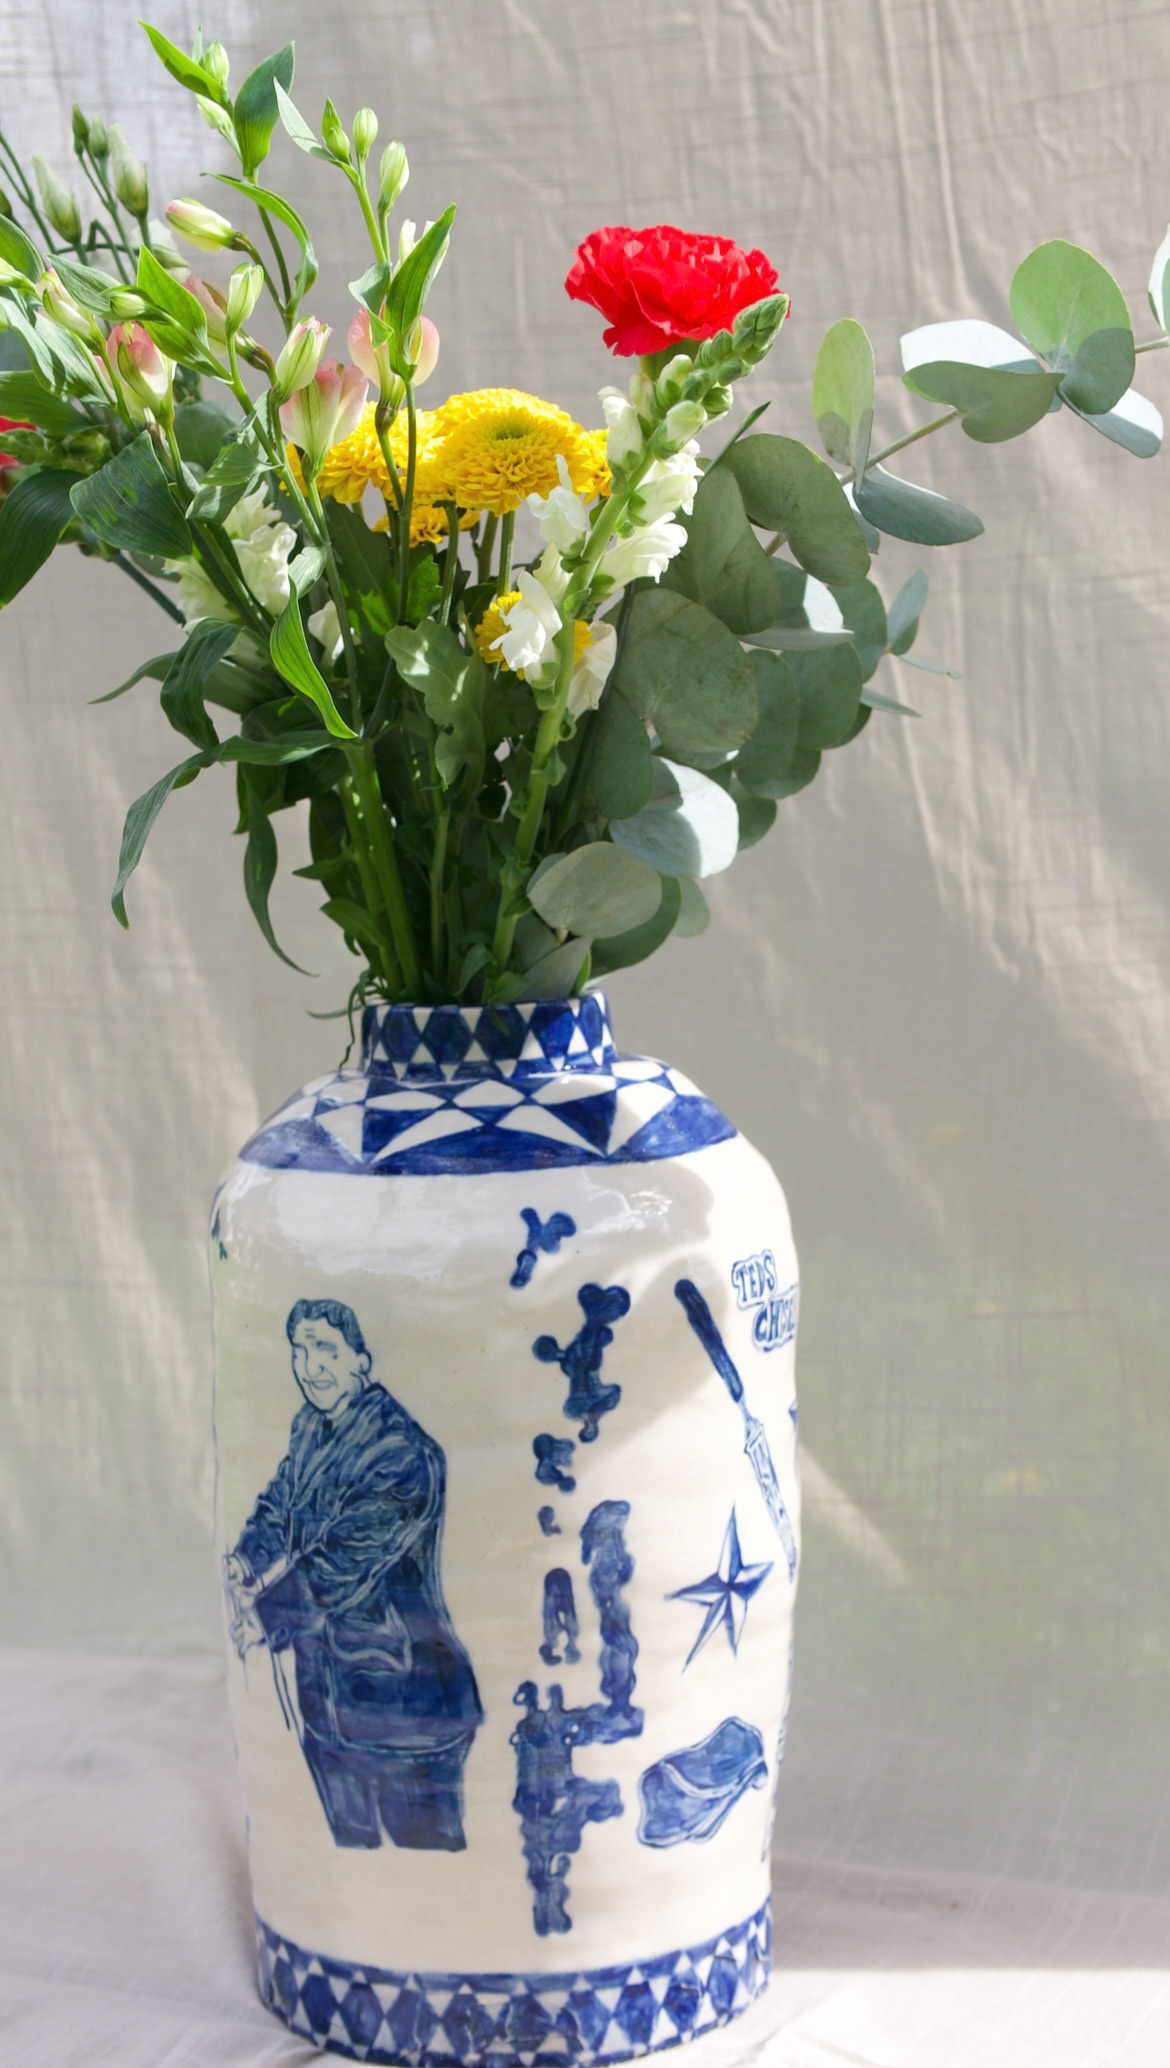
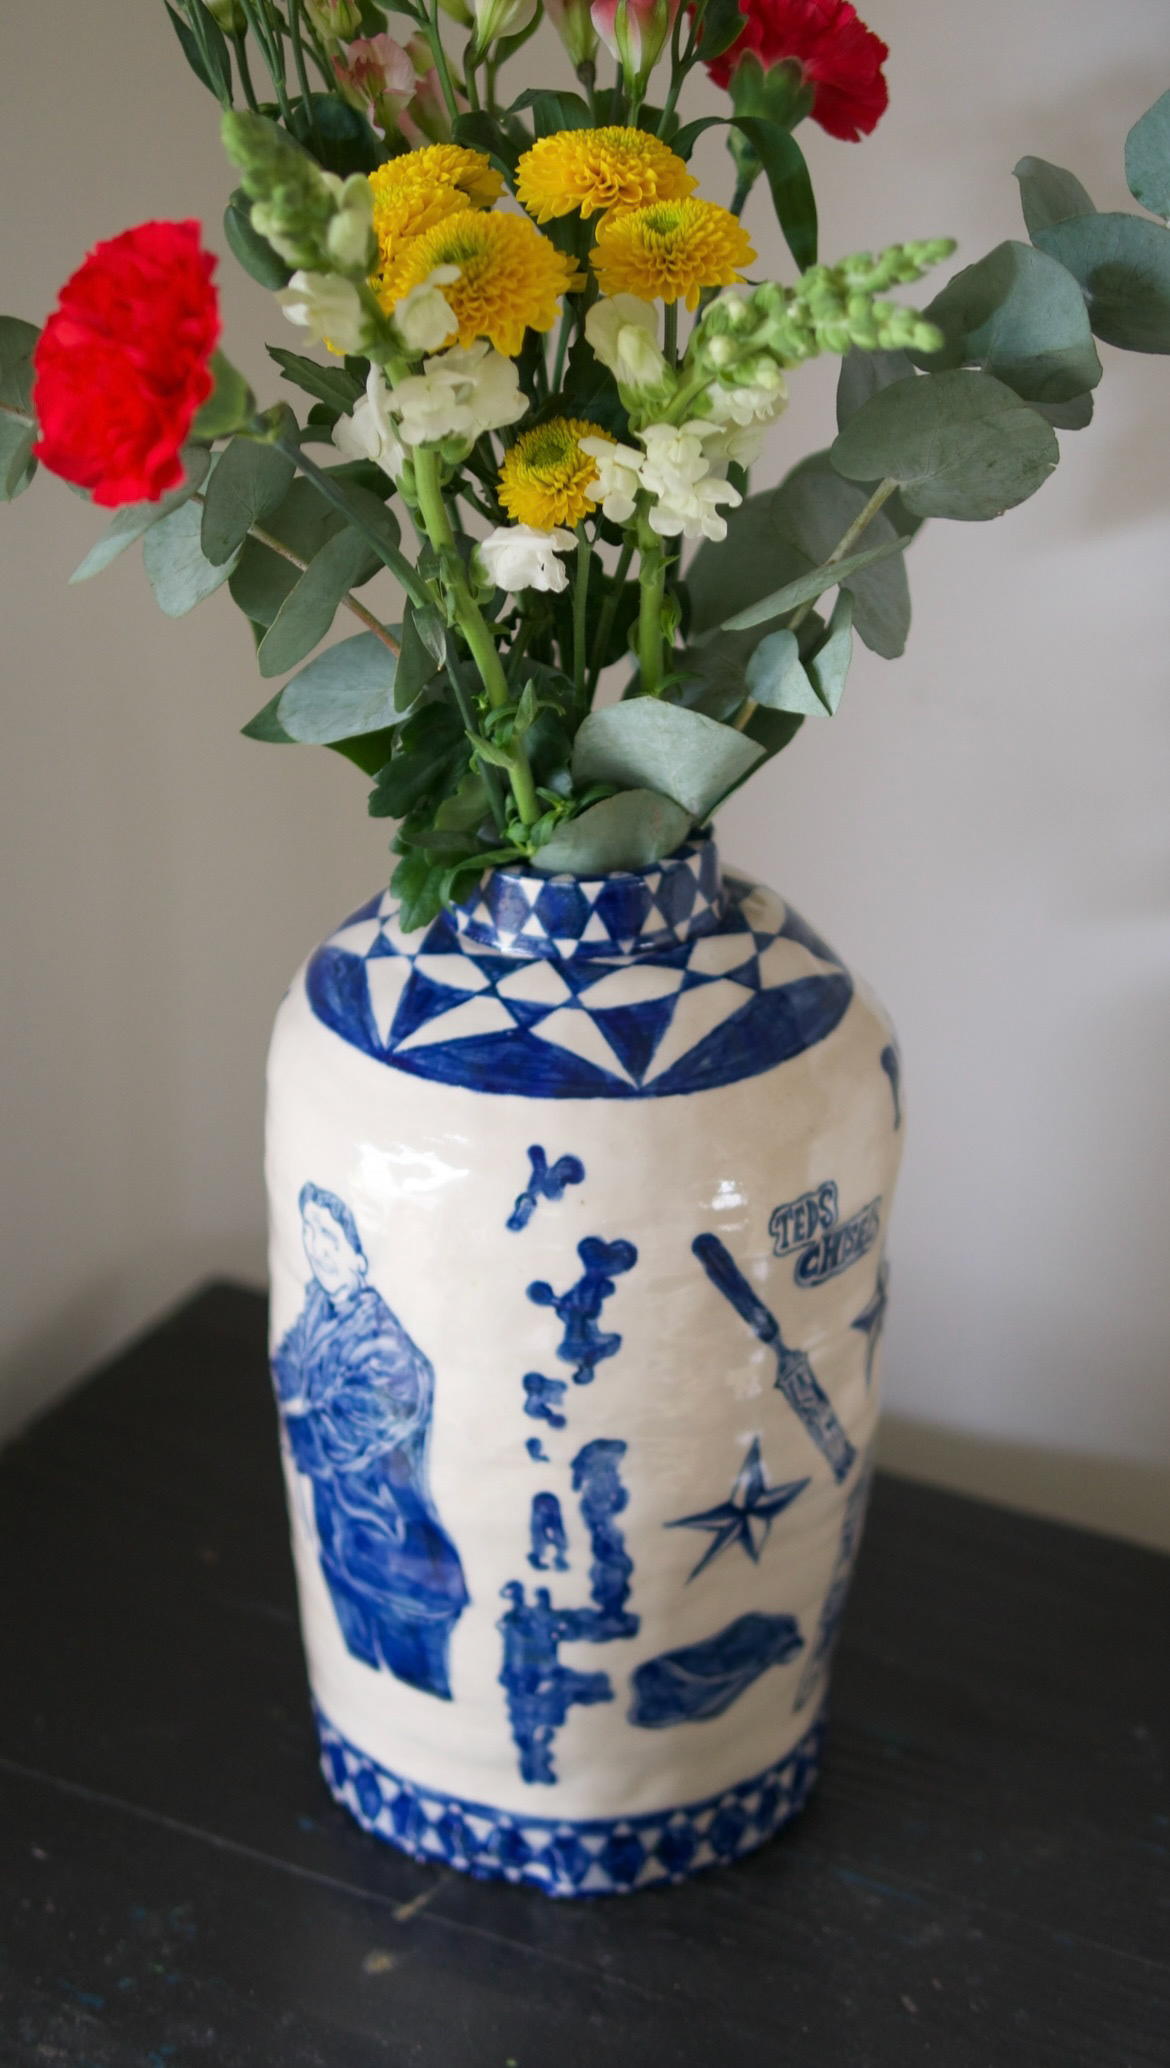
First we looked into my grandmas father, my great grandfather on my mothers side. Edward "Ted" Thompson was a draftsman, wood turner and was extremely proficient in marquetry. He worked with a team to maintain St Peters church in Sunderland among other places in the area. (pictures of Ted below).


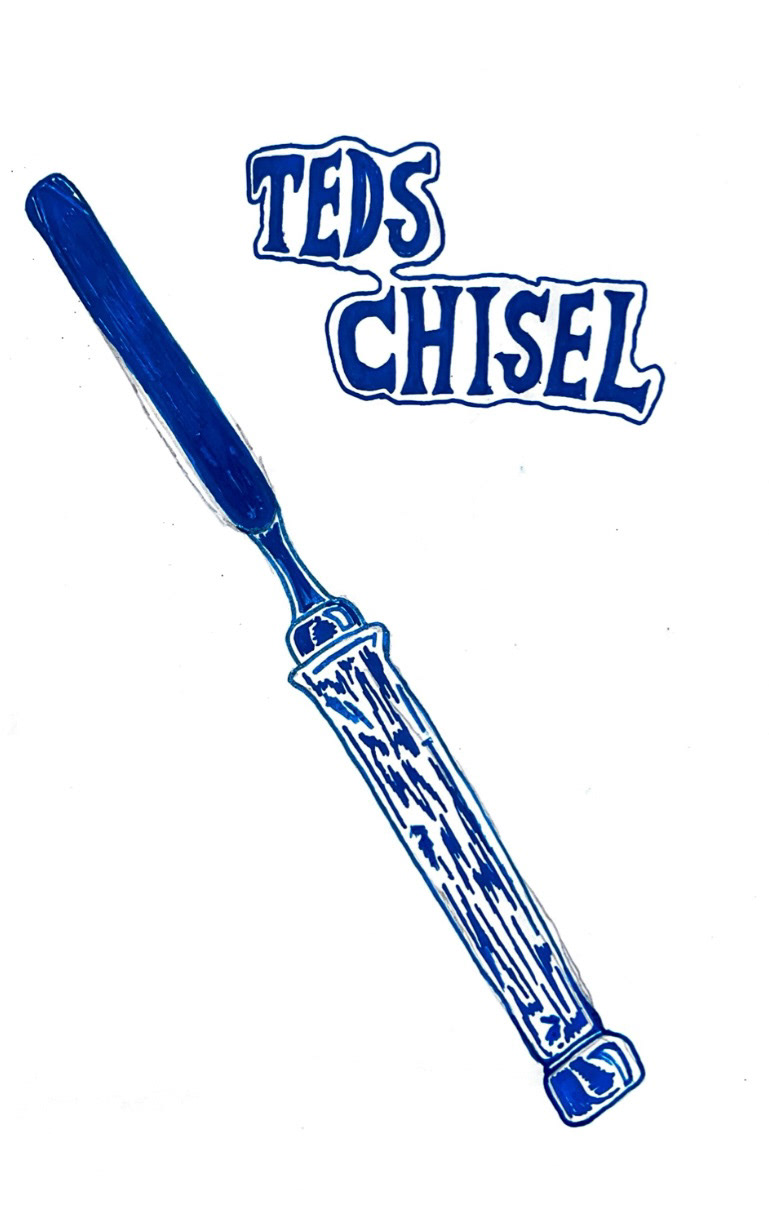
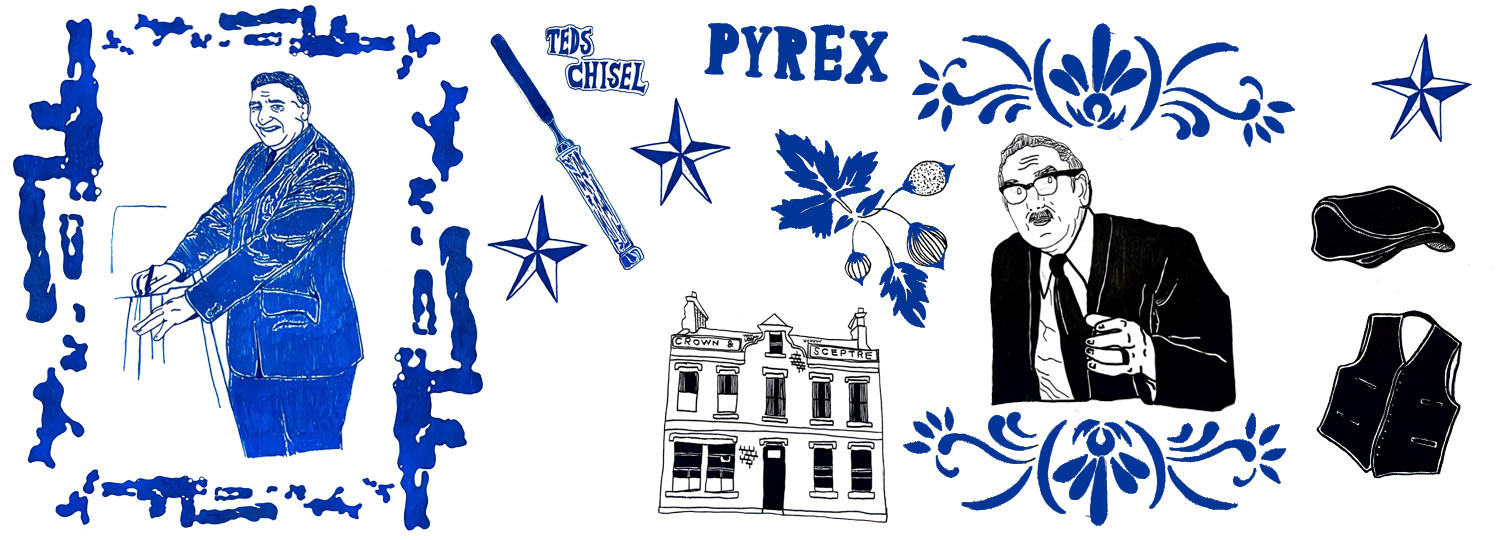
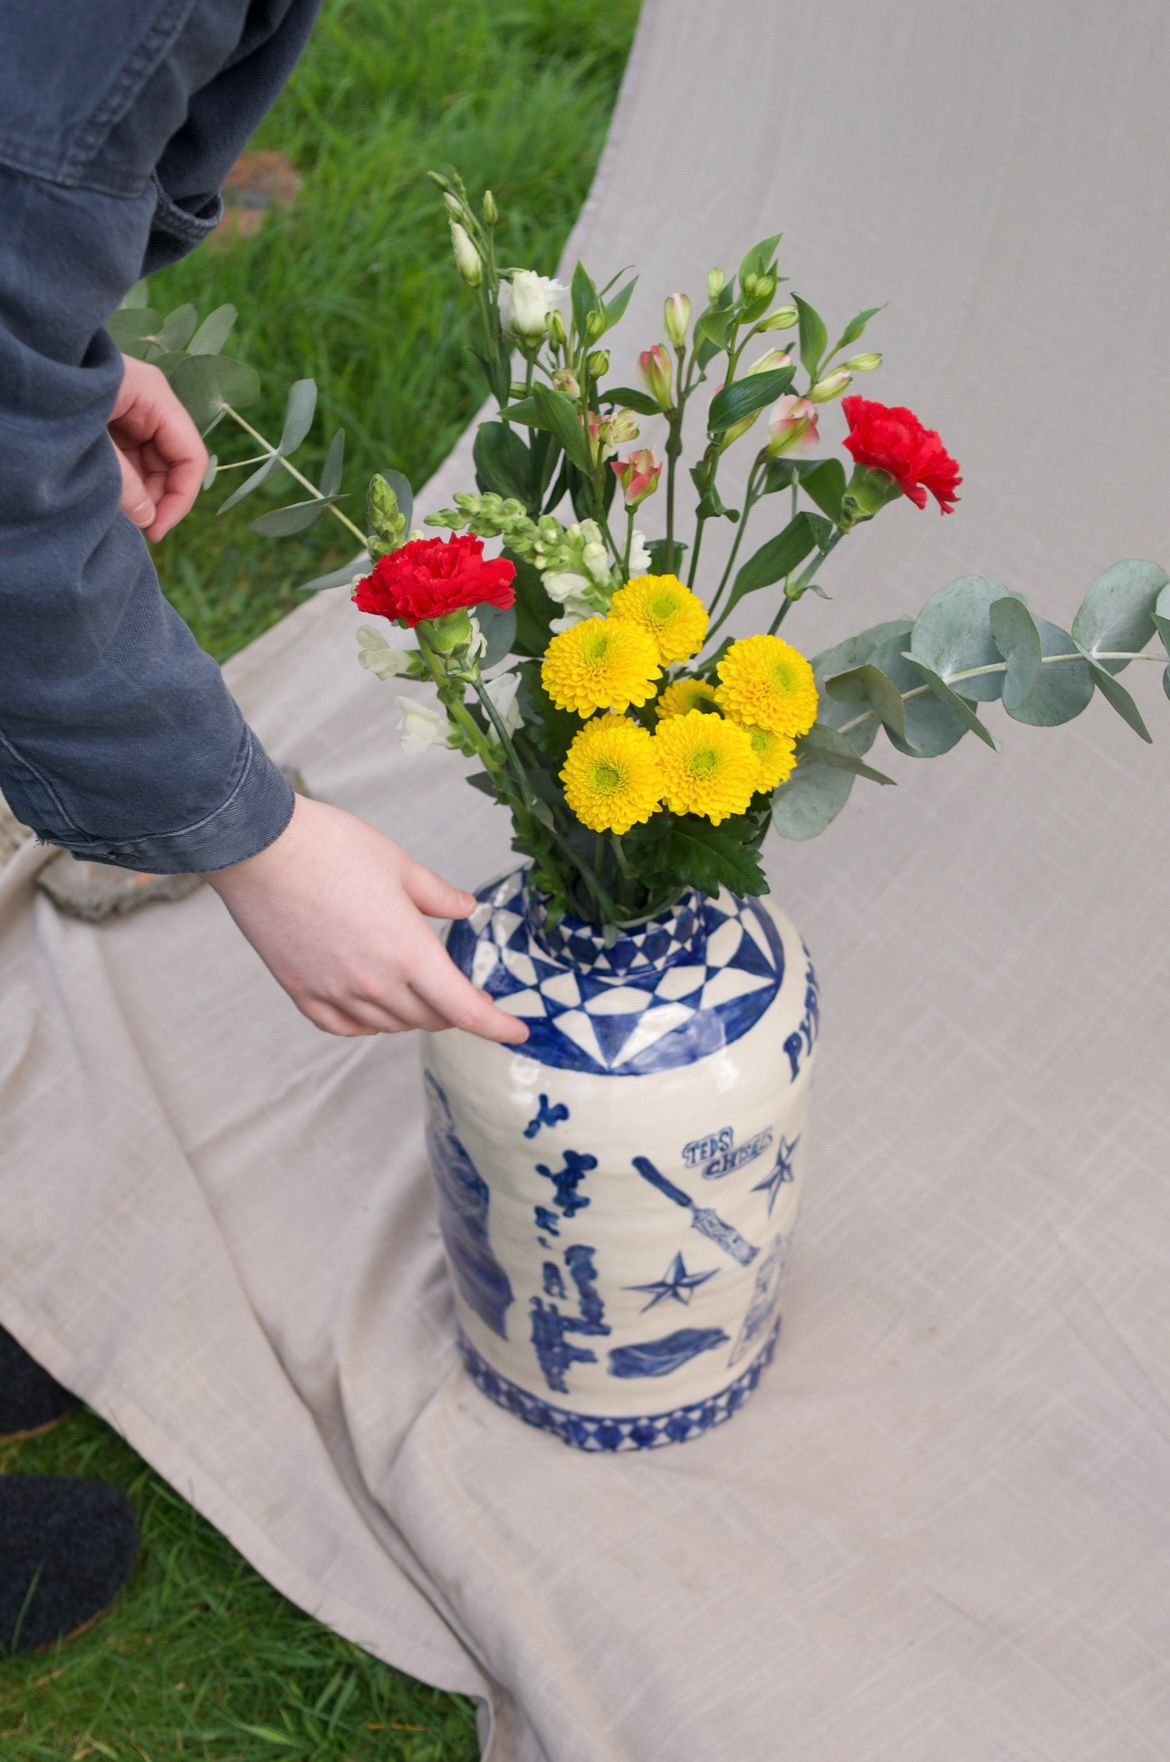
We still own one of his chisels, affectionately called "Teds Chisel". (below).
I set off drawing some illustrations inspired by these pictures and researched some patterns and motifs found in marquetry as unfortunately we did not have any photos of his work.
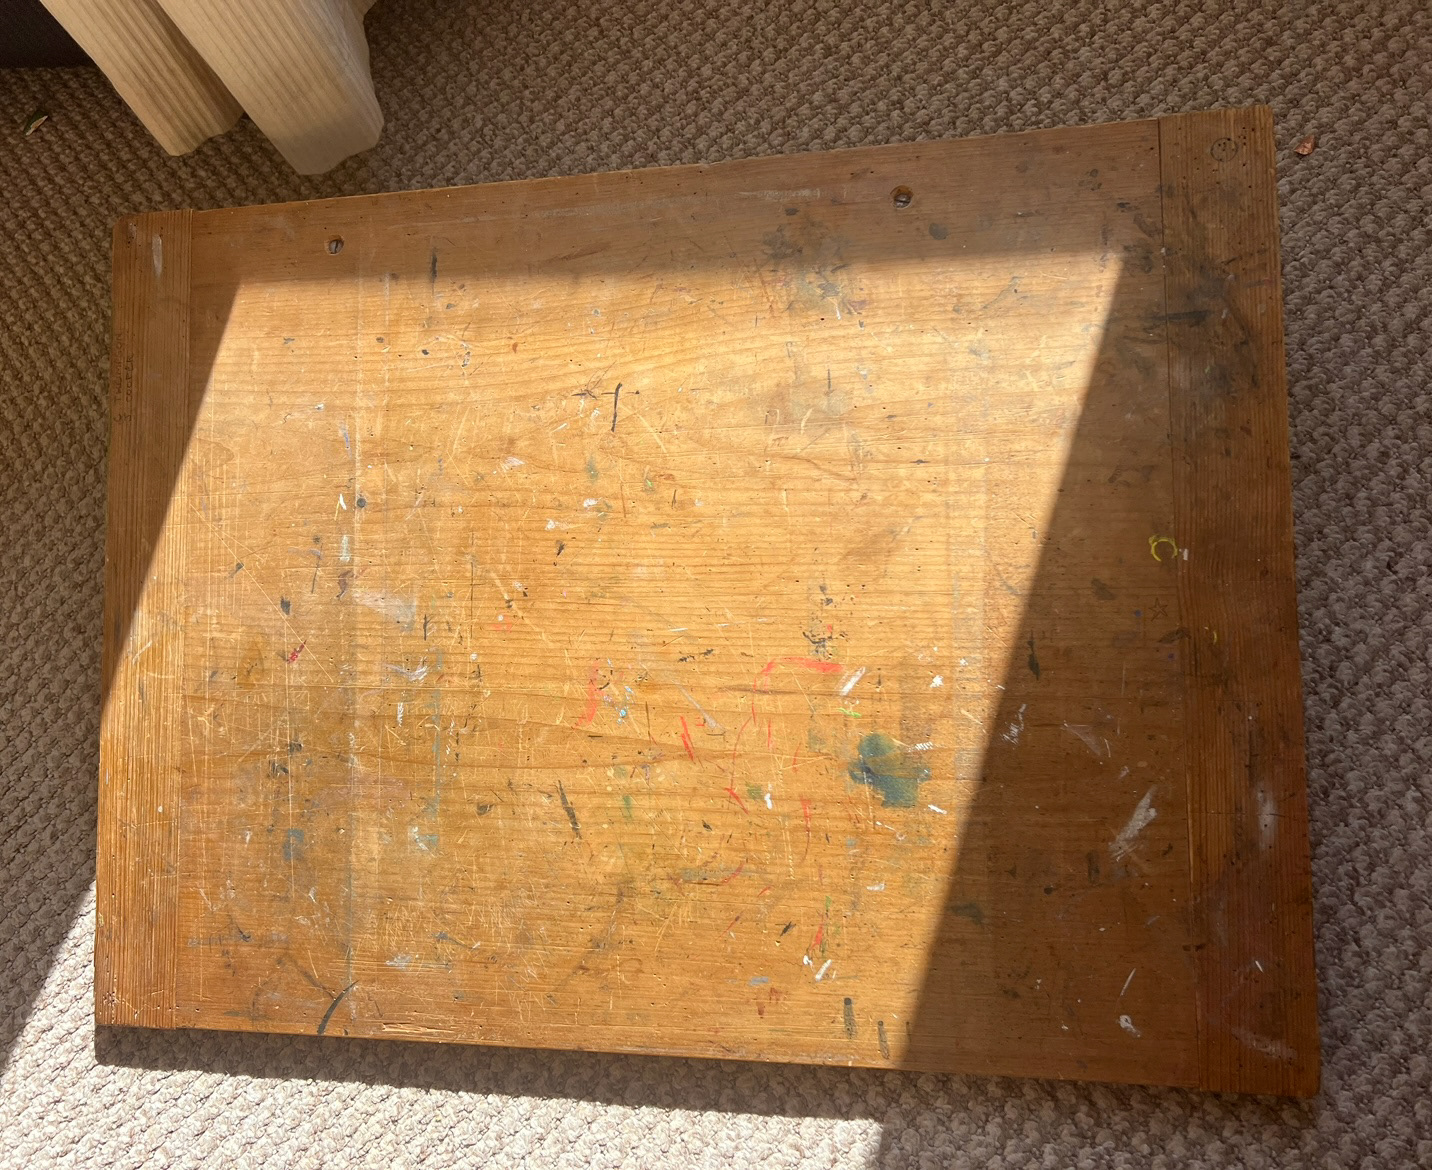
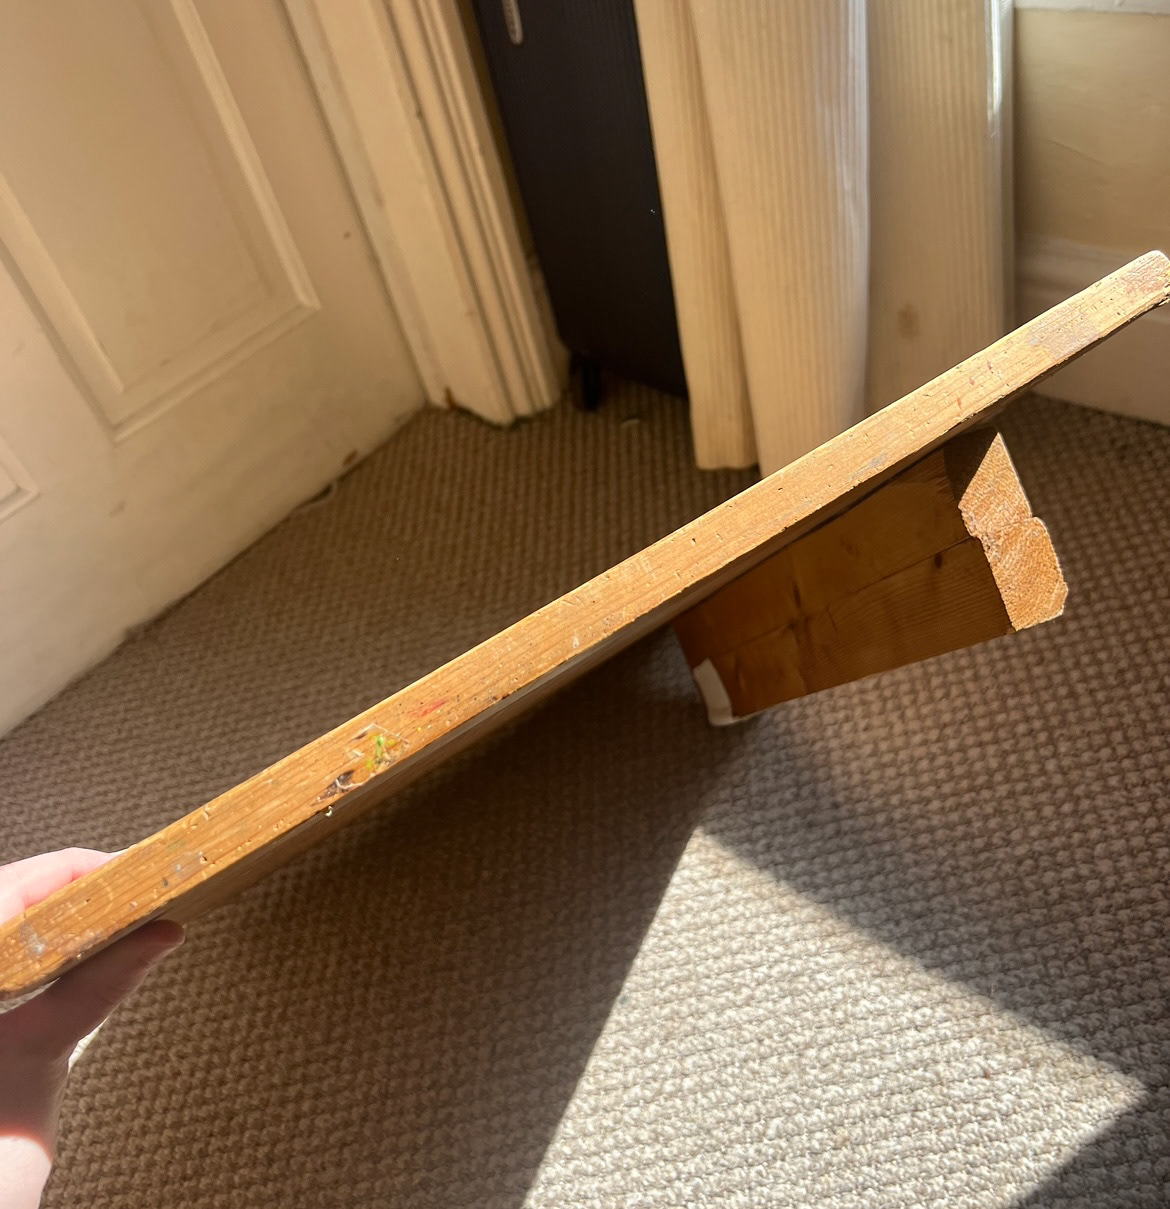
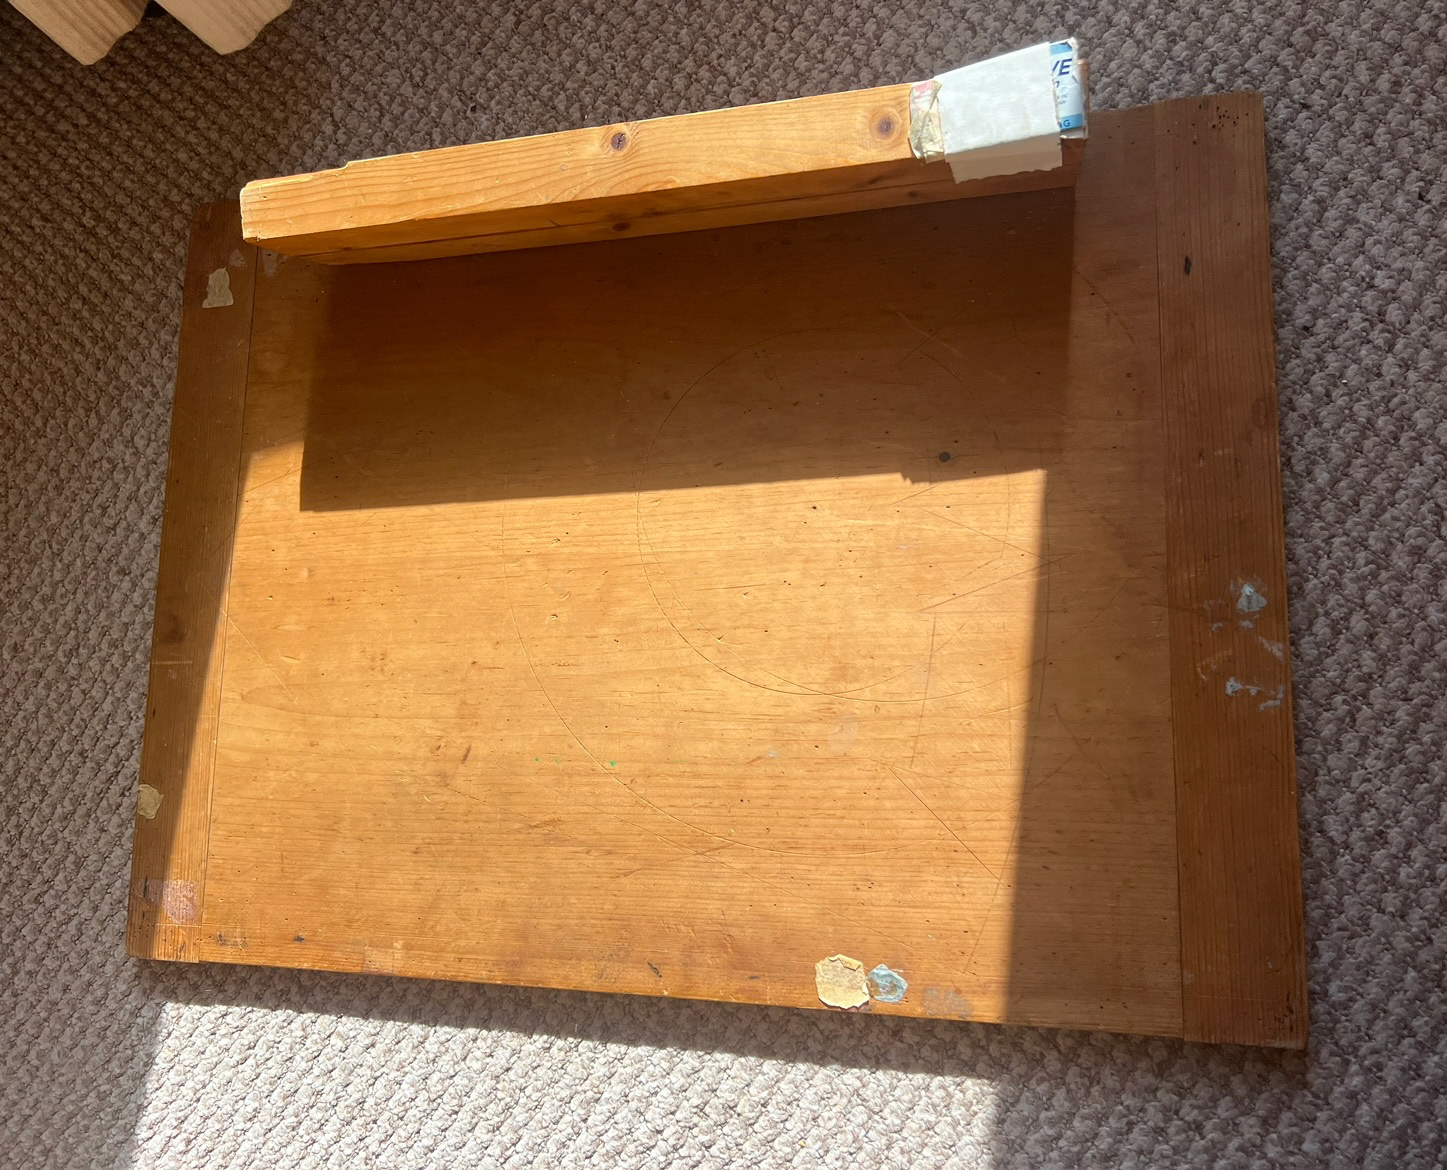
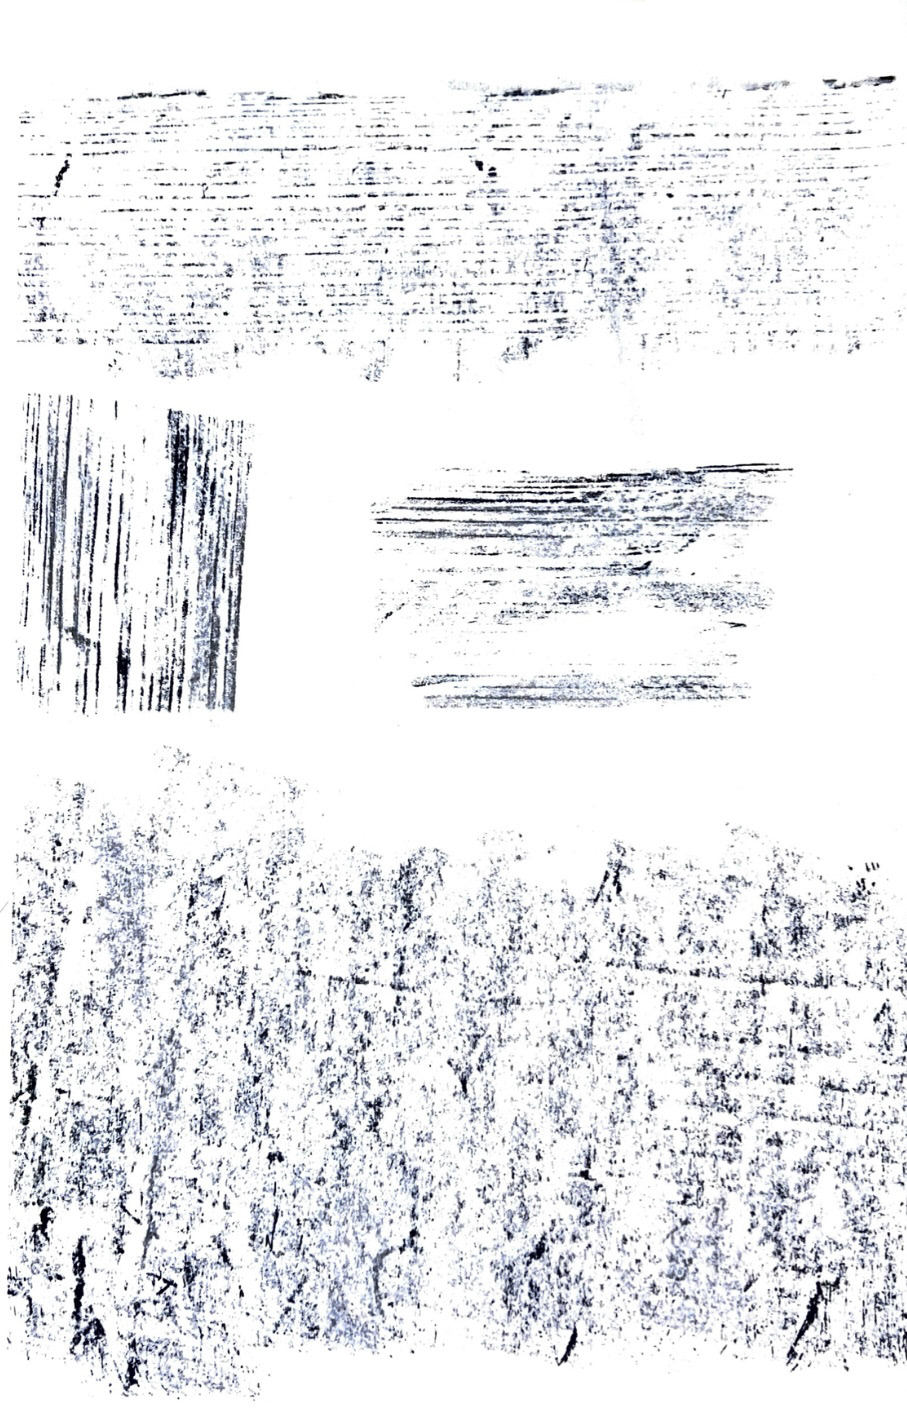
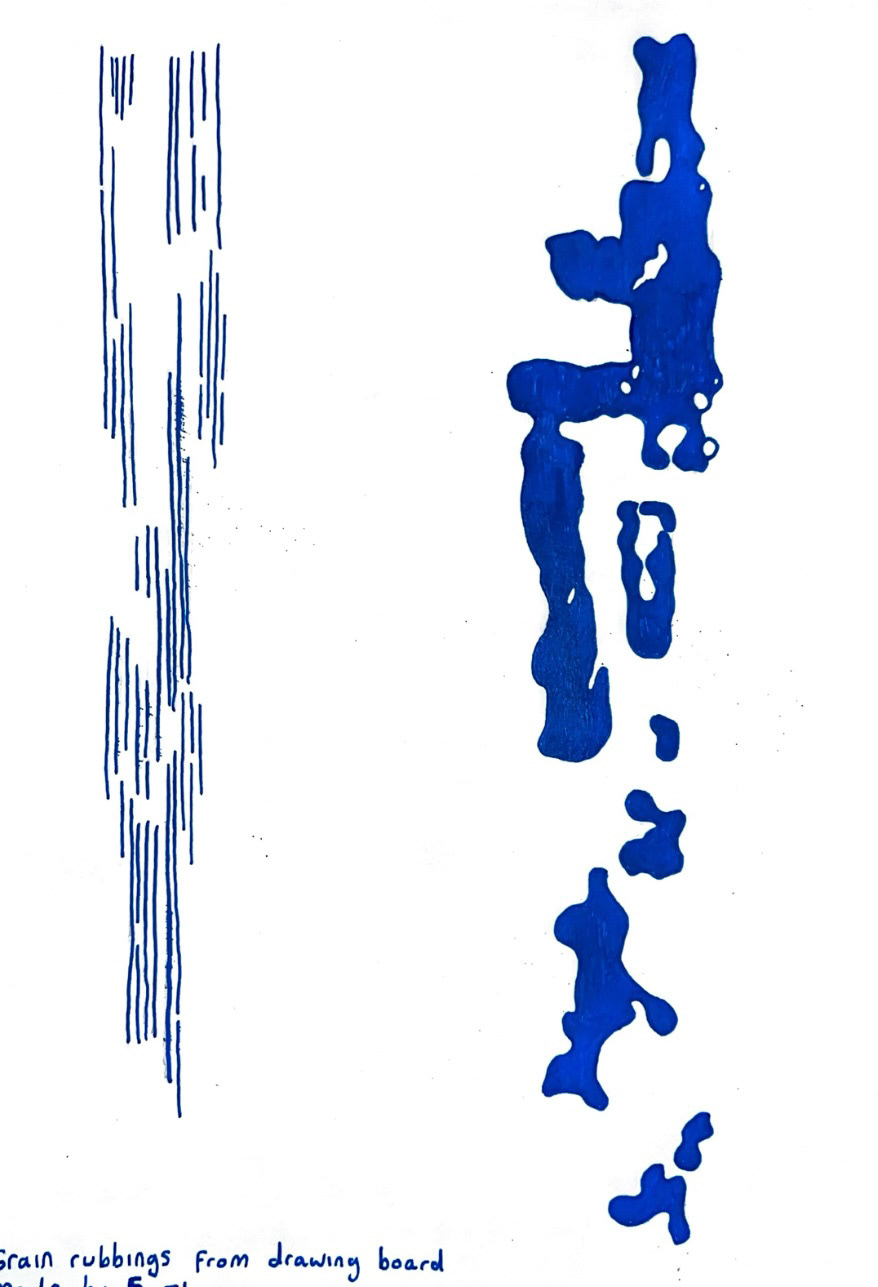
Fortunately I do own a piece made by him. He made a drawing board out of scrap pieces of wood for my grandma to use for her hobby of watercolours, it then got passed down to my uncle John who is a professional illustrator, who then passed it on to me to use with my drawing. I took some charcoal rubbings of the wood grain to incorporate into my design. A huge amount of history is stored in this one unassuming piece as every part of it has scratches, remnants of paint and also everyone who has used it has carved their names into it. The scraps he used to make it also came from his old draftsman's bench so has remnants of his work on it also. (drawing board below)
(charcoal rubbings).

(drawings taken from rubbings below).
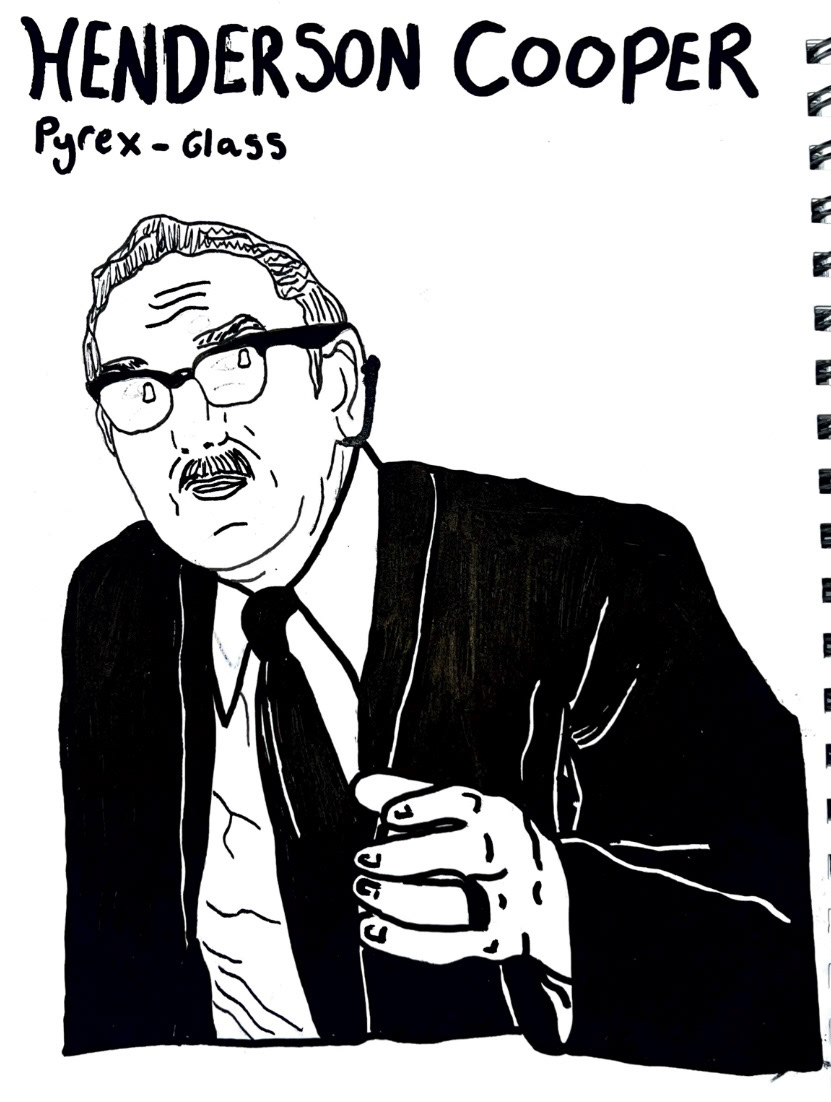
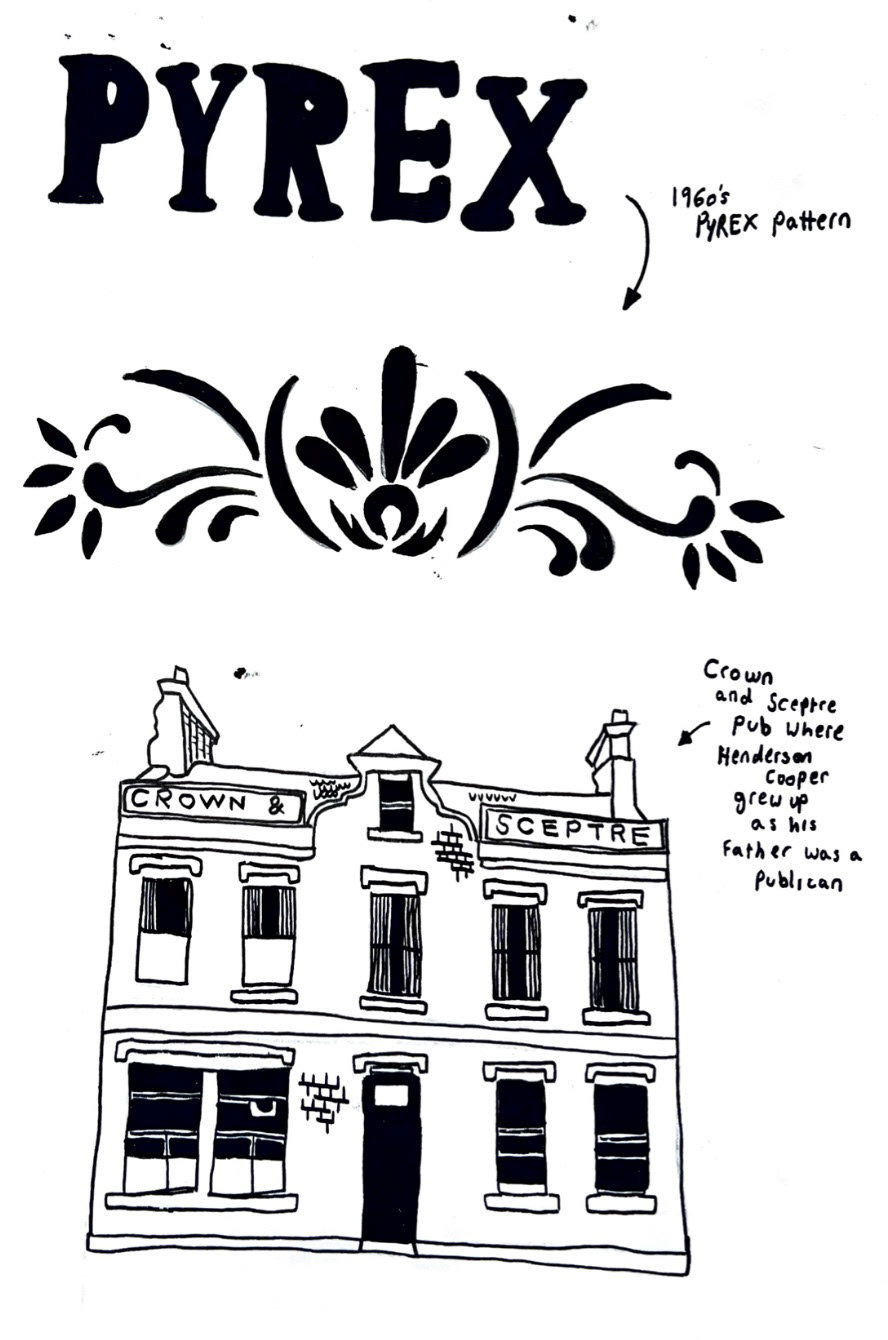
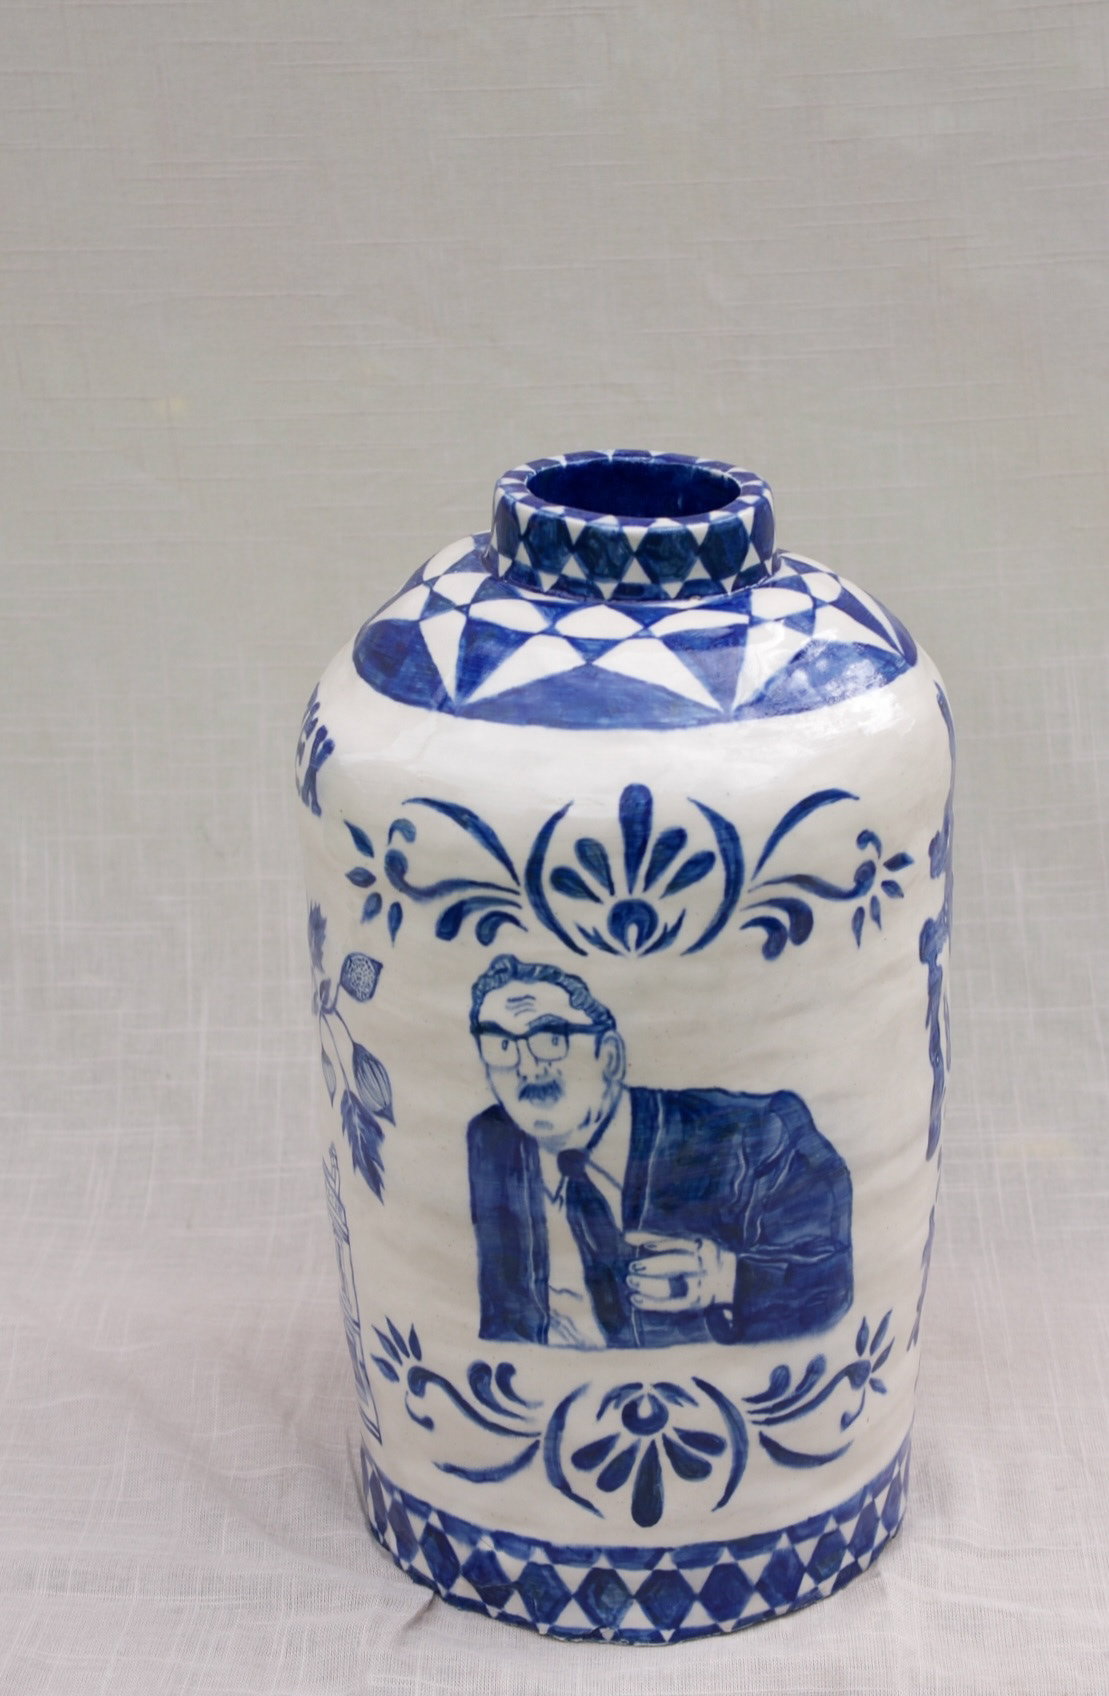
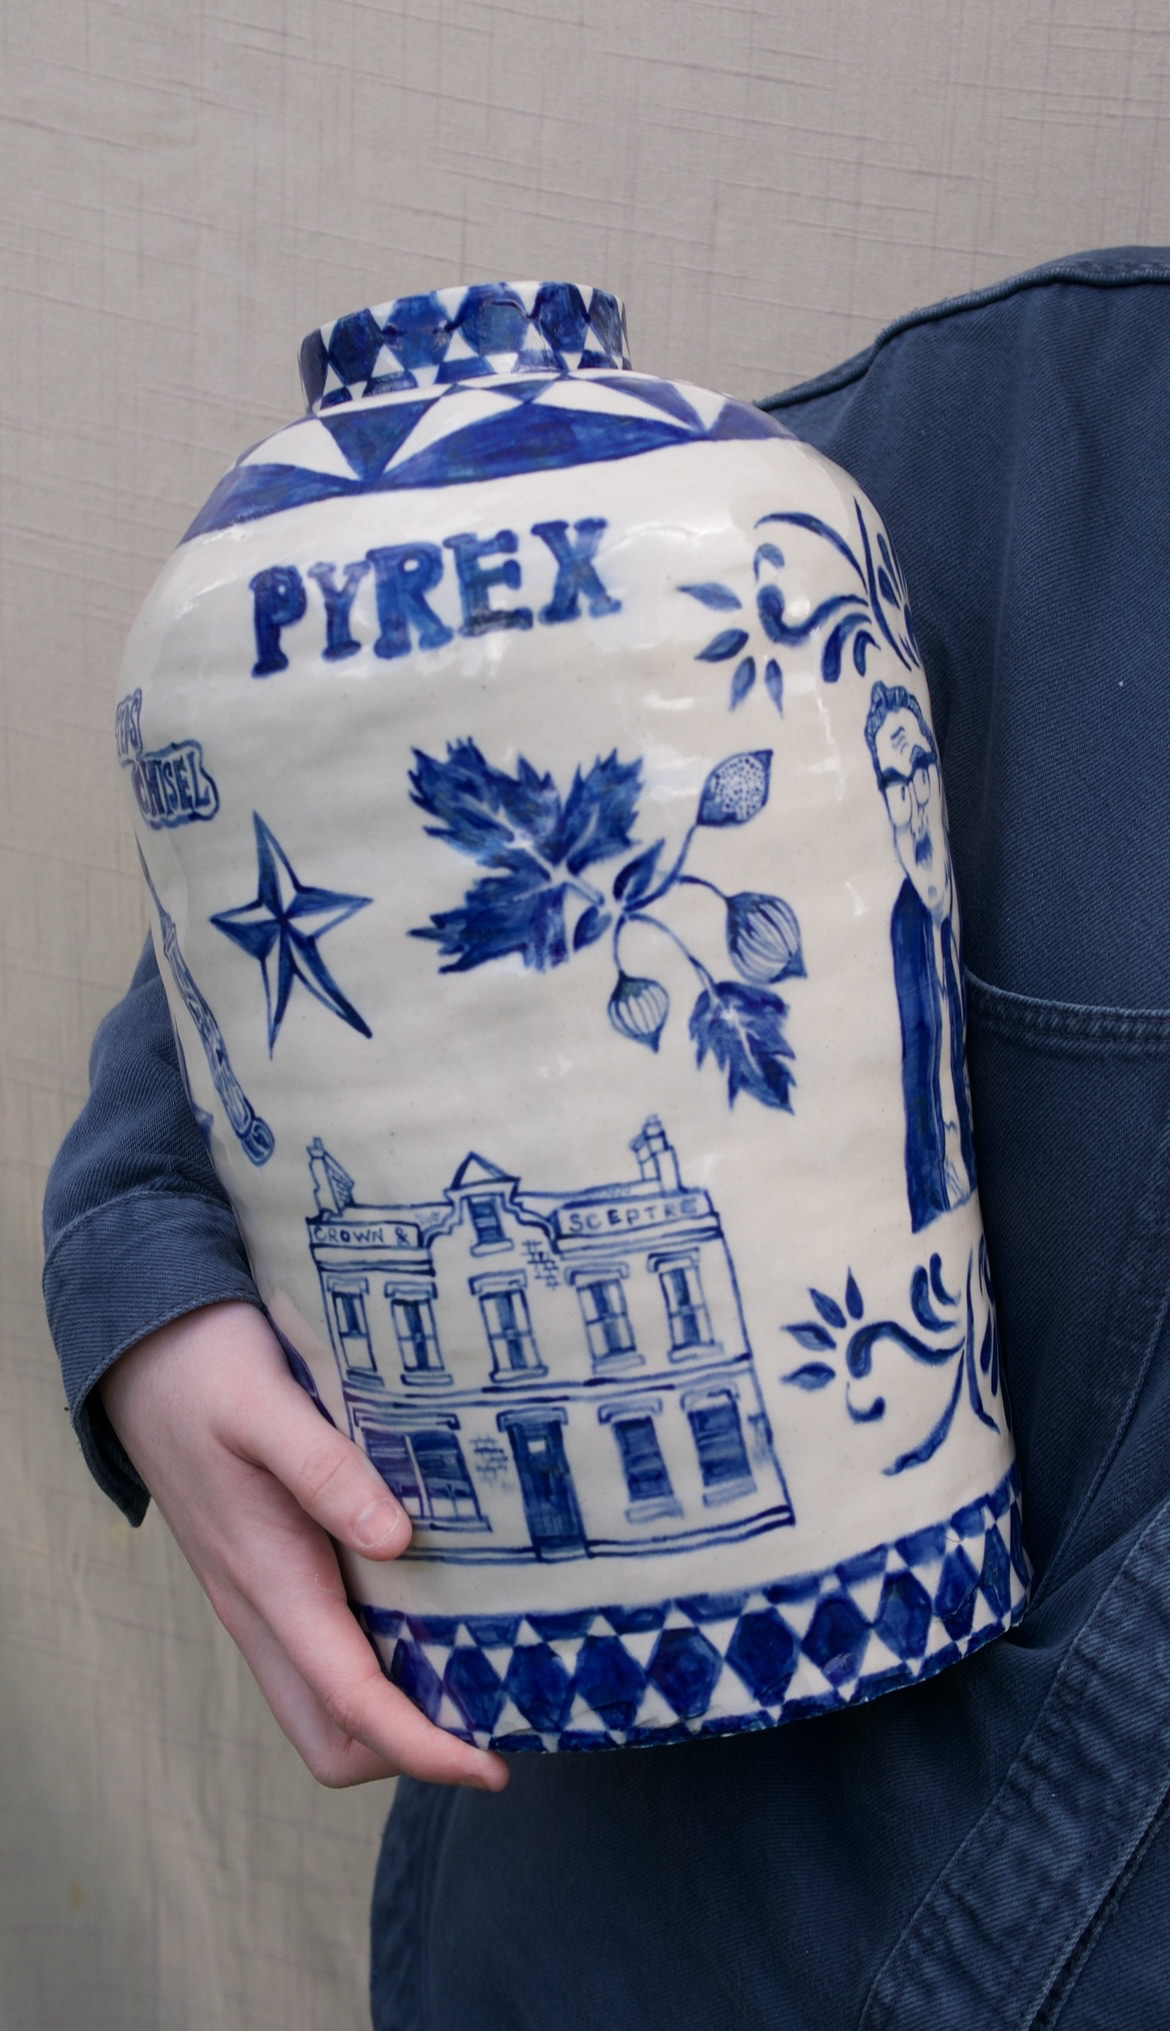
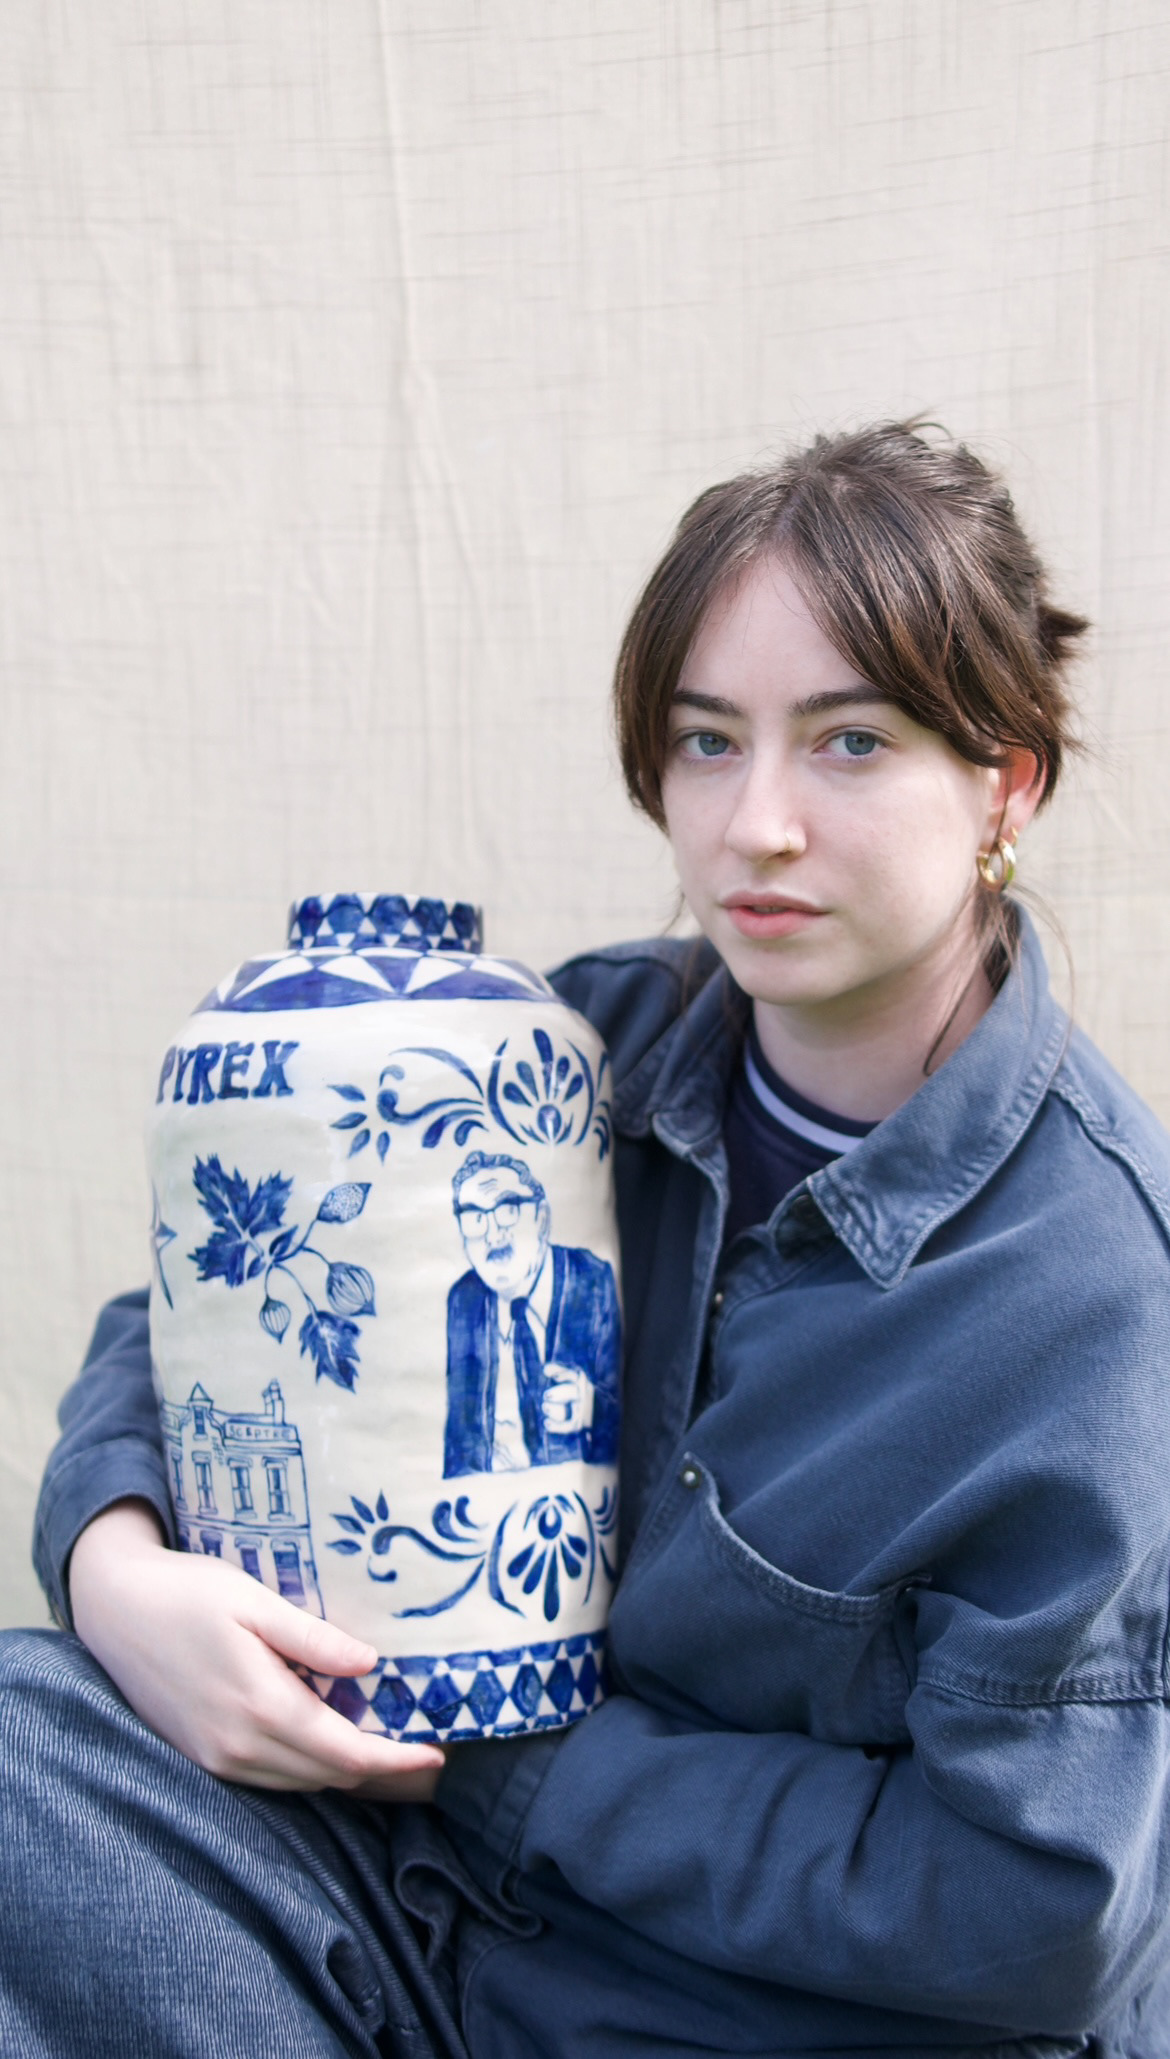
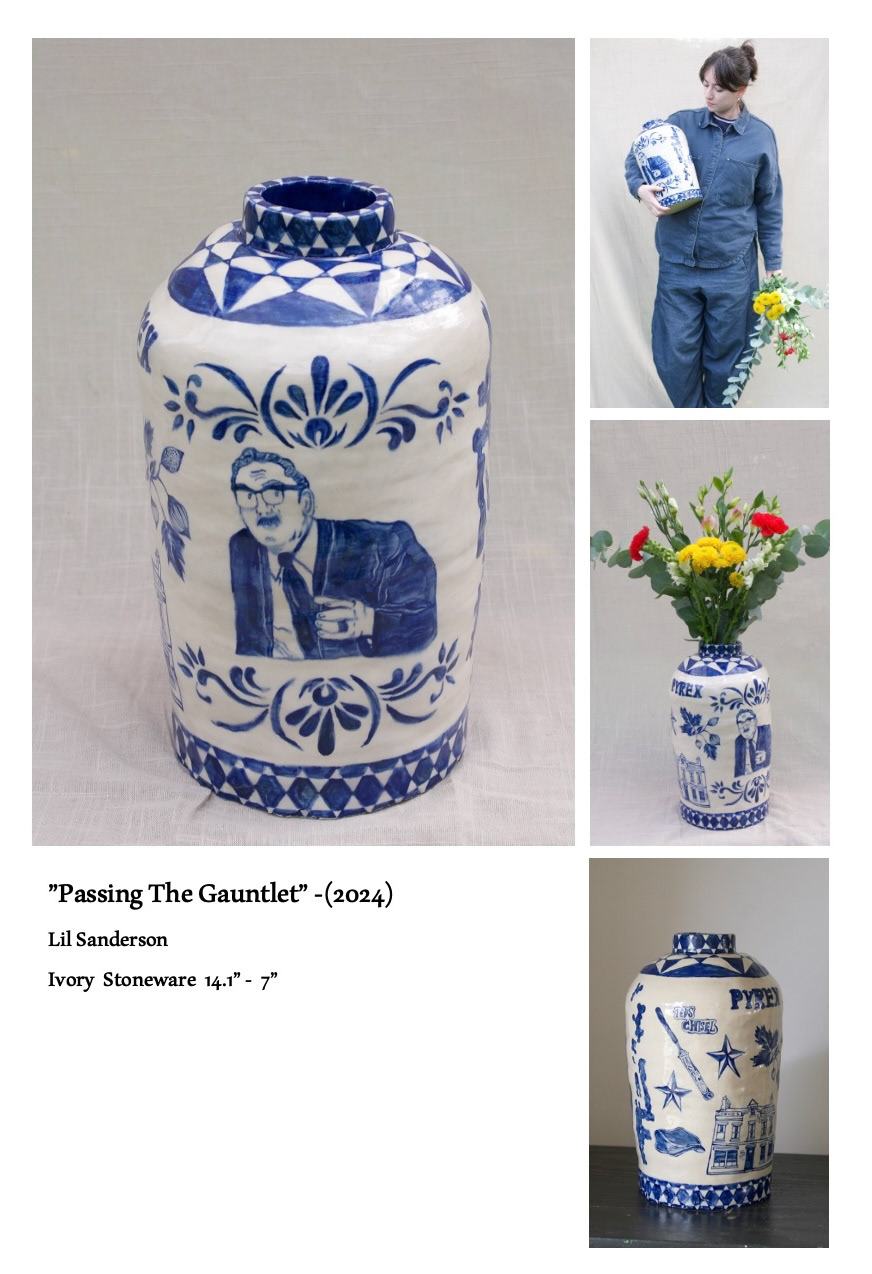
The next person we looked into was my other great grandfather, Henderson Cooper who worked at Pyrex in the glass works in Sunderland. (picture below.)


we found records of the pub that he lived in as well as some pyrex designs that were in production when he was working there which I then drew to incorporate into my design.
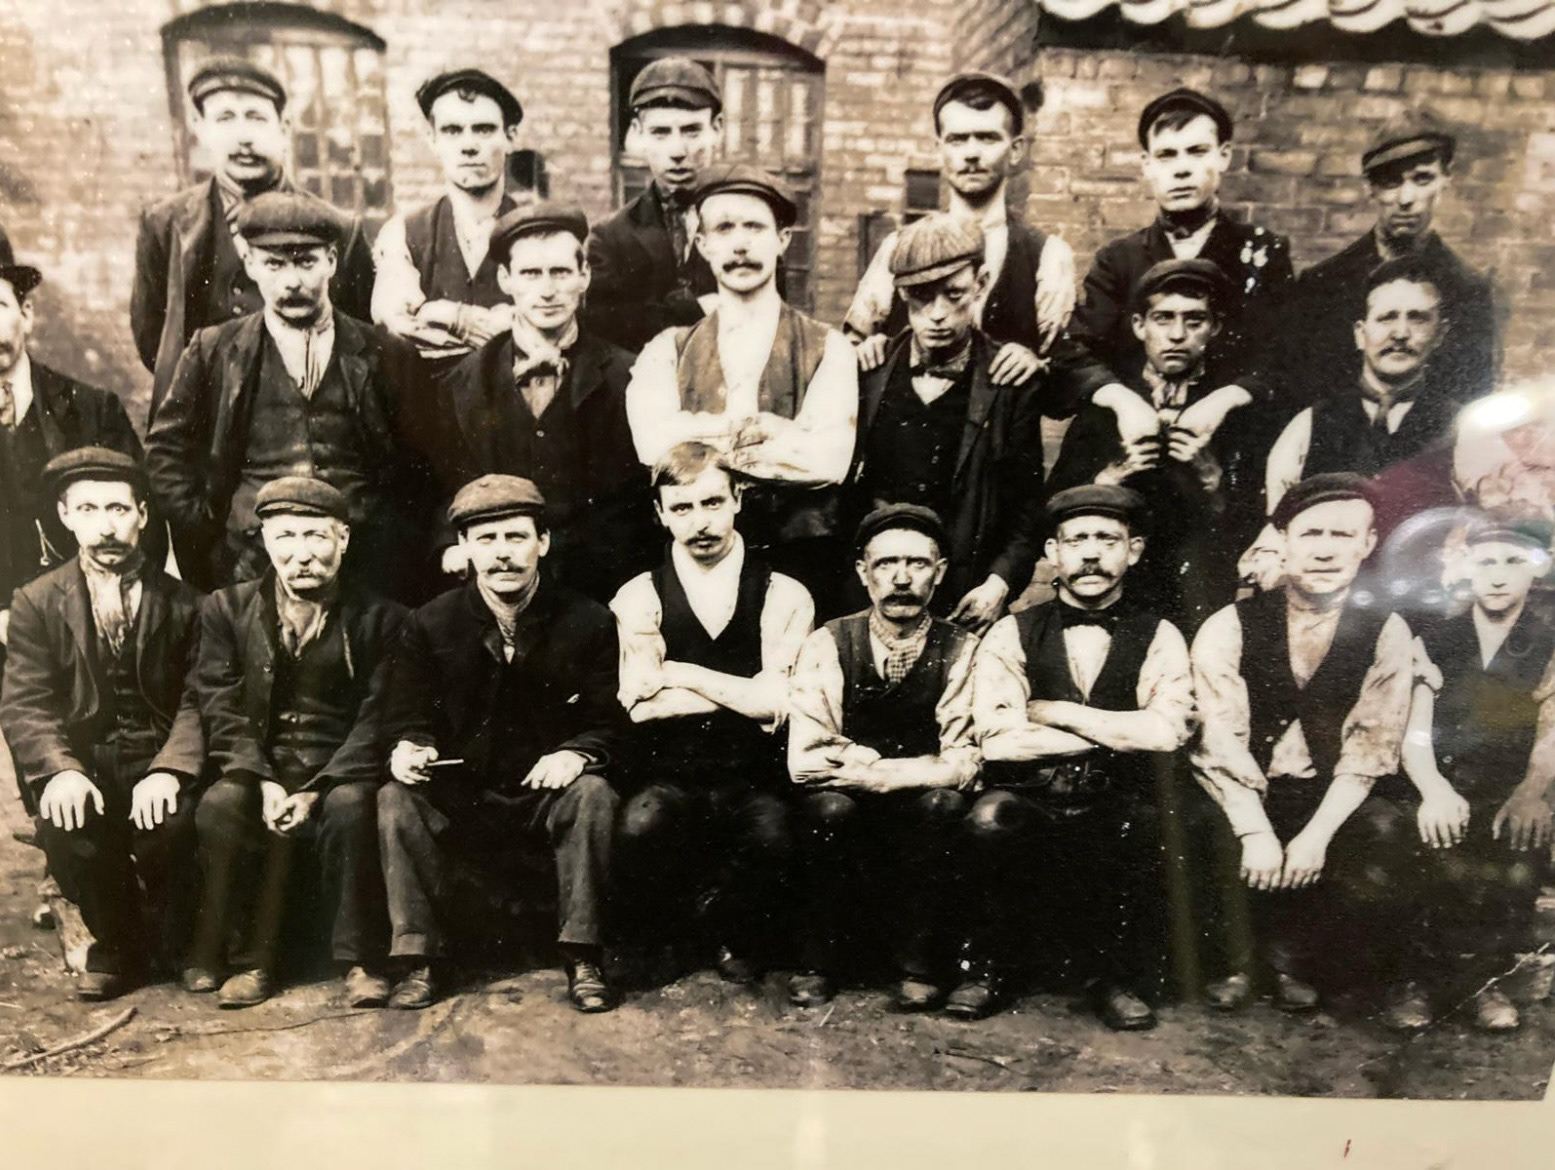
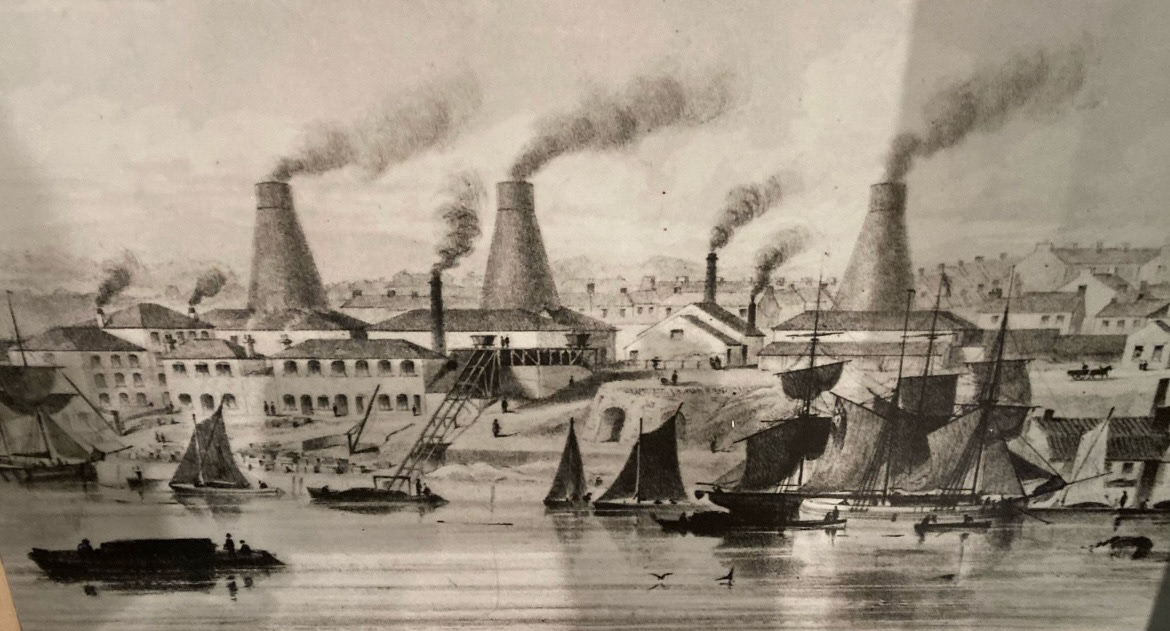
The third person in my family that I looked into was my great great grandfather on my grandmas side, the father of Edward Thompson, named William Thomas Thompson. He worked as a glass blower at Ayres Quay. He worked in the production of flint glass in 1910. This was the most expensive glass for table ware being produced there at the time. Unfortunately we could not find any photographs of him specifically at the time however we were able to find a picture of some glass blowers from the same company, courtesy of the antiquarian society, who said that he would have worn similar if not the same sort of clothing as him. (below) (also a drawing of Ayres Quay from 1910).
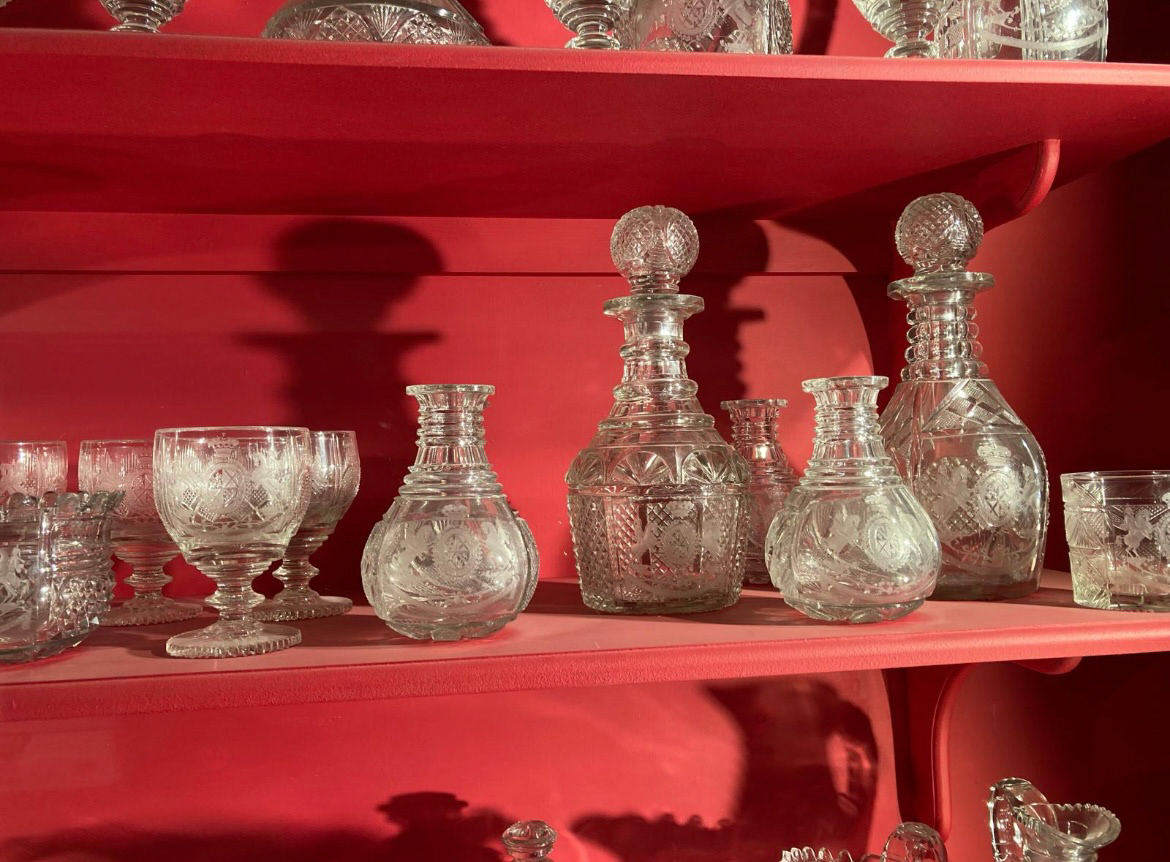
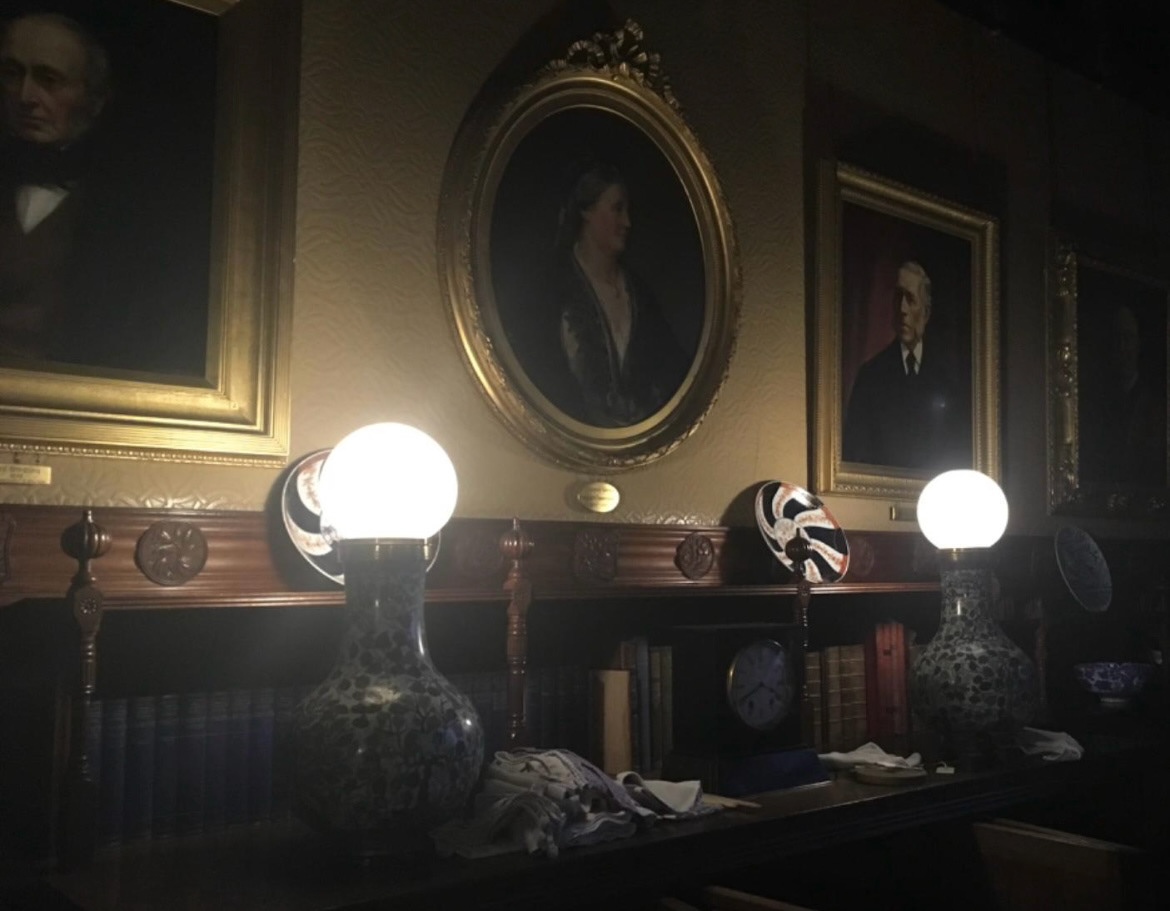
Also at the antiquarian society, they had some flit glass pieces that they thought he could have potentially worked on as they were blown, and carved at about the right time when he would have been there. We also found some pictures of some early electric lighting at Cragside national trust property which were made by glassblowers at Ayres Quay at the time. (both below).
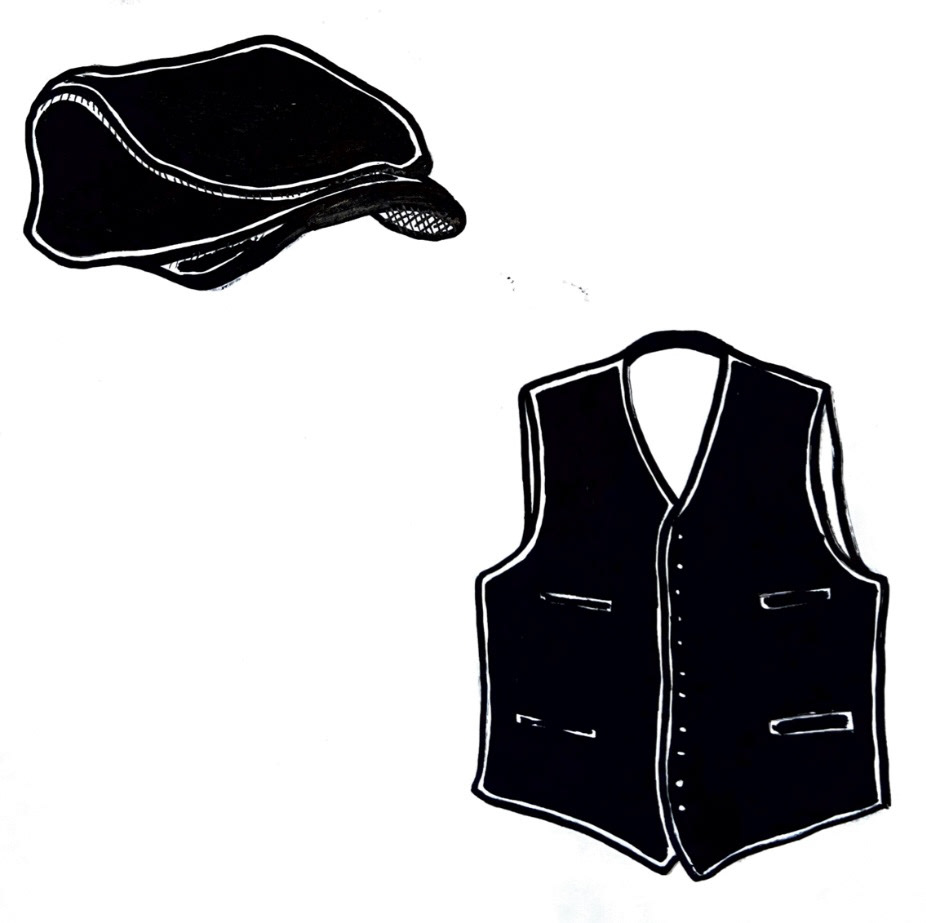
To represent William Thompson, I did an illustration of a flat cap and waist coat worn by the glass blowers at the time from the photograph.
Now that I had all of my illustrations completed, I could upload them into photoshop and arrange them into my final design which I would then hand paint onto my pot.
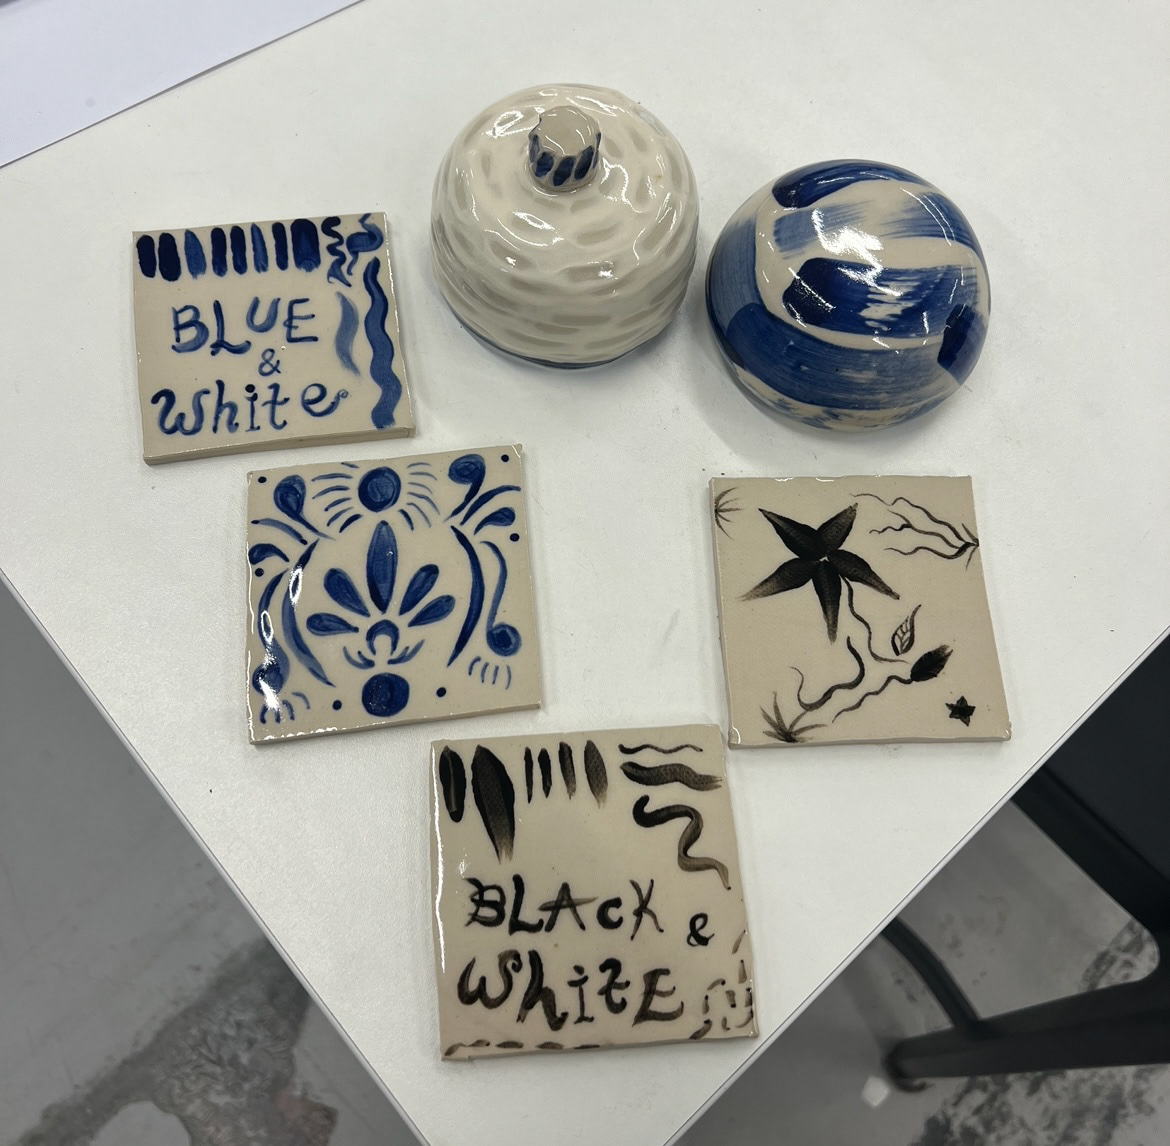
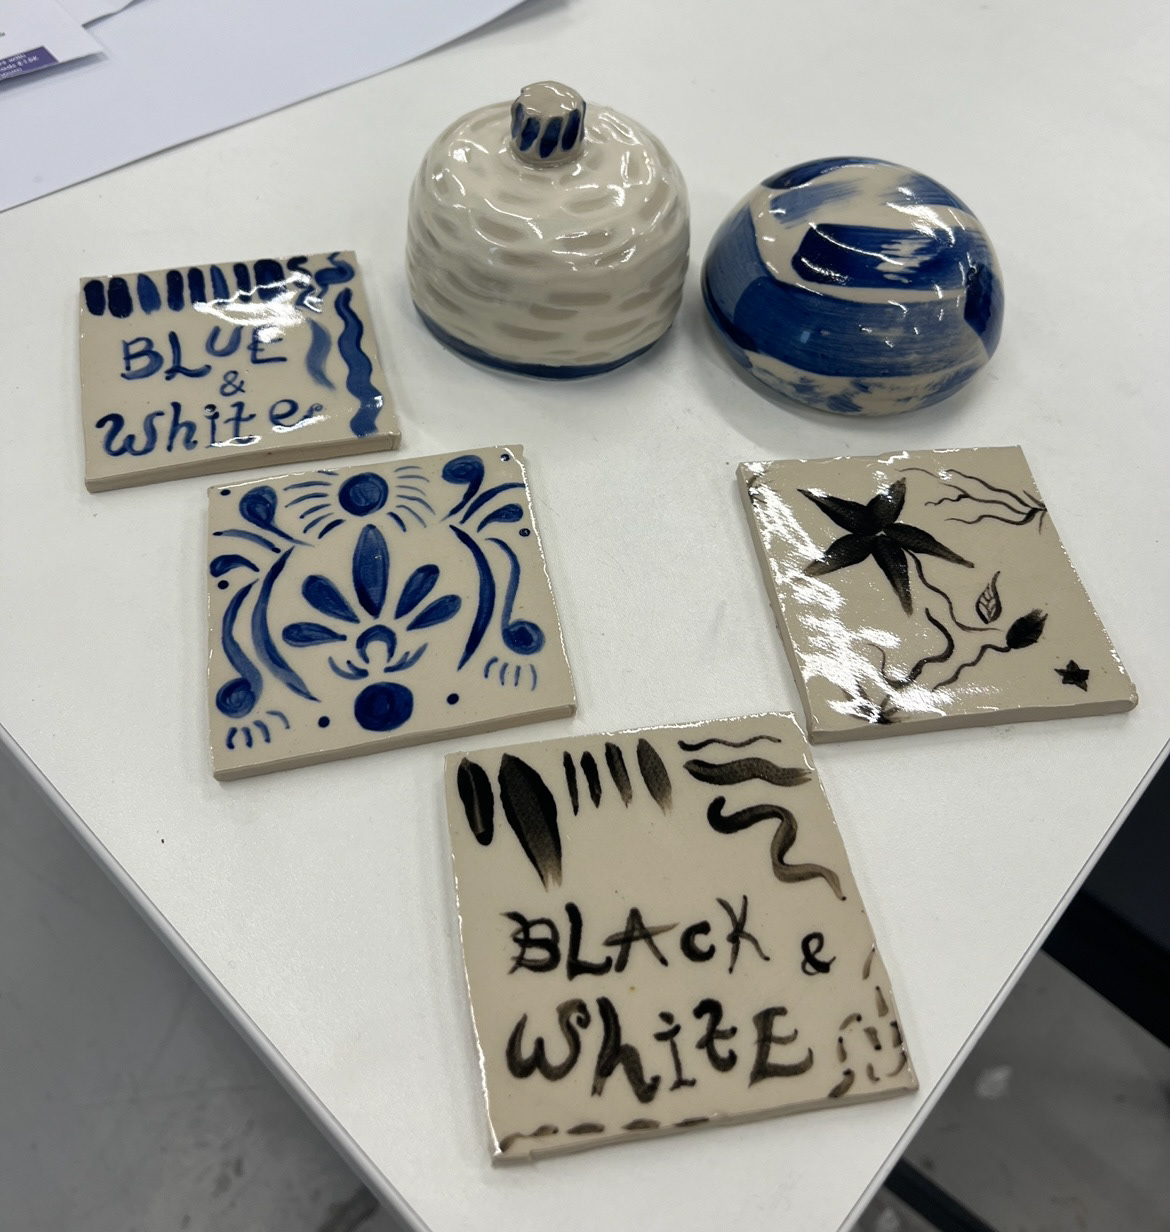
before moving onto my final glazing however, I completed some glaze test tiles and some lids using my underglazes and some clear shiny stoneware glaze so that I could see how the colour would come out and the pigment density when the underglazes were applied using a brush. (below), even though I knew I was going to exclusively use blue underglaze, I wanted to test out some black as well just to see if using different colours would create different brush effects. I was very happy with how the blue underglaze came out so decided to continue with that.
It was at this point I had to accept that my piece was not going to be completed with a functional lid due to time pressures however I did have some samples of similar lid designs that I would have gone forward with If I had been able to complete this extra step.
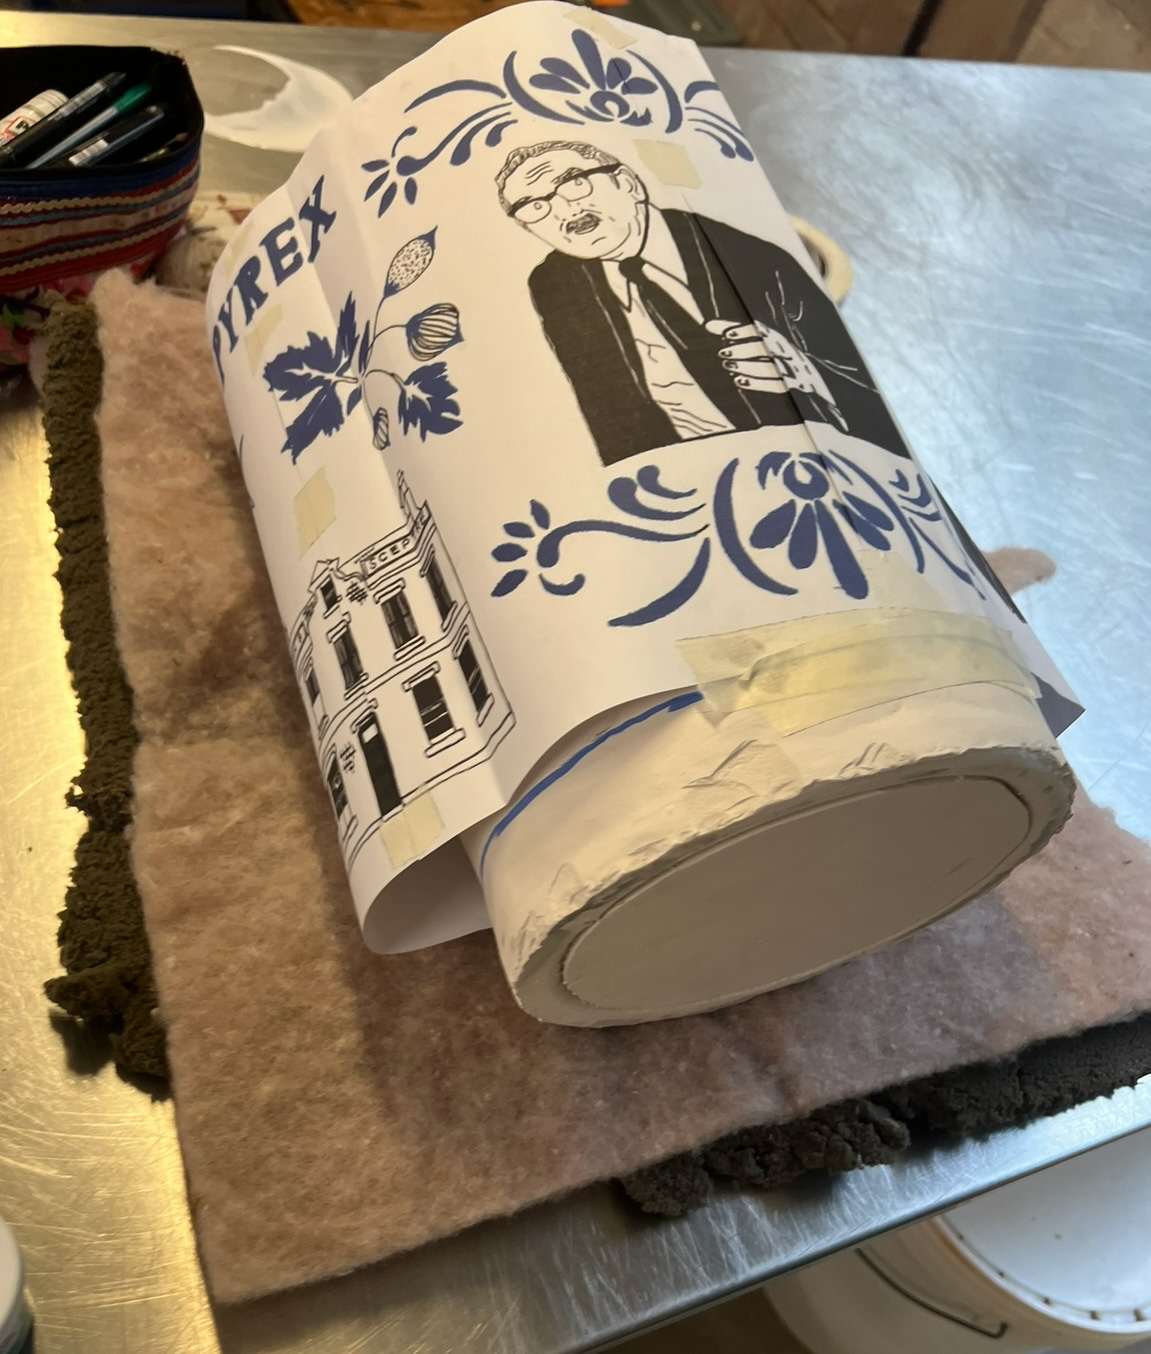
Once my pot had come out of the bisque kiln and I had my final design ready, I measured my pot and printed my design out onto multiple sheets of paper and taped them together so that I could see how my design would look when on a round surface. I fit my design around my pot like a collar. (below).
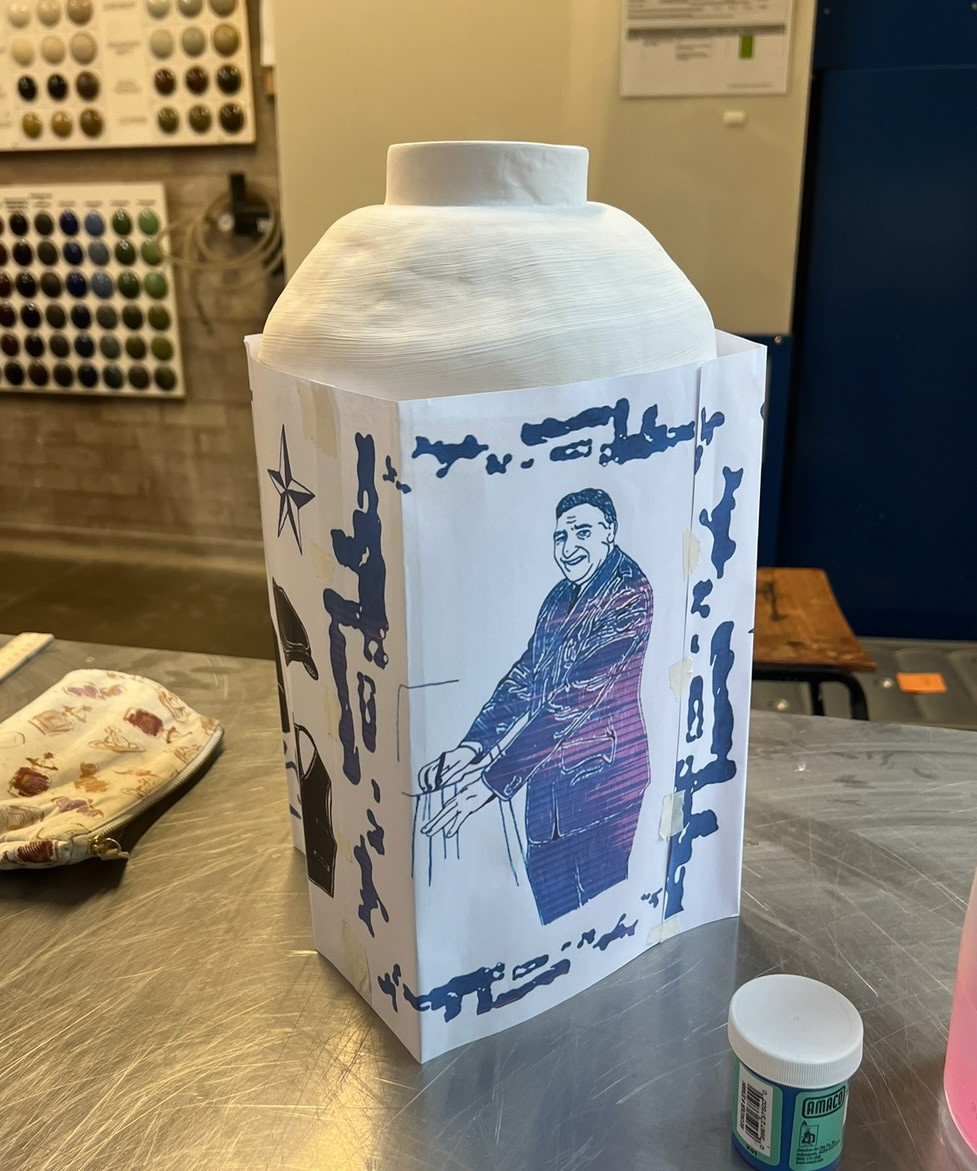
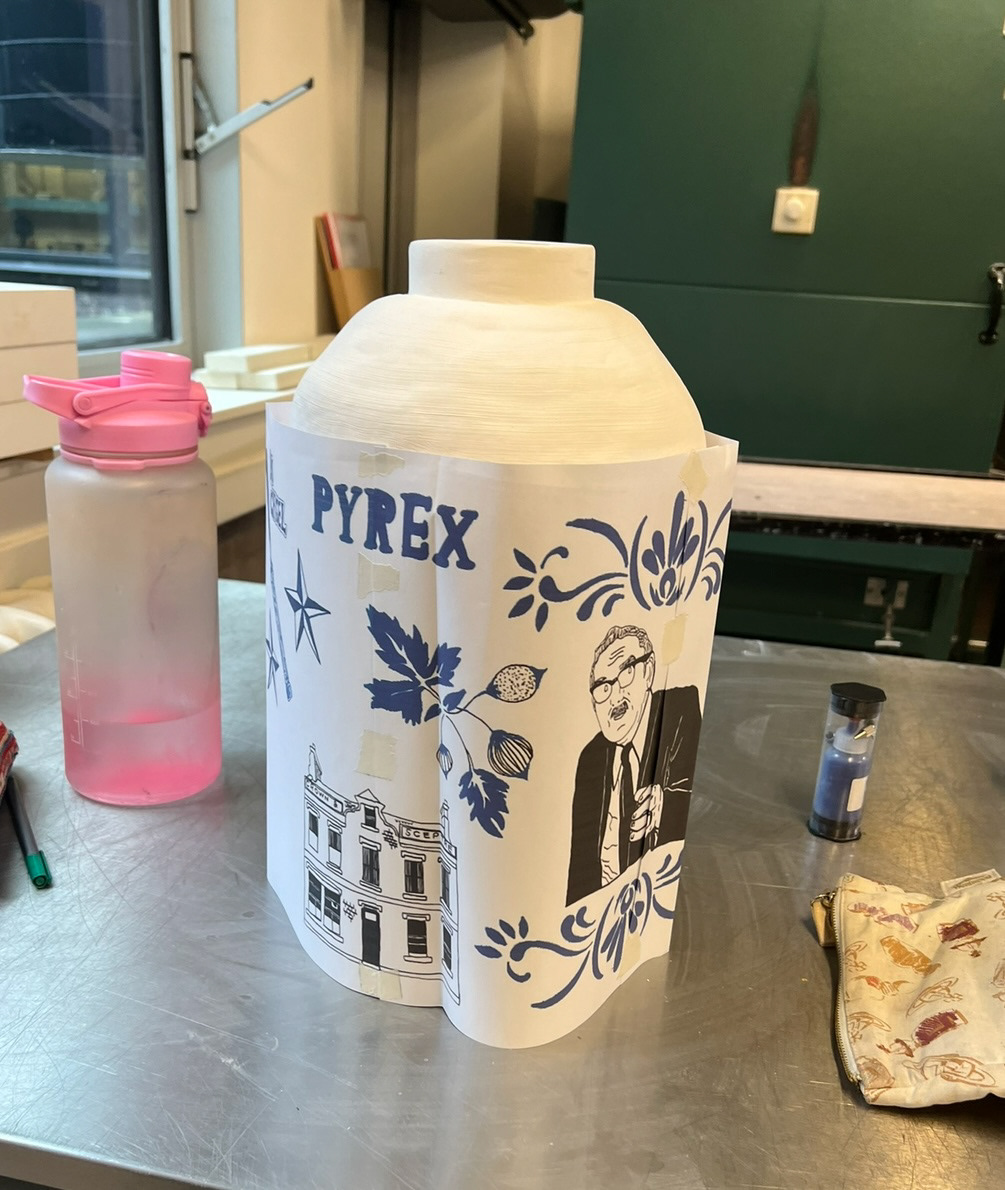
Before plotting out my design, I had to work out where the areas of pattern were going to go around the base and rim of my pot. This decorative feature is traditional in most examples of ginger jars and I thought would contribute greatly to the recognisability of the reference subject, so It was a no brainer that I had to add this feature to my pot. Using a ruler I effectively mapped out these border lines and painted them on my pot.
(see "collar mapping, glazing day 1 - Pt 1" in UC2 videos folder)
Once I had mapped out the space where the rest of my design would go, I could more onto the image transferring process. I decided paint my pot in sections so that I could place the motifs of my design individually so I could ensure correct spacing and placement.
To transfer my illustrations onto my pot, my method was to cover the back of the piece of paper with my drawing on with charcoal. I then tape the paper to my pot as tight as possible, with the charcoal facing down against my pot and the drawing on top facing me. I then take a fine tipped pencil and trace over the top of my drawing, applying significant pressure to ensure a clear transfer. The pressure of the pencil on the paper transfers the charcoal underneath onto the surface it is touching, in this instance my pot. I then remove the paper and the outline of my illustration I have traced, is applied to the pot in charcoal, which I then just have to over paint with my underglaze, obviously applying smaller more intricate details freehand where necessary.
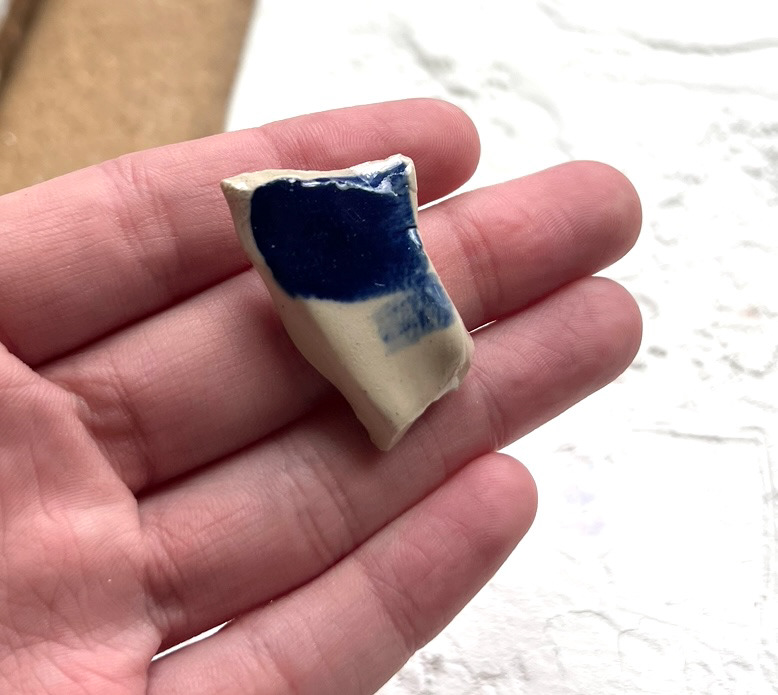
I was a little bit worried that once it was time for firing that the charcoal would potentially get trapped under the clear shiny top glaze and create black smudgy marks all over my pot. Even though charcoal is almost completely carbon and would burn off in the kiln, I wanted to be sure for definite just in case, because otherwise I would have to fit an additional firing into my schedule which I wasn't sure I had time for. To be safe I did a small sample test. I covered a bisque fired piece of ivory stoneware with graphite, then over painted half with underglaze and then finally dipped the whole thing in clear shiny ivory stoneware.
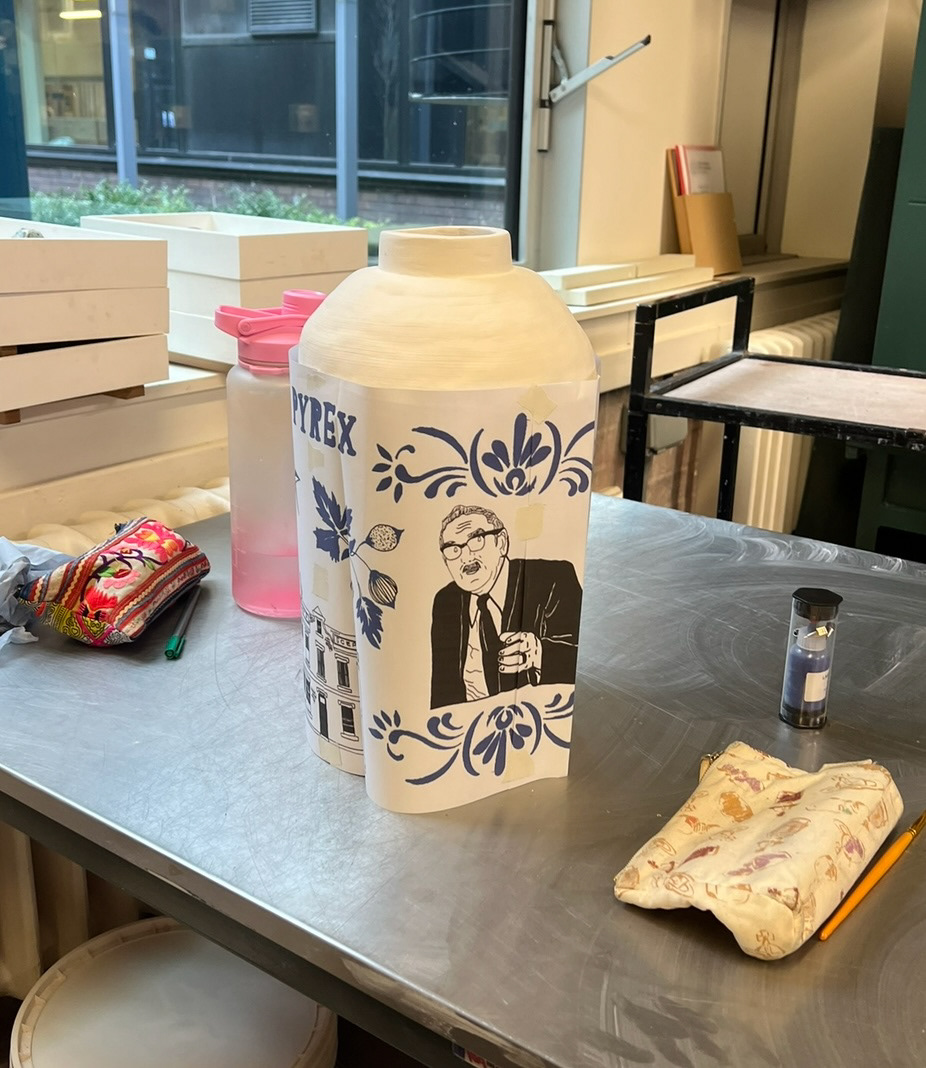
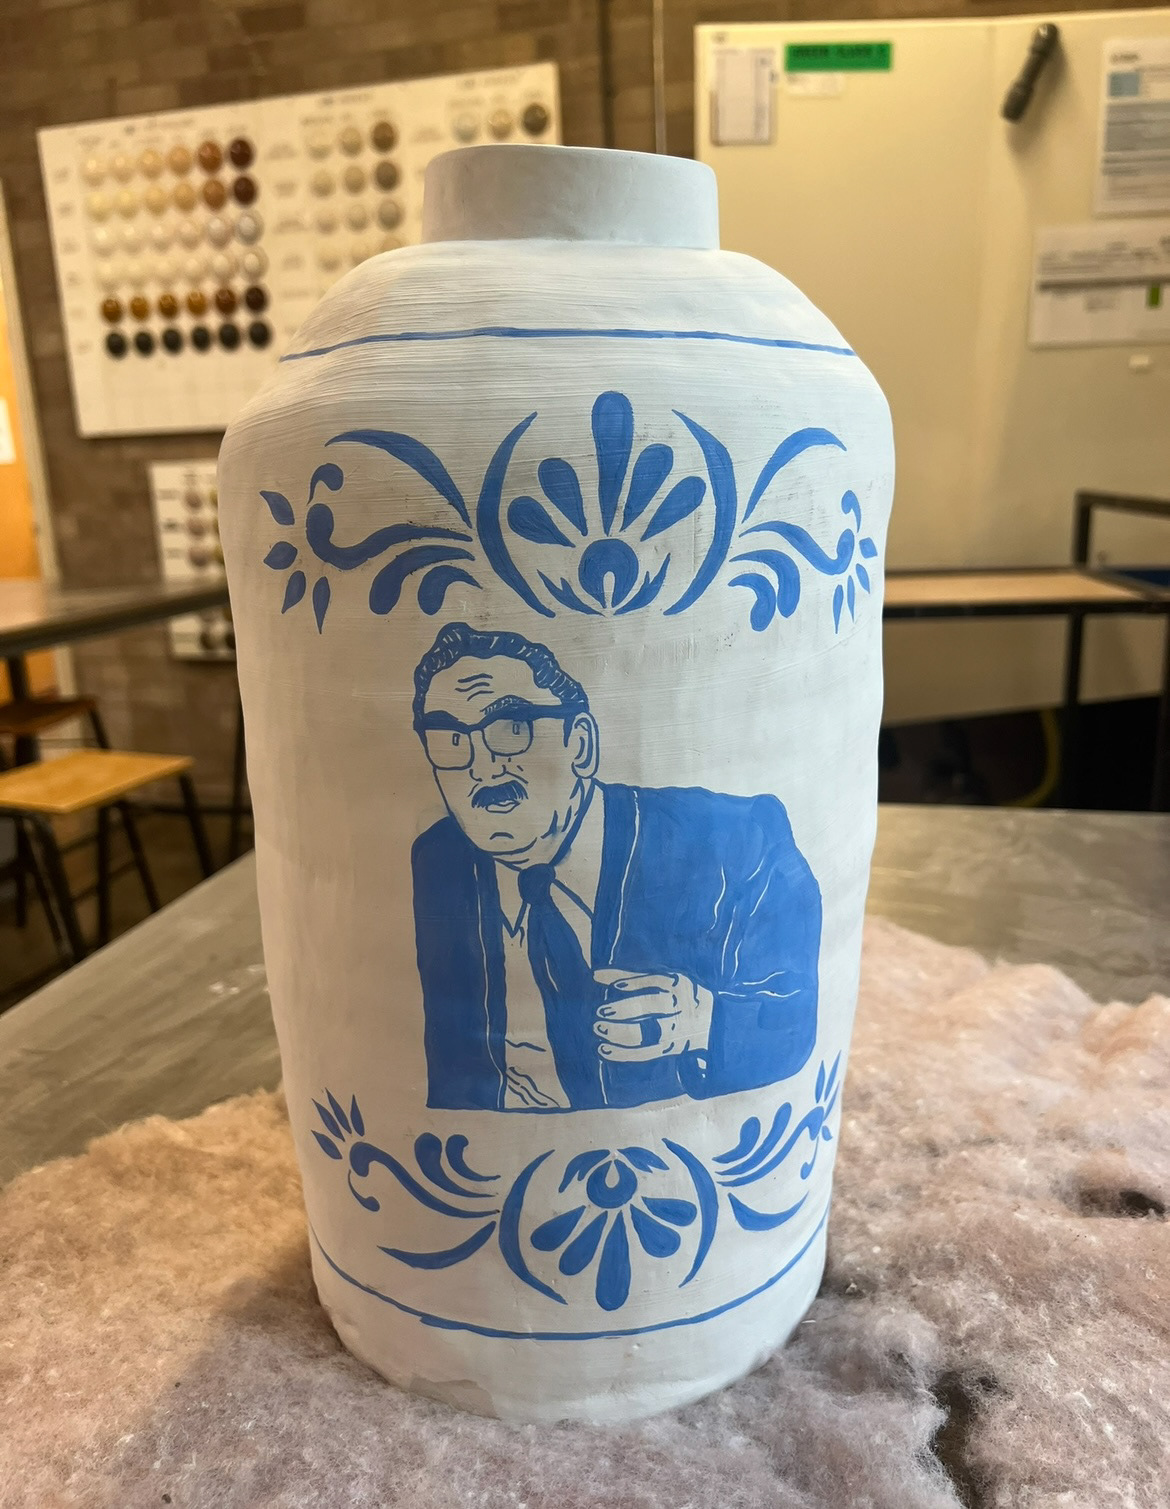
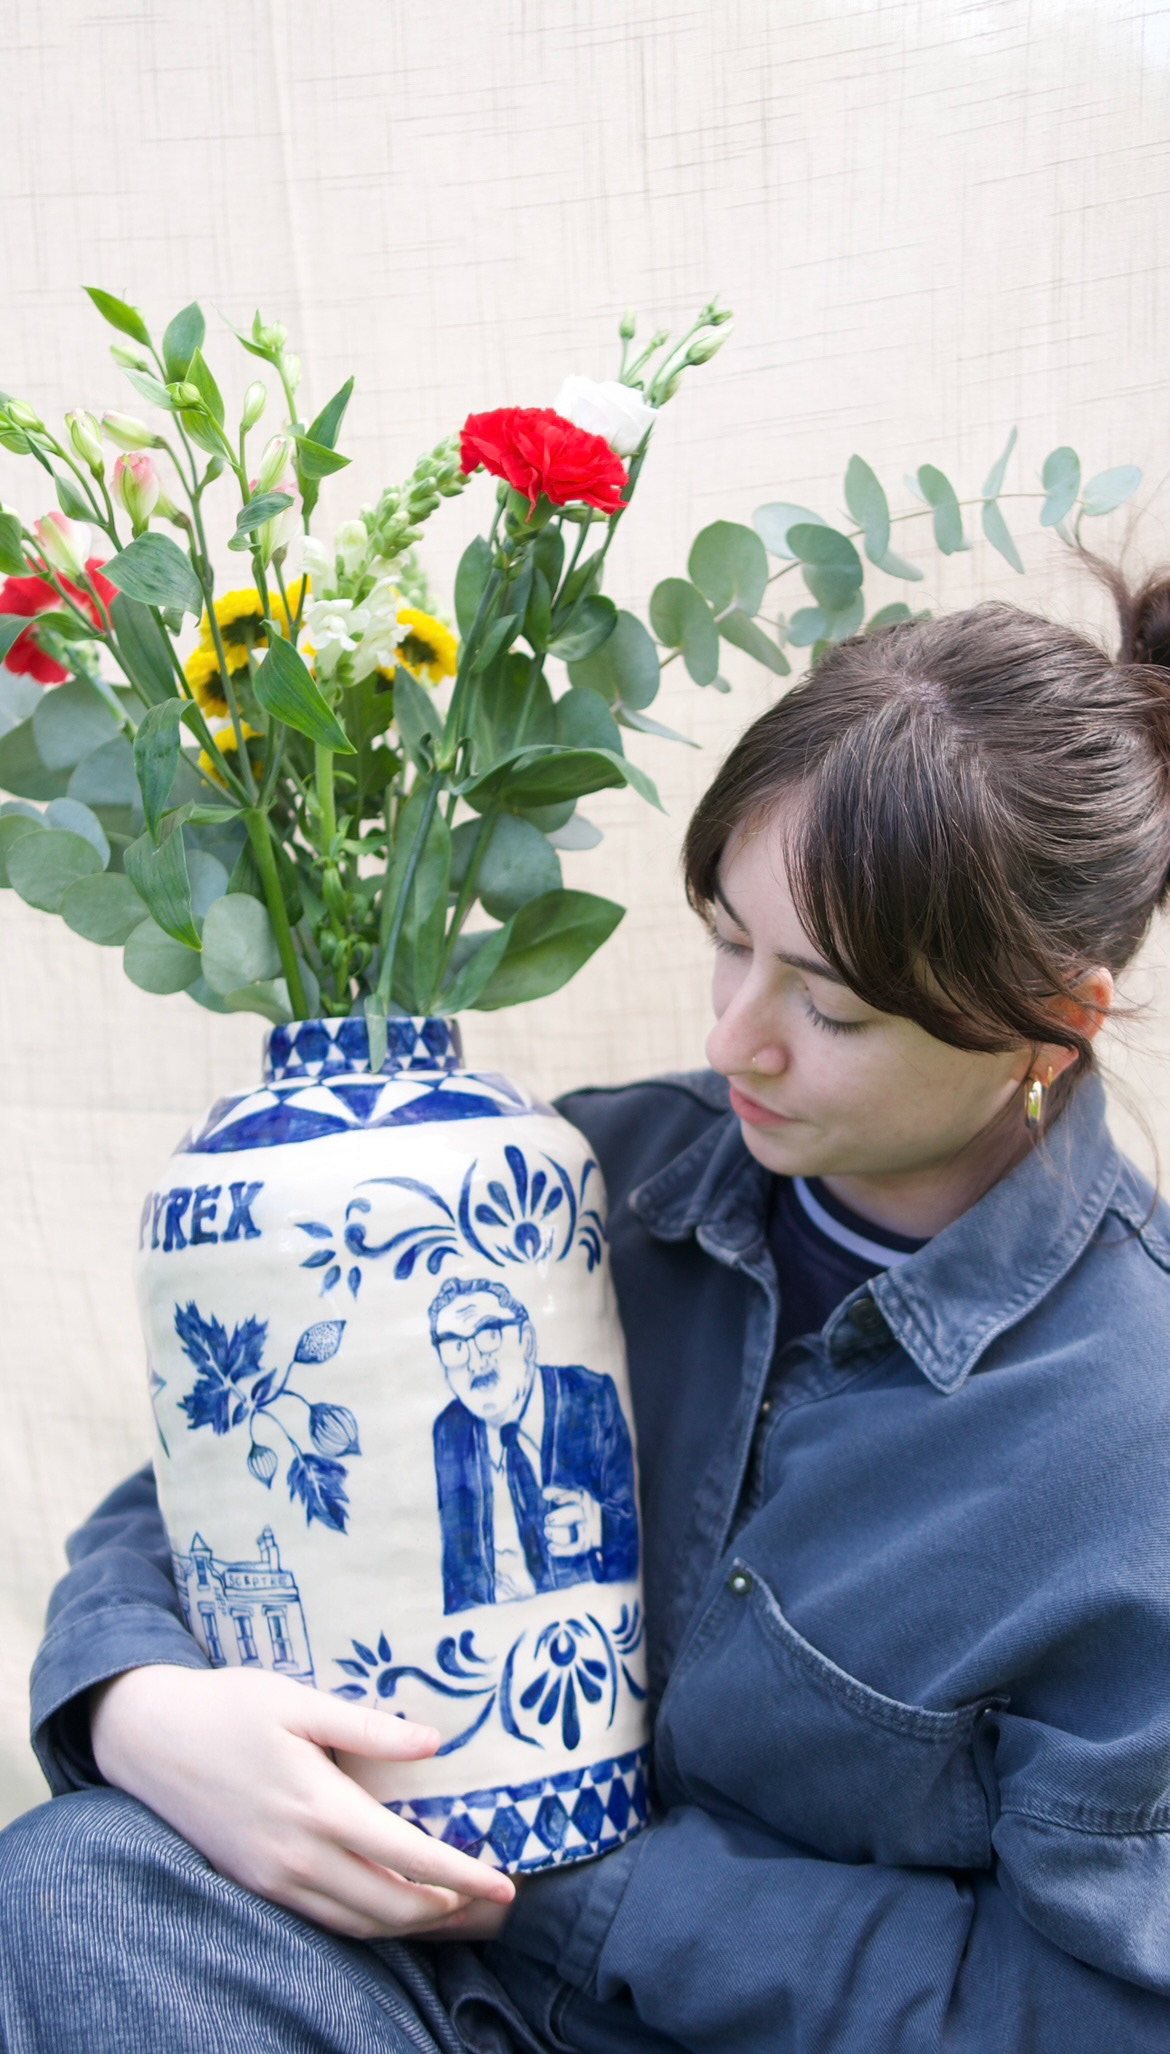
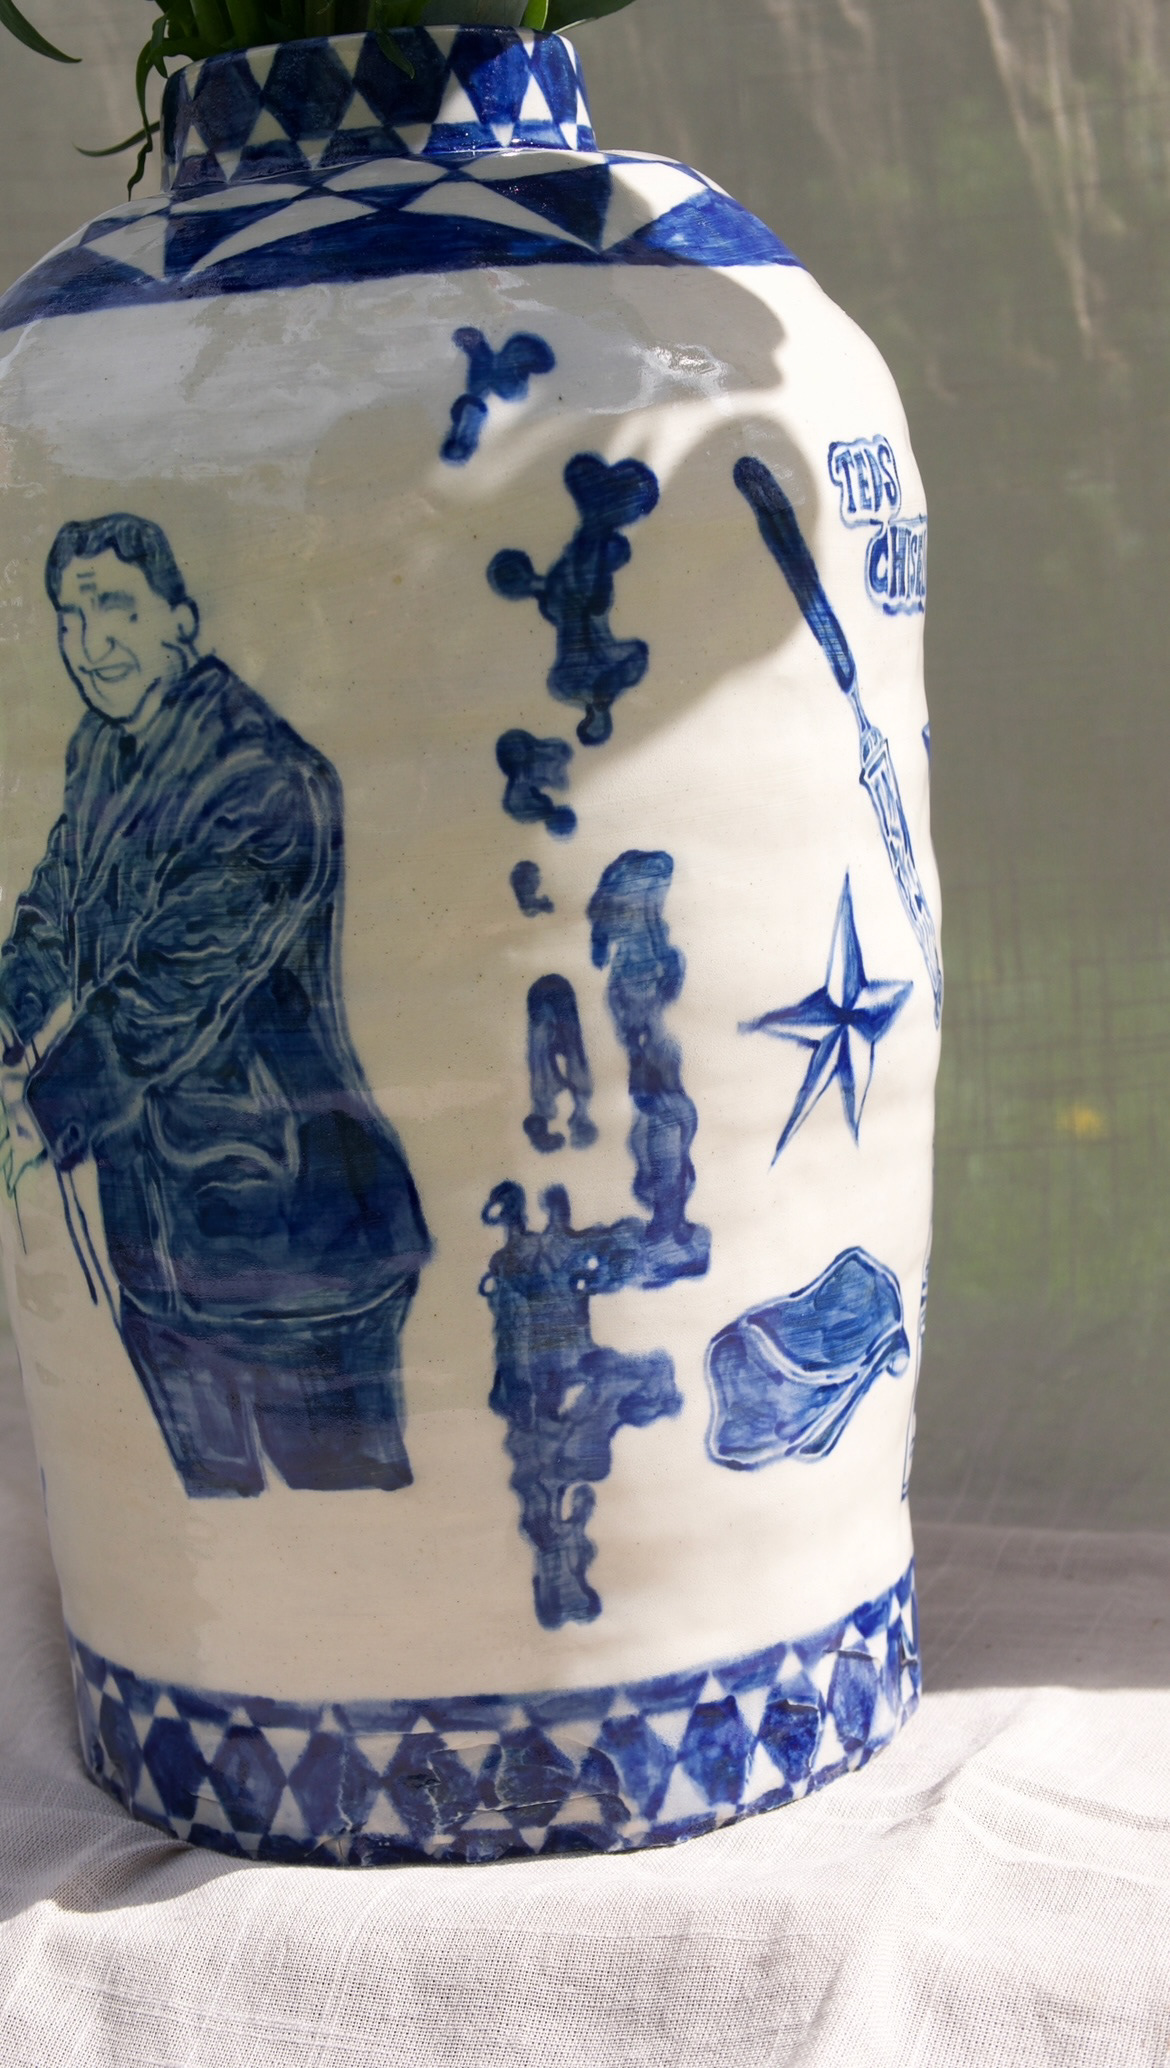
Now that I was completely confident in my materials and my methods, I could finally start applying and painting my design onto my pot. I started off on day one with the biggest motif featuring the portrait of Henderson Cooper, surrounded by the 1960s Pyrex designs.
(see video of me hand painting and applying design in UC2 Videos page under "Glazing day 1 -Pt2")
Painted pot day 1. (below).
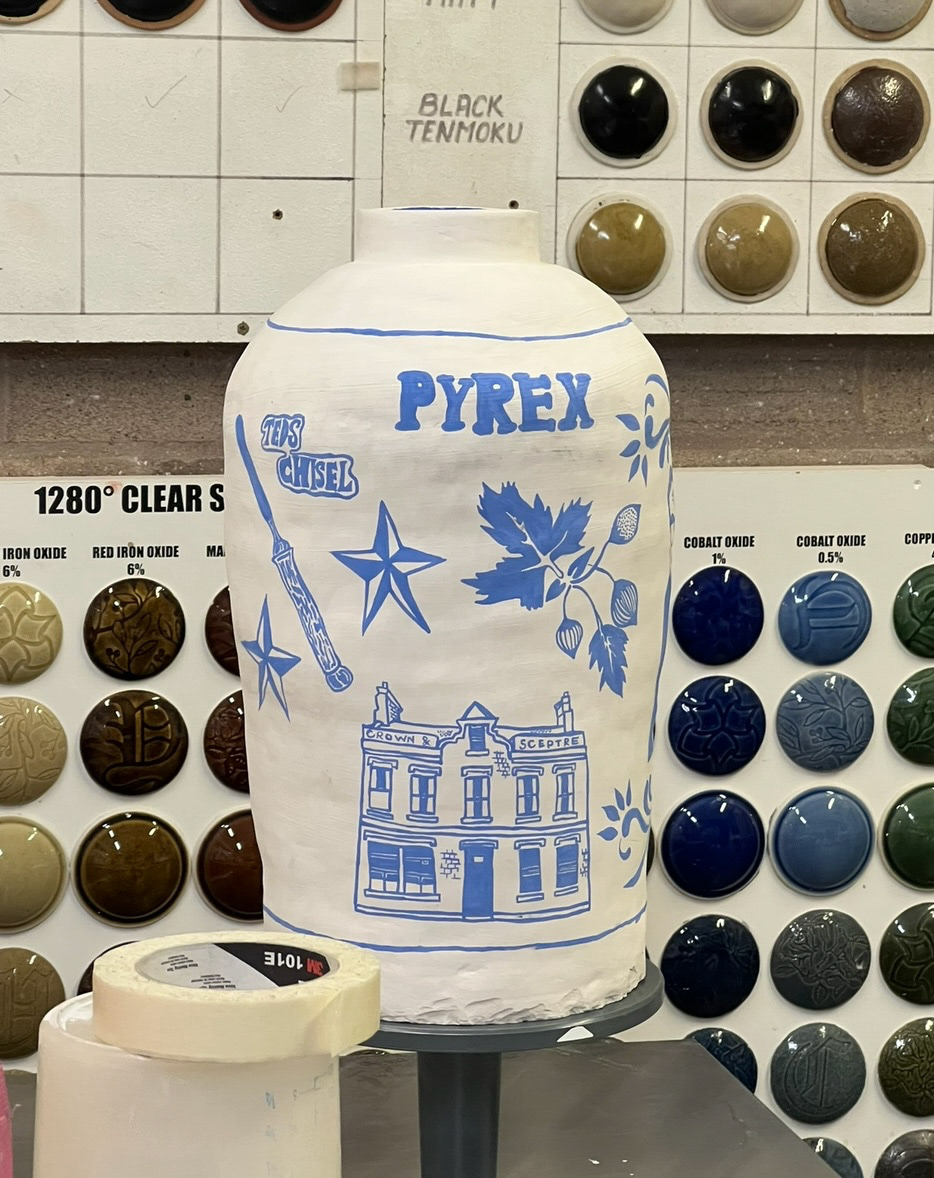
On day 2 of glazing I worked a mixture of freehand and my graphite transfer method. I completed the illustrations of the Crown and Sceptre, Teds chisel, some marquetry motifs and also the majority of the portrait of Ted. (see process video in UC2 video page under "Glazing Day 2- Pt1")
Pot on day two of glazing (below). (also see in UC2 Video page, "Glazing day 2 - Pt2" for 360 view so far).
On the third day of painting the only illustration I had left to apply was Teds woodgrain border and Williams flat cap. Due to the warping when converting my flat design onto a round surface, I was no longer able to fit Williams waistcoat onto the pot but I think this was a small compromise I was willing to make to overcome the risk of the design looking cluttered. I also had to compromise on the top and bottom sections of Teds border, again for the reason of the design looking cluttered when it came to the next step.
(see UC2 Video page "glazing day 3 - Pt1")
The next step was to apply the collar design to the rim and bottom of the pot that I had marked out earlier. I thought that the pattern that I would use should also be related to north east heritage in some way rather than just being generic.
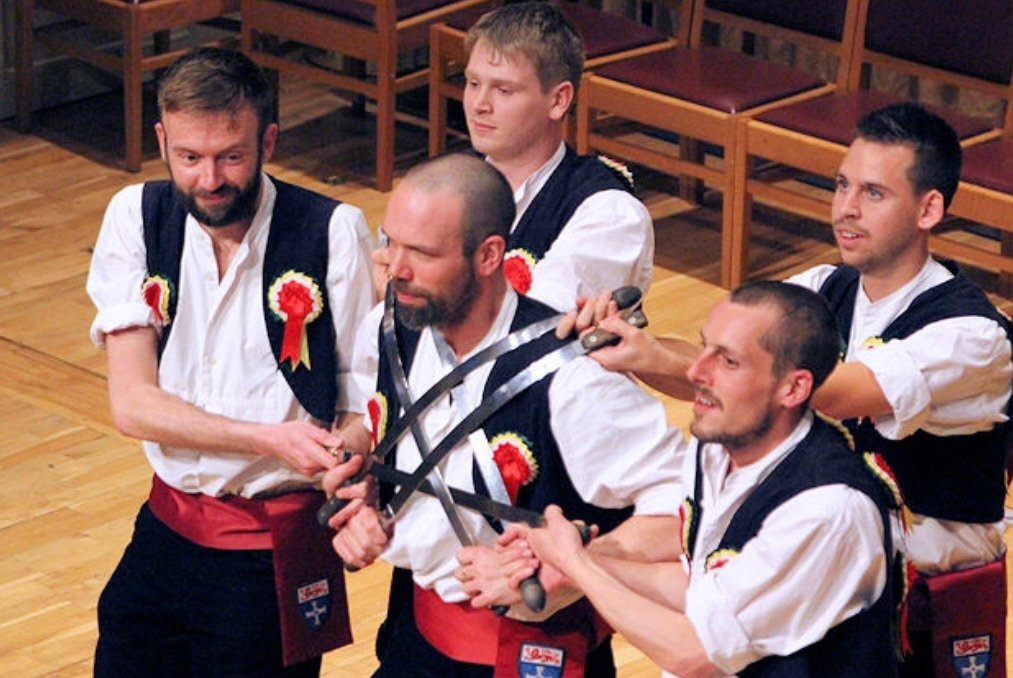
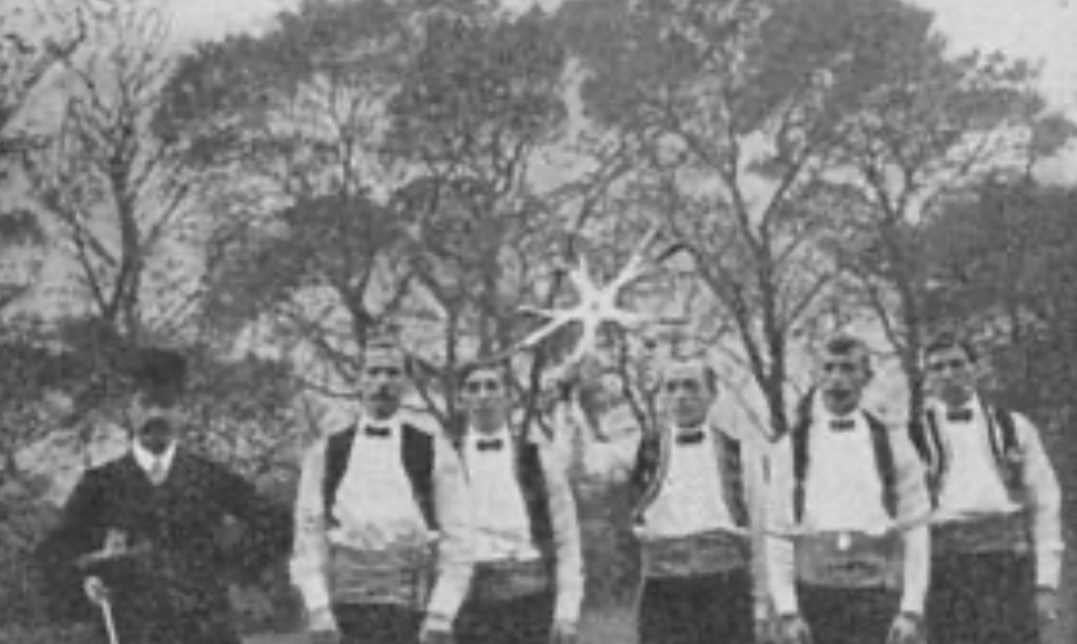
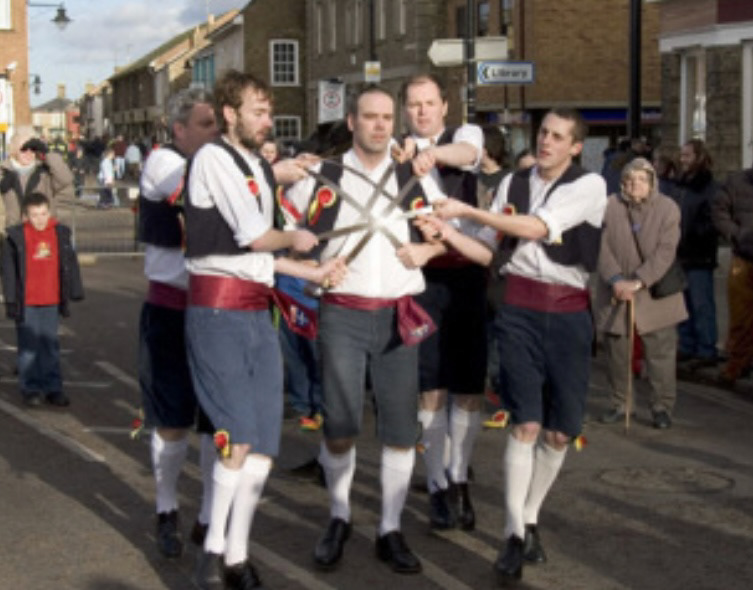
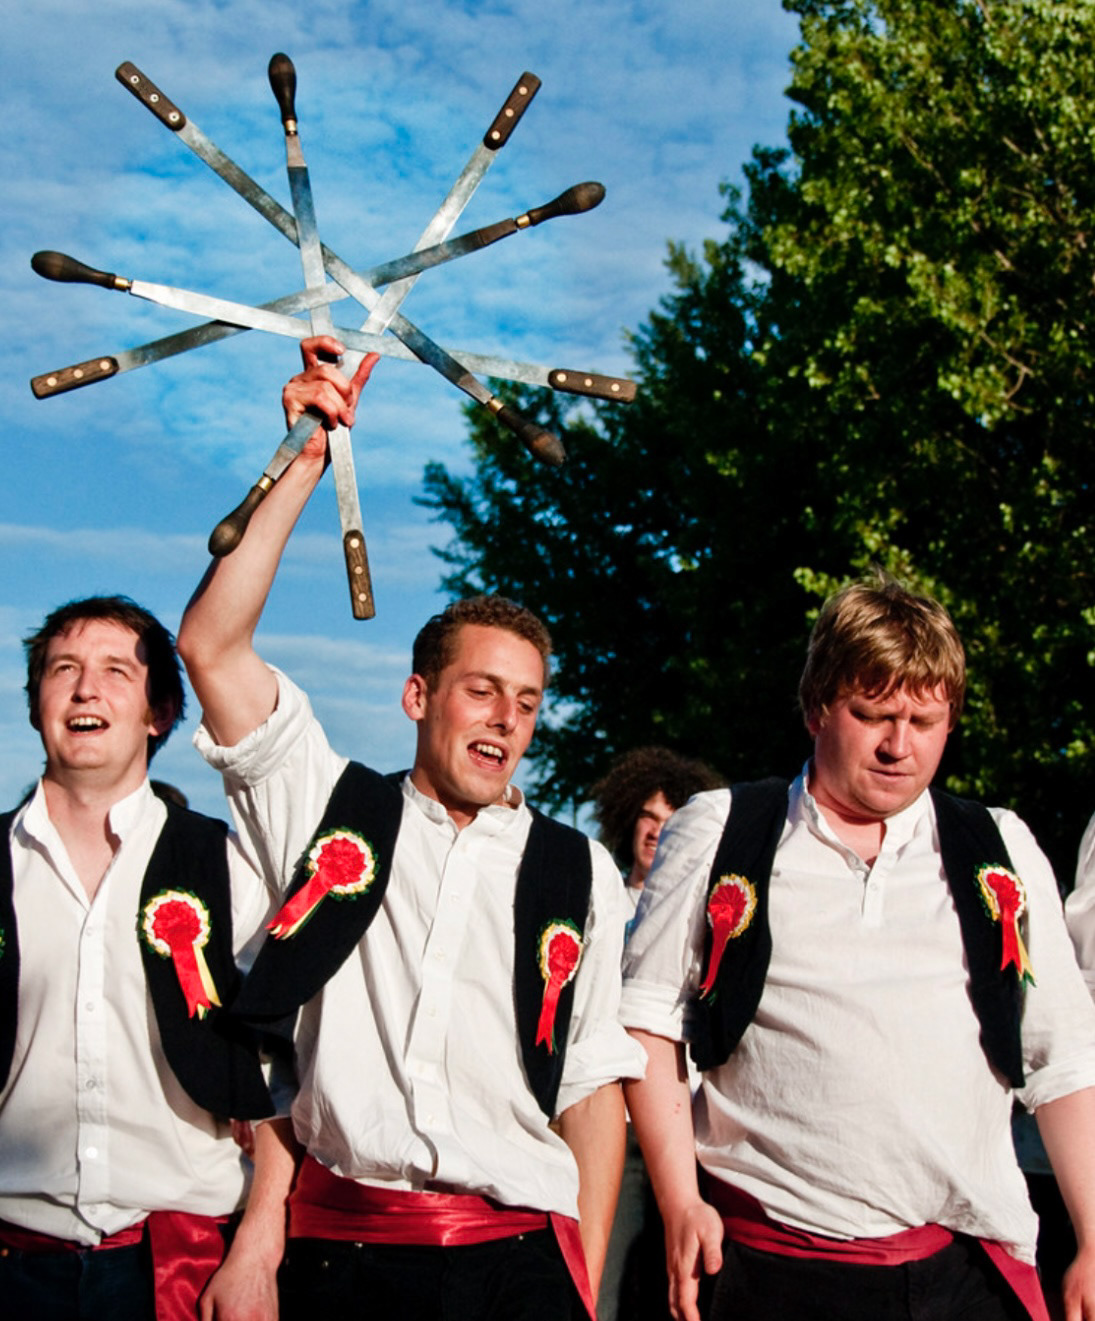
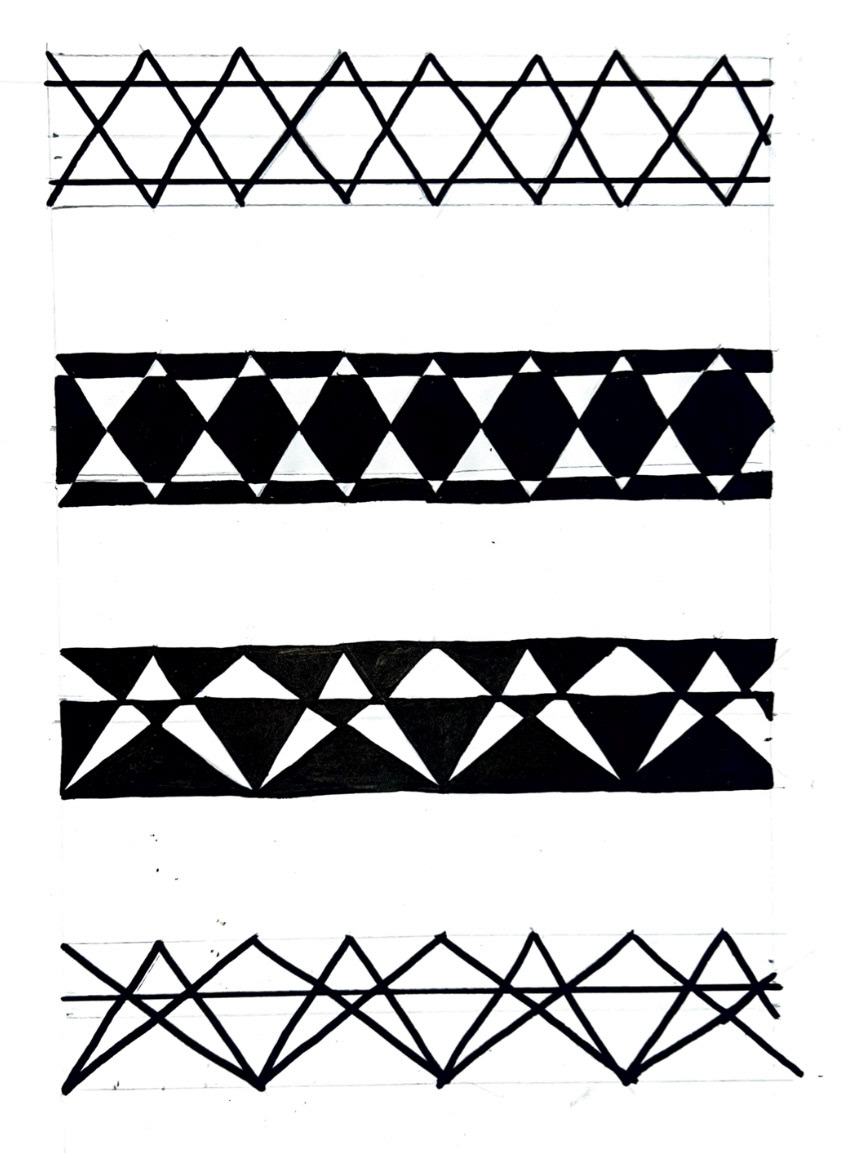
I decided to look at the pattern involved in the northumberland folk tradition of sword dancing. The swords, known as rappers that they used were traditionally crafted by workmen using left over industry materials, which meant the metal used had to be very thin to go further. This gave the swords a bendy, flexible quality, meaning that the dances could be elaborate and intricate as they weaved and danced around each other in formation to form patterns with the swords. (images of sword dancing below).
I took these sword formations and arranged them into a geometric repeat pattern and then played around with colouring in certain areas so that it would be more impactful as a surface pattern. (patterns below).
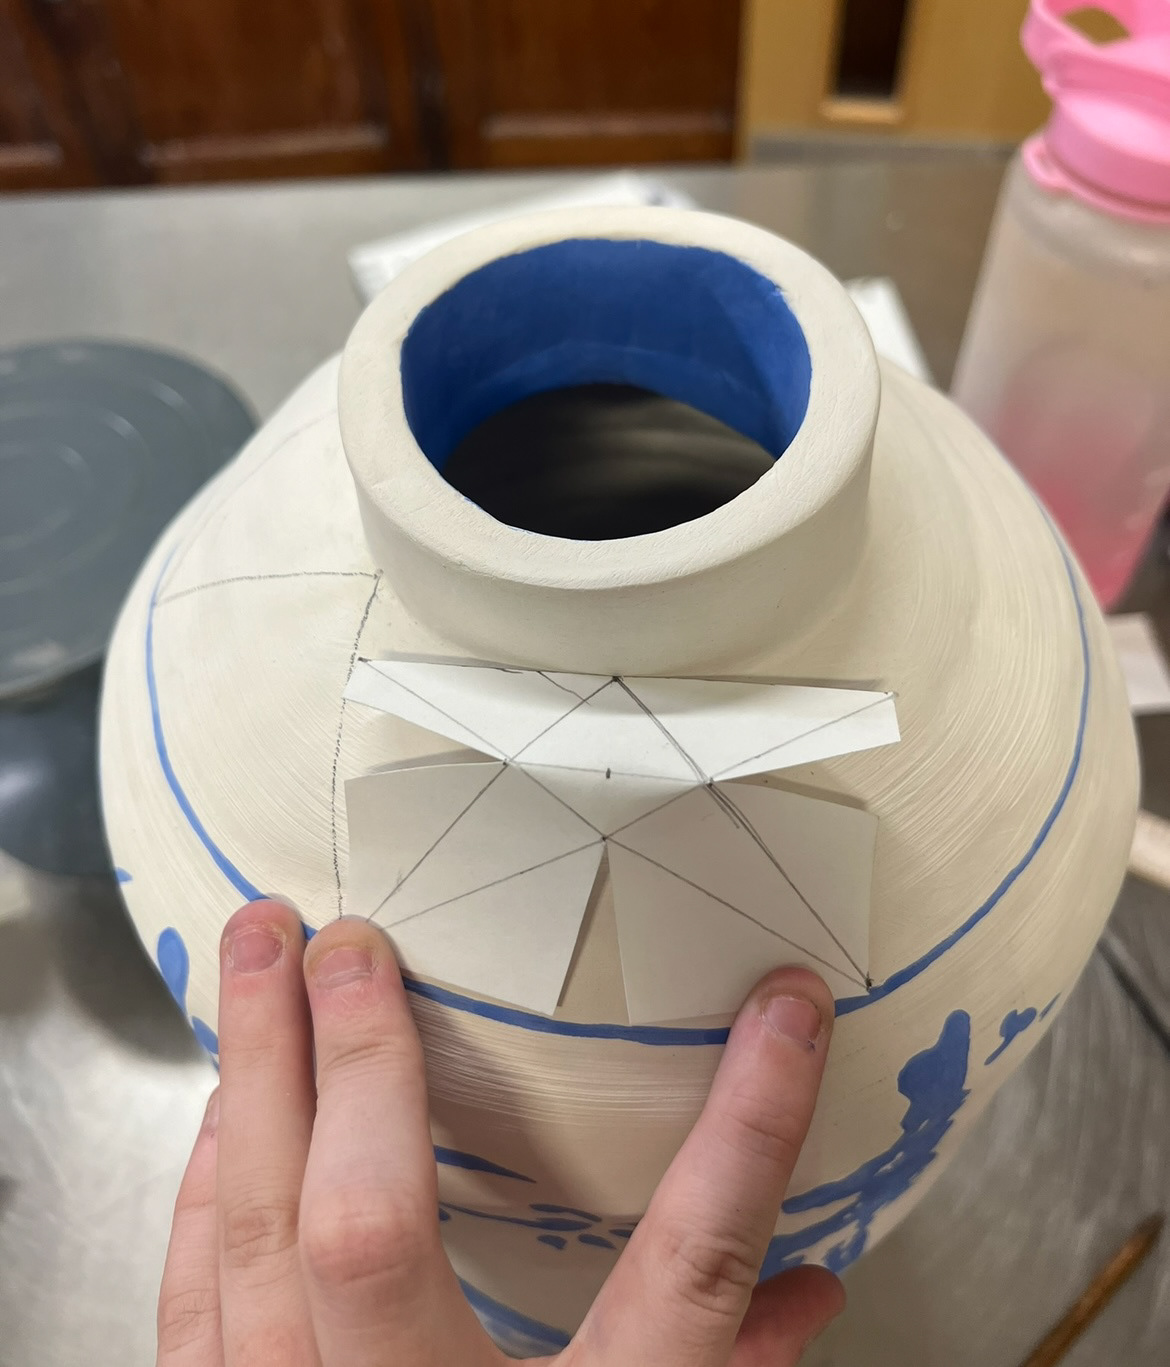
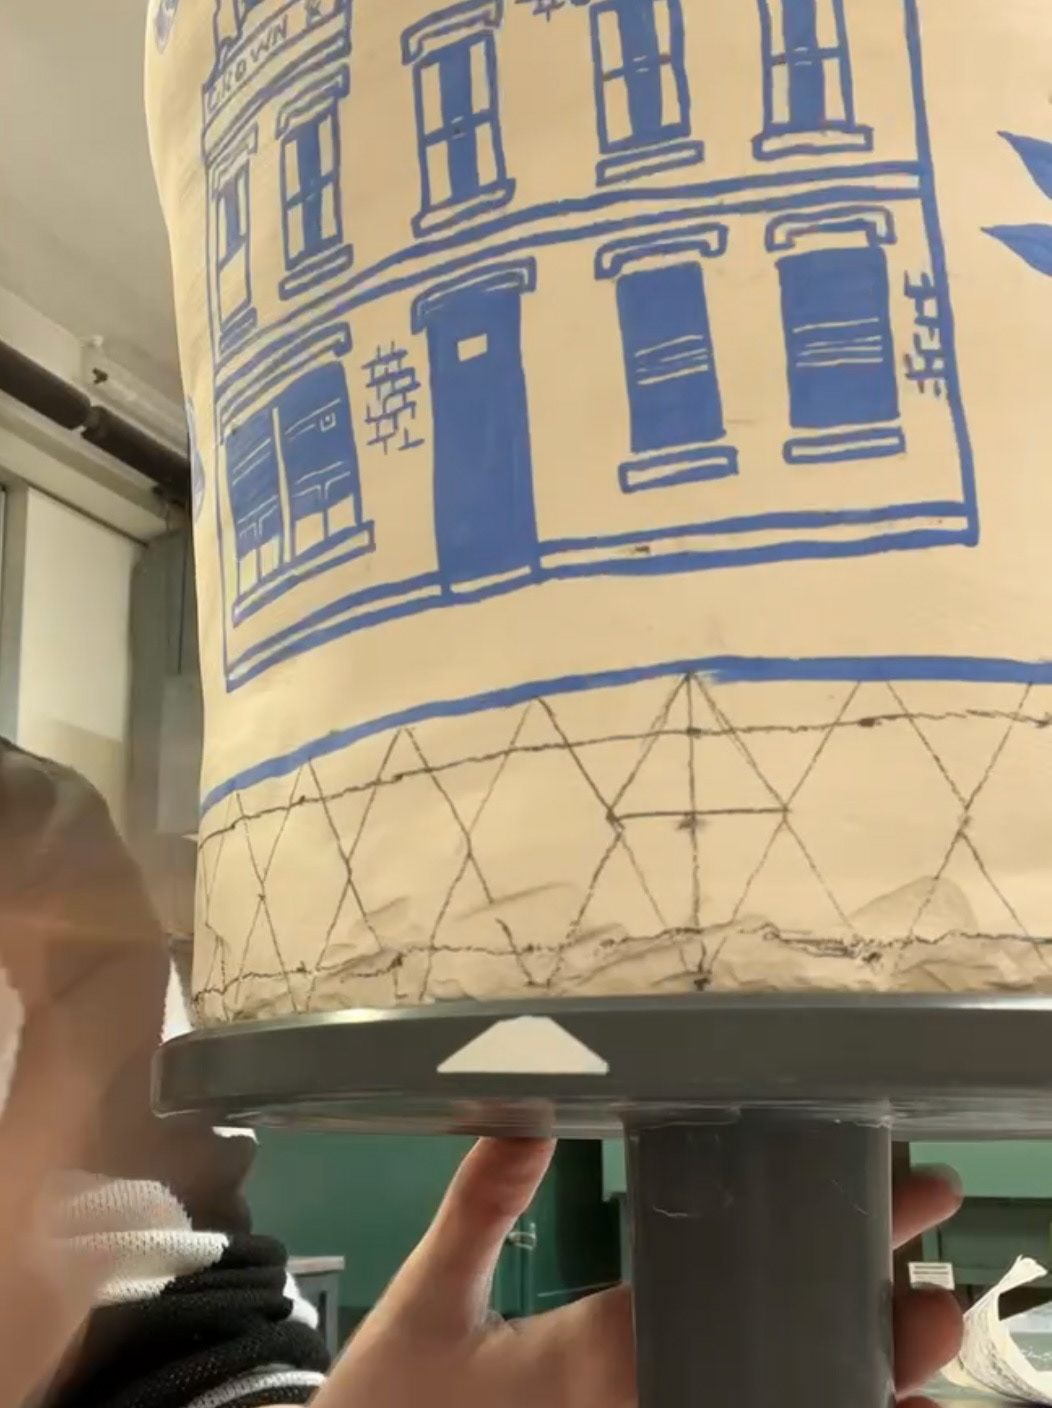
Now that I had these patterns, I had to then work out how to transfer them onto a round form. This proved to be tricky as working with a geometric pattern with lot of straight lines on a round shape could run into a lot of issues, especially on the top hipped portion of the pot as the shape was unusual. I ended up having to take my original drawings (above), size them up appropriately and create a mathematical template from which I could plot points onto my pot. (template below).
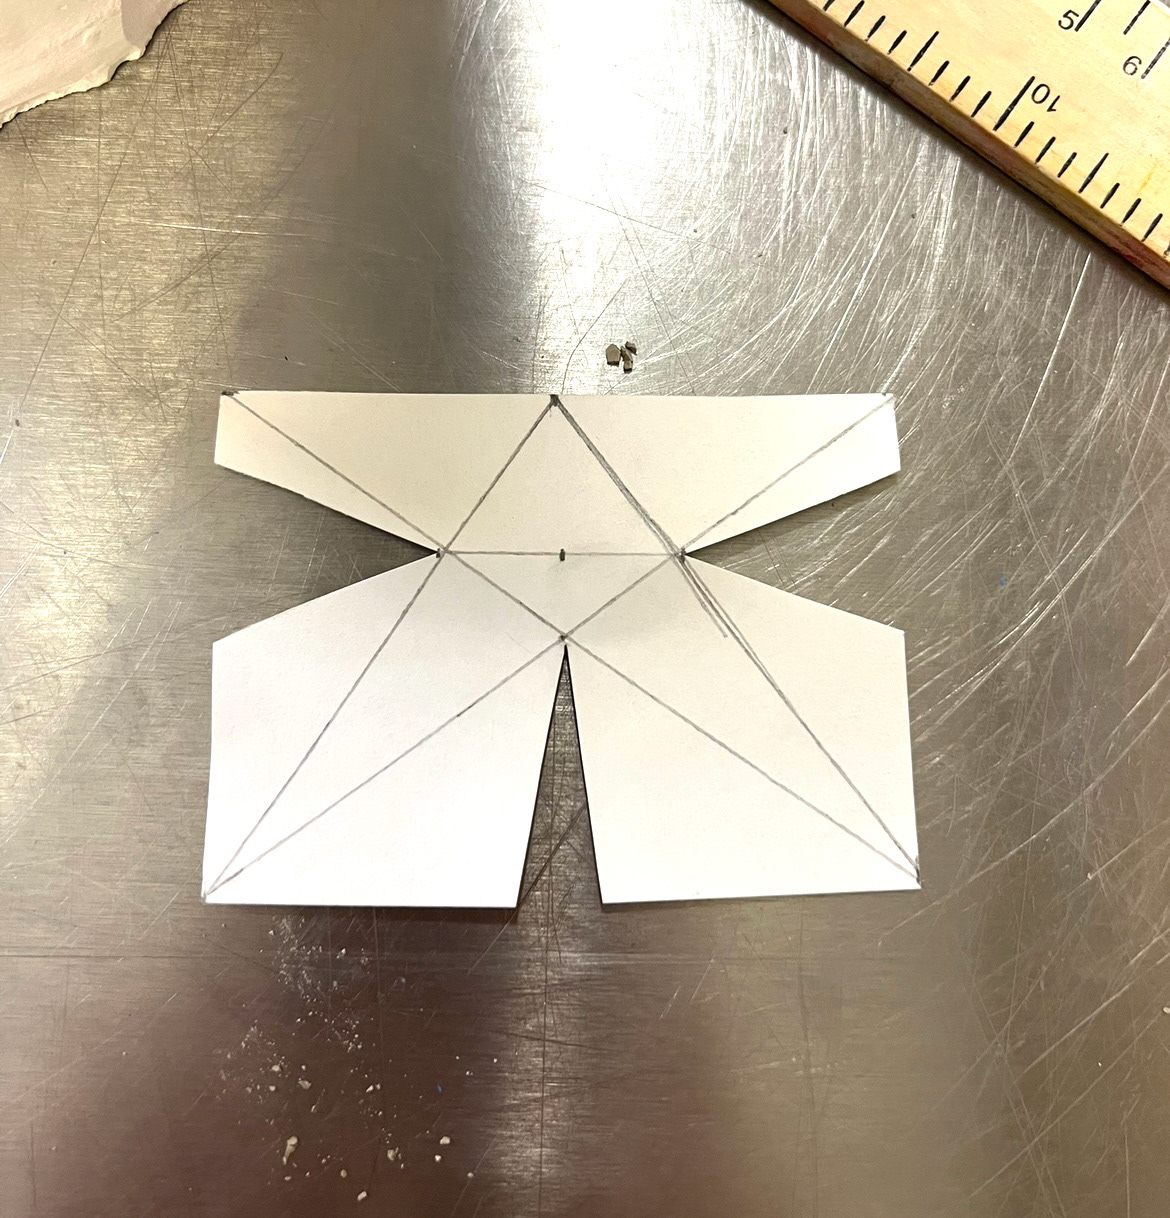
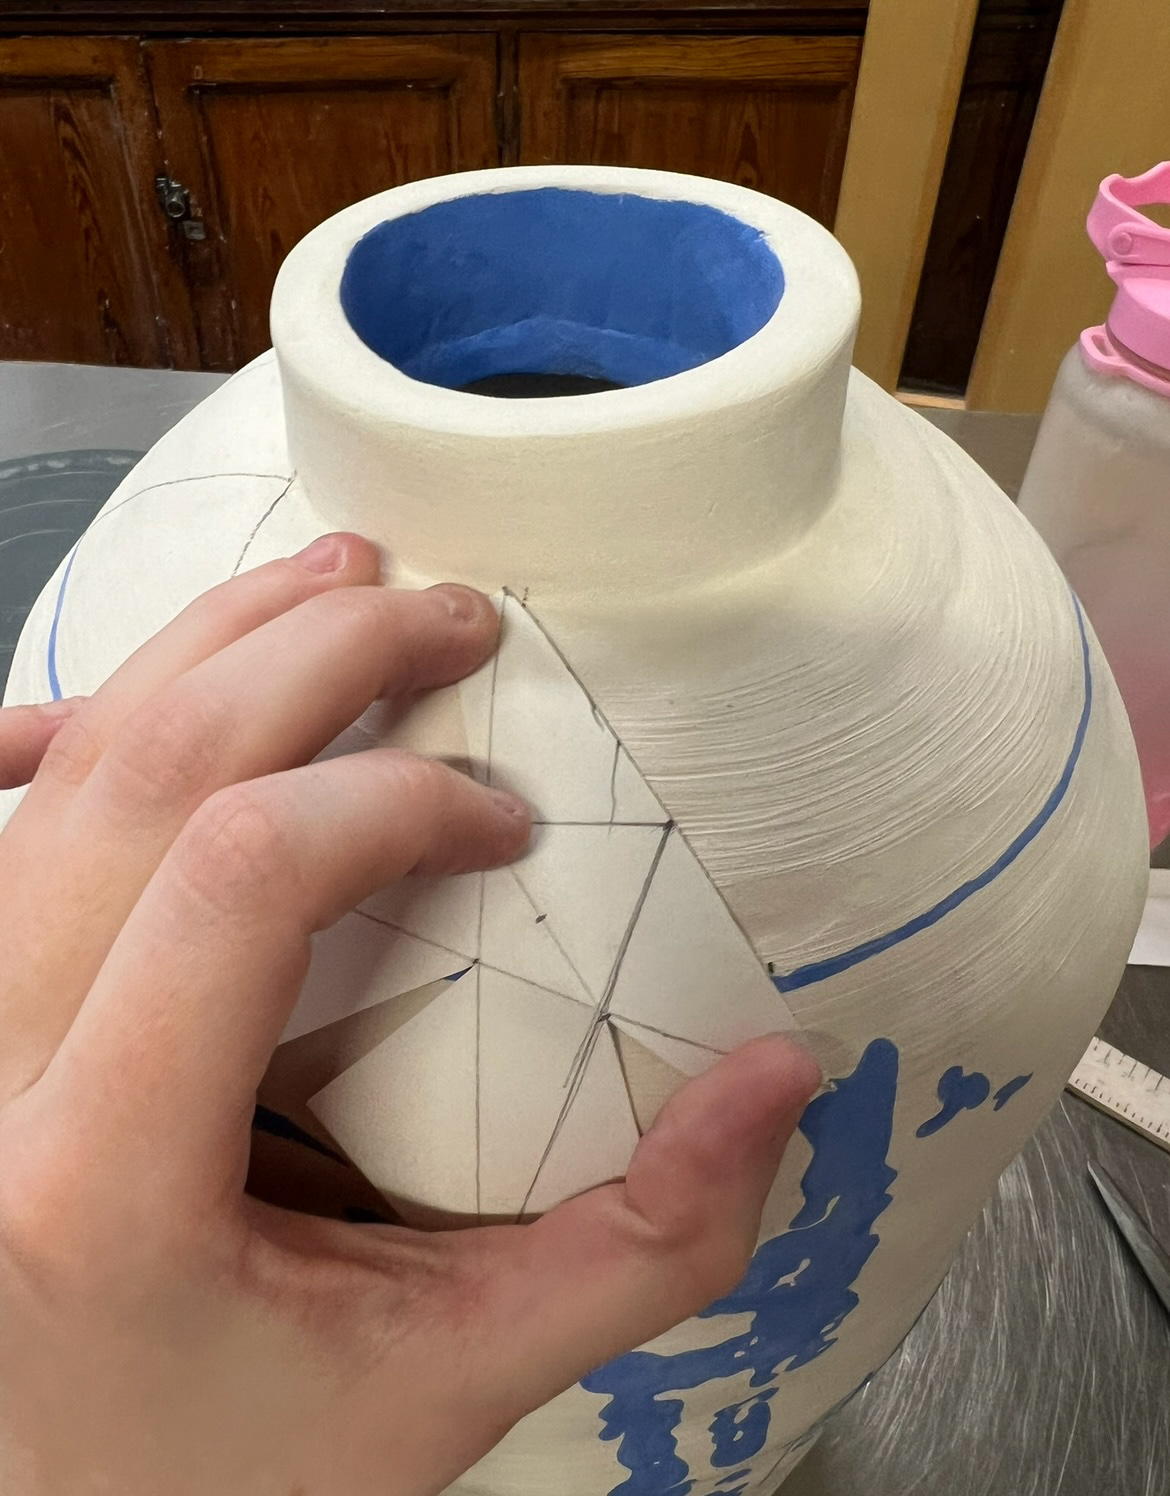
I cut pieces out of the template almost to act like pleat seams so that the template would be more flexible around the form. Each point on the template would act as a plotting reference point that I could use when it was applied to the pot so that when I marked my points, I could later join them up to create my geometric pattern. I also found that using the top straight edge of the template as a ruler when joining my points worked very well as it was made out of paper so it was flexible enough to bend around the form appropriately. I poked a hole in the middle of my template so that I could plot the straight lane that ran through my design also. (template in action below).
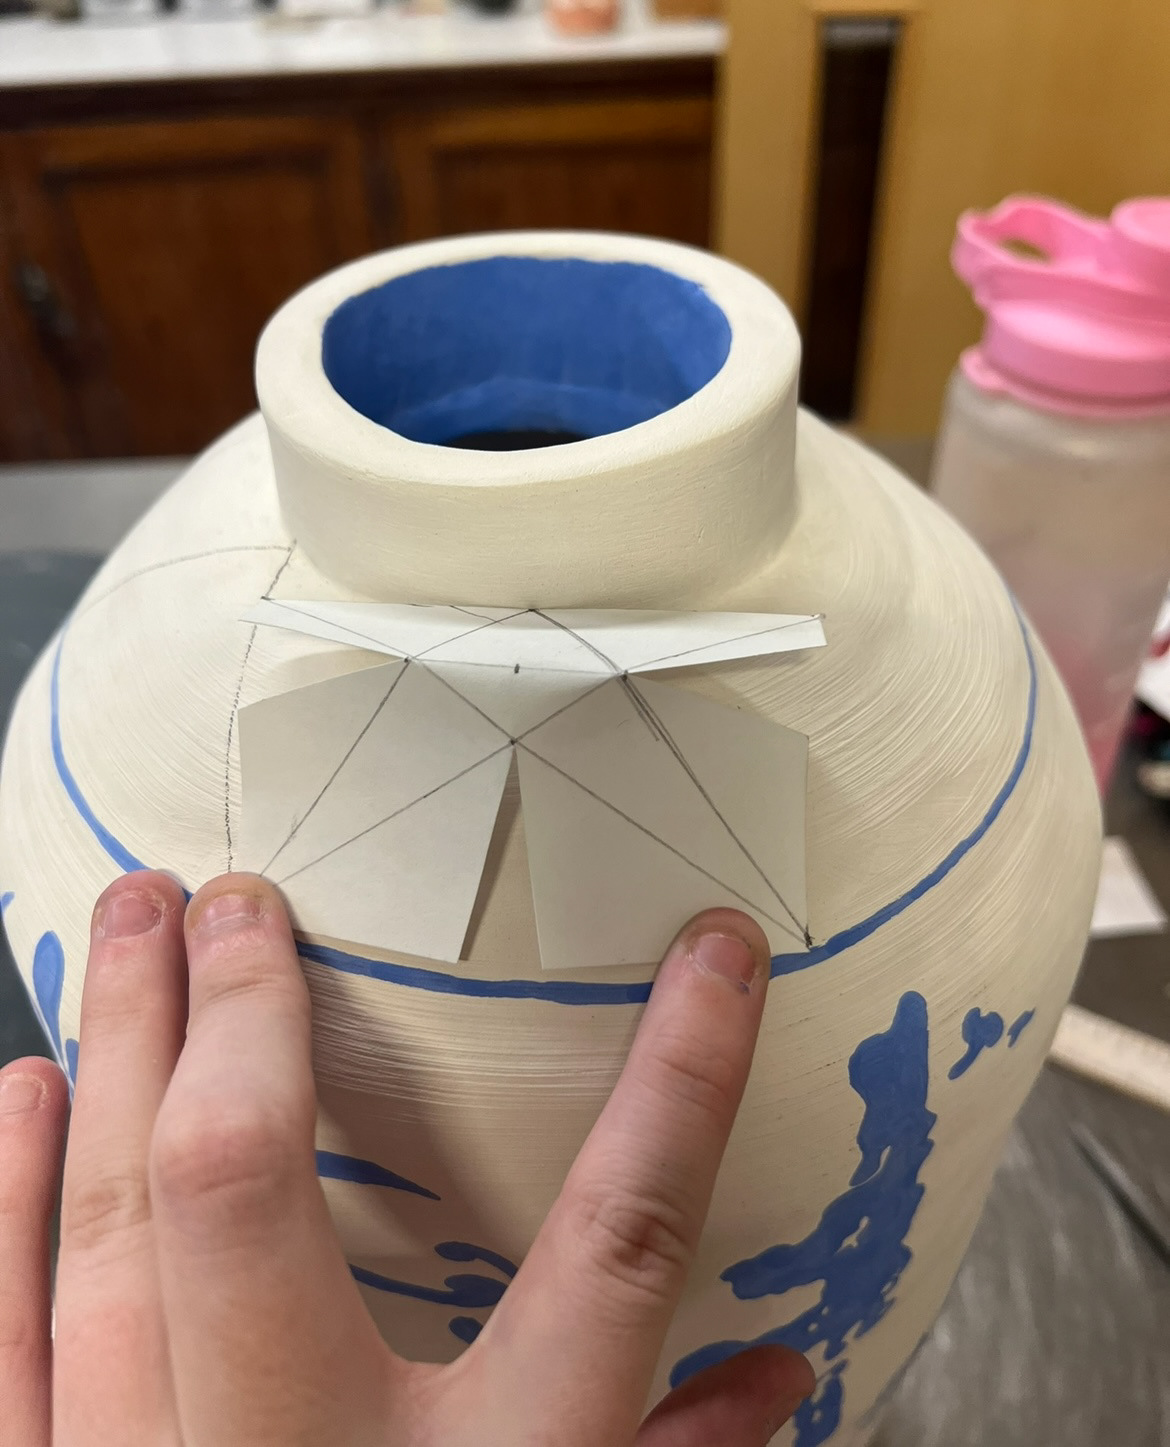
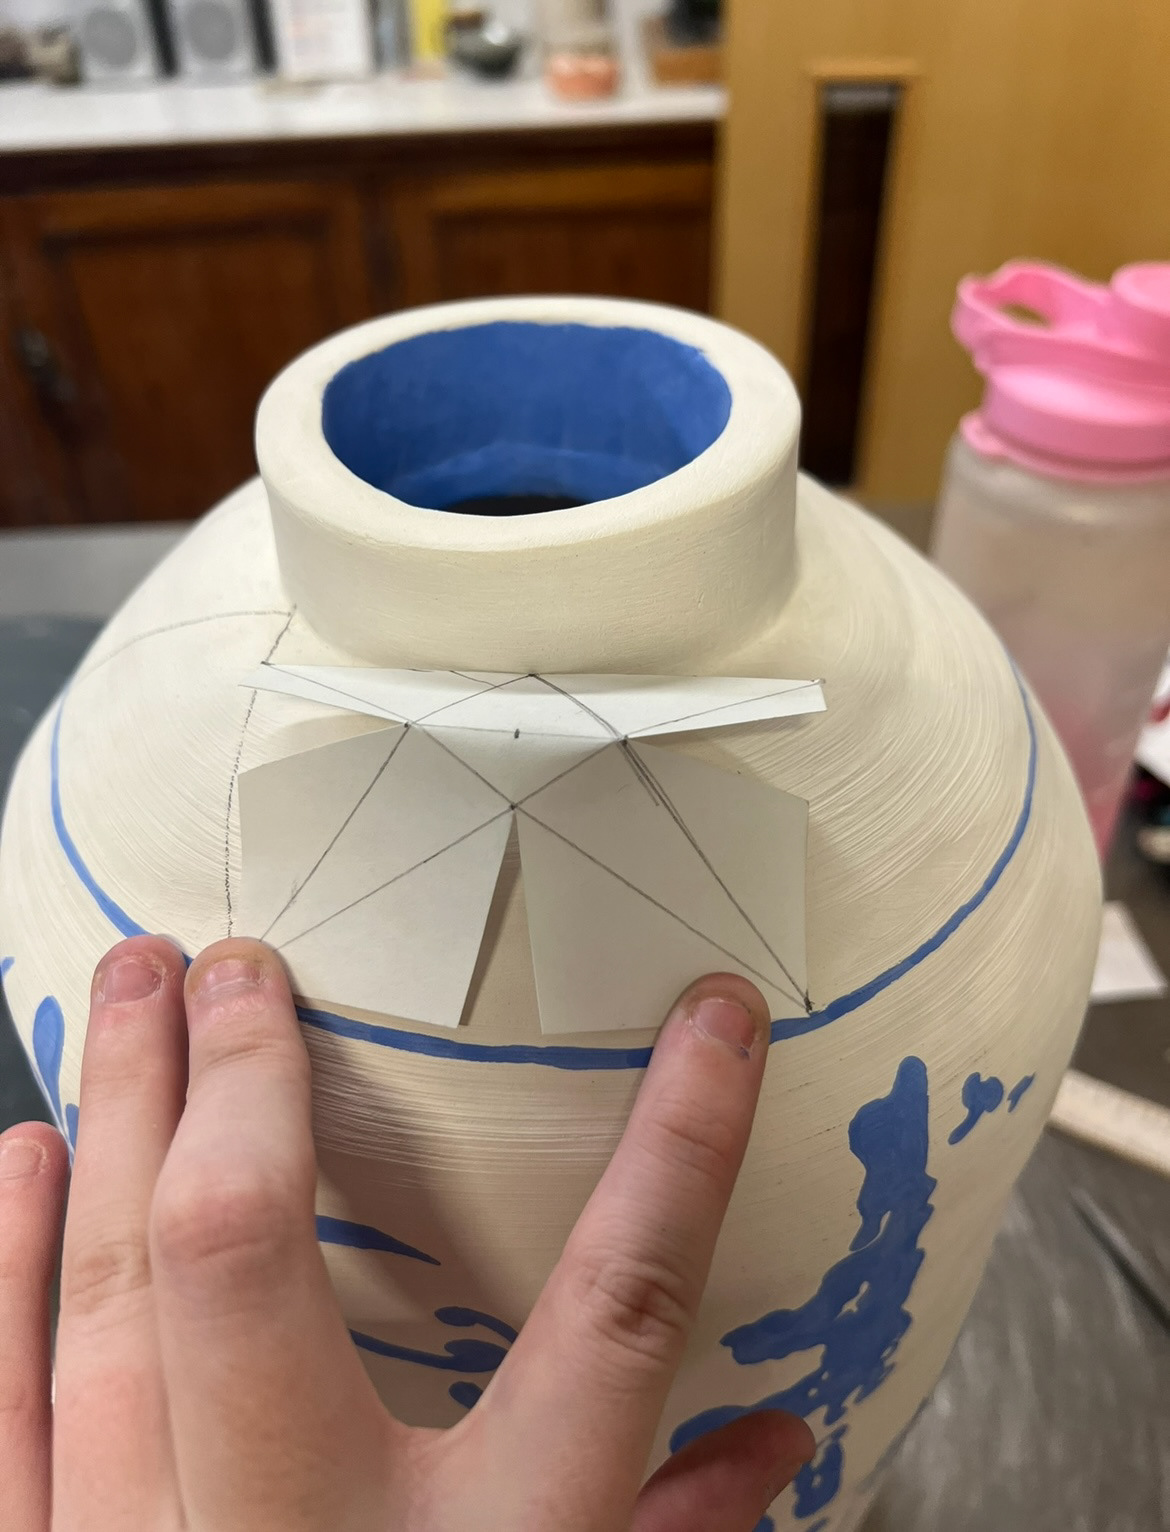
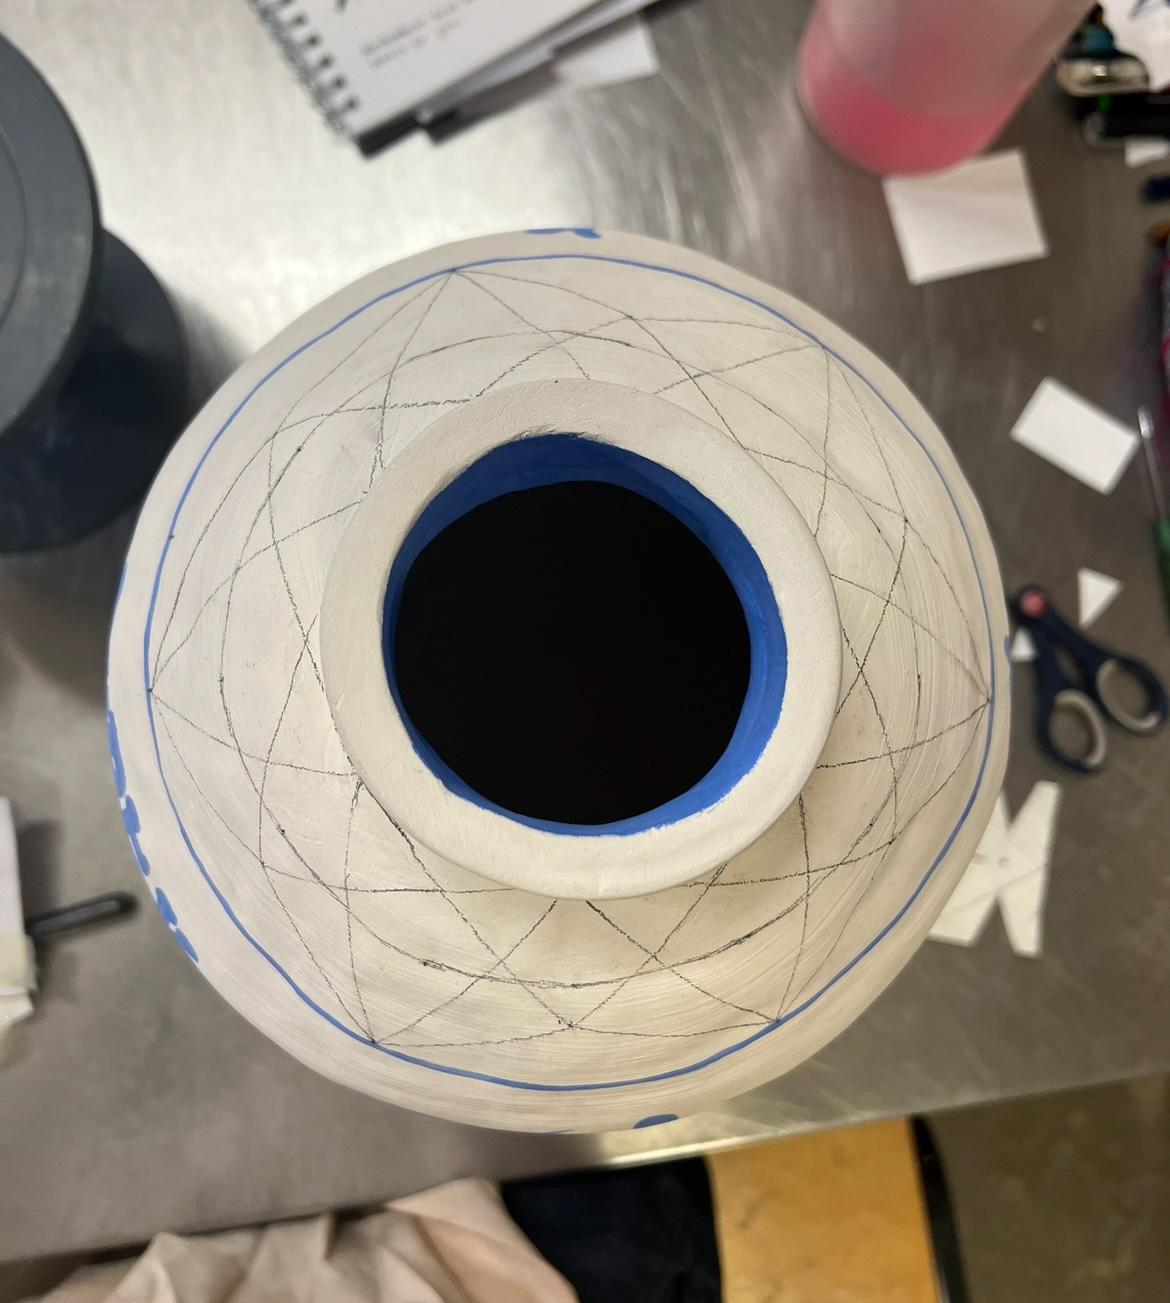
was defiantly one of the most technologically difficult aspects of my design to execute as it required a lot of mathematical accuracy, which is defiantly not one of my strong points but I think i did well considering and the design came out exactly how I wanted it and I think it looks very effective. (finished plotted design below).
(see UC2 Videos page "Glazing day 3 - Pt2).
(Pot after glazing day 3 below).
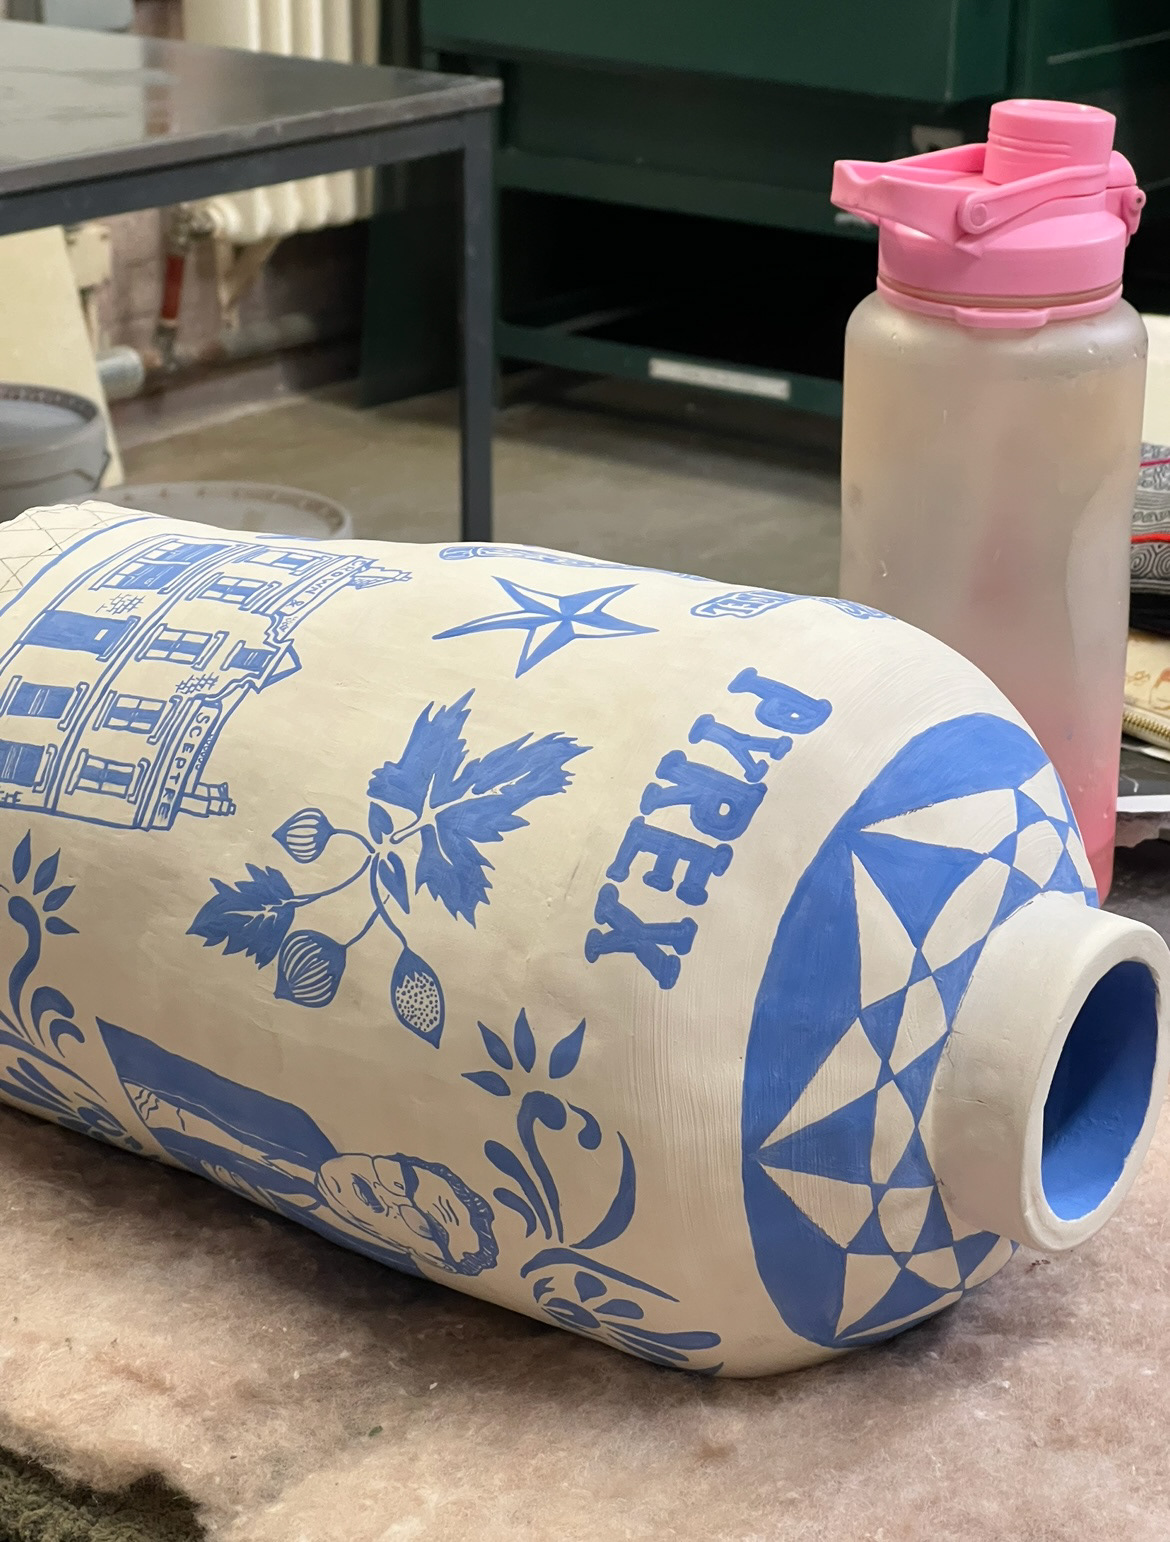
On the fourth and final day of glazing, all I had left to do was the bottom section of pattern and the rim of the pot, before going in and applying my stoneware clear shiny top coat of glaze. For these two sections, I had chosen to apply the top pattern on my sword dancing geometric pattern sheet (above). To plot this one, I cut out a Dimond shape of the appropriate size, and apply plot points for where the horizontal lines would hit. I plotted this out around the top and bottom sections so I could start filling them in with underglaze. (below).
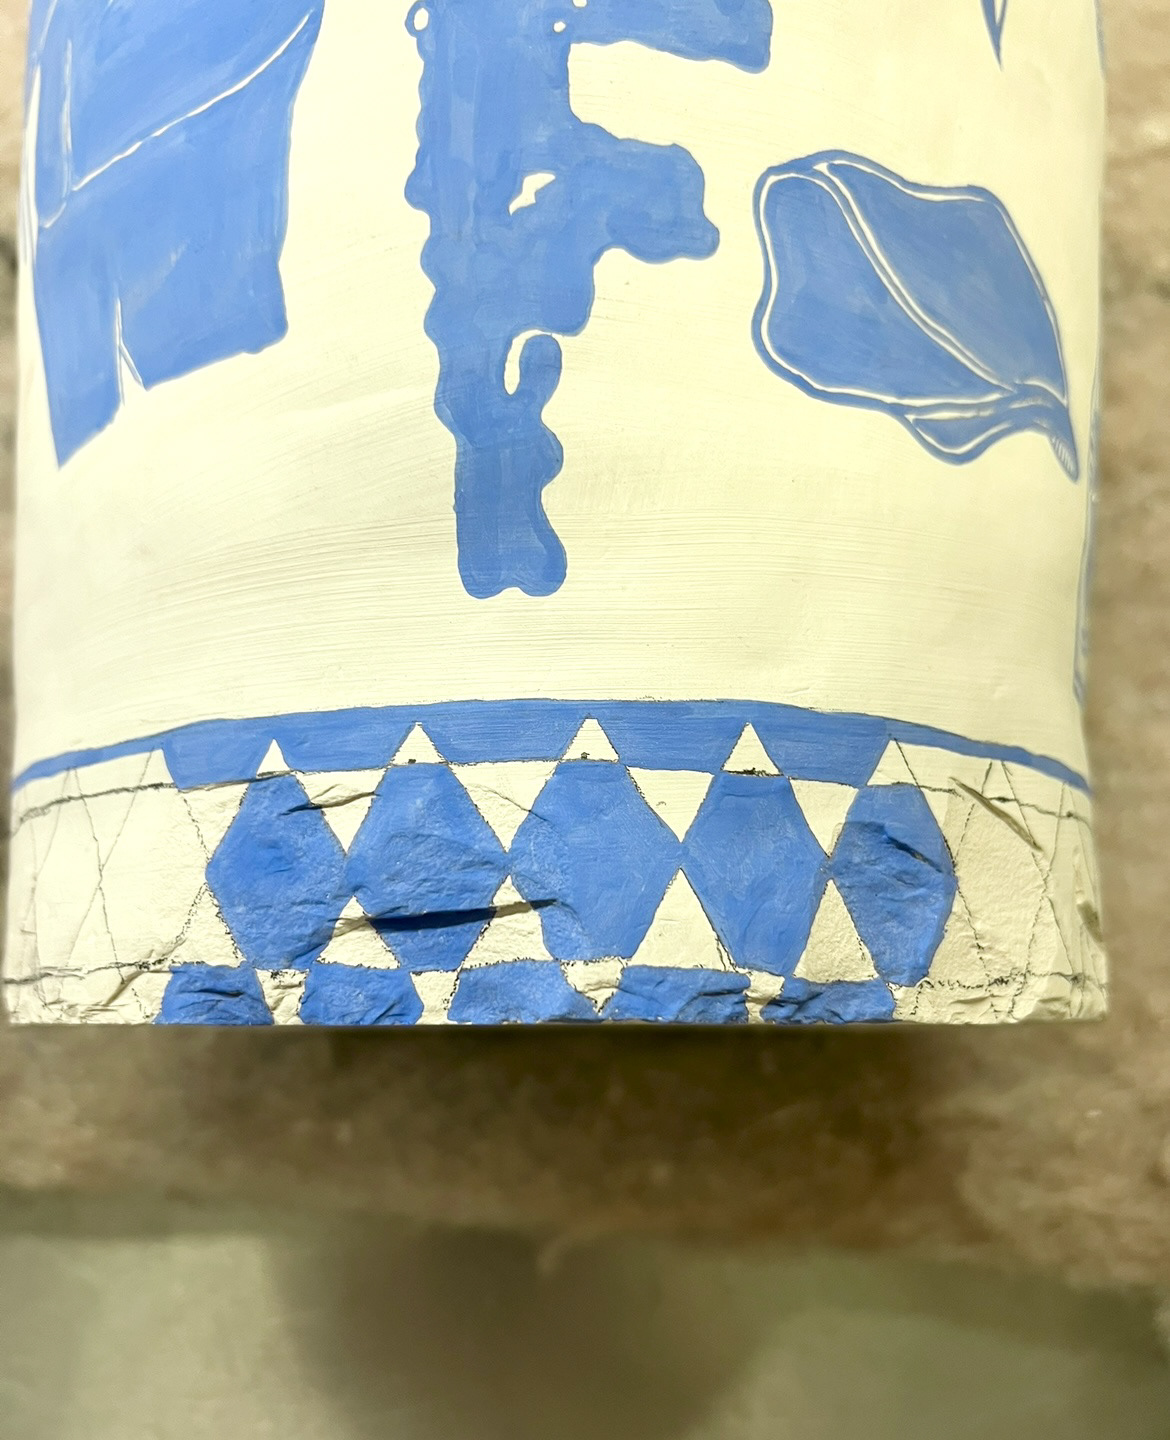
The bottom section of my pot proved to be a challenge, as in the drying process, it fell victim to some quite significant chips and breakage. Trying to plot accurate straight over these uneven surfaces meant that the design would never be perfect but I think I did quite well in the circumstances. I'm glad that the breakage did not impact the design too much and if anything, the pattern almost helped disguise some of the breakage which was fortunate.
(see UC2 Video page "Glazing day 4 - final underglaze 360"
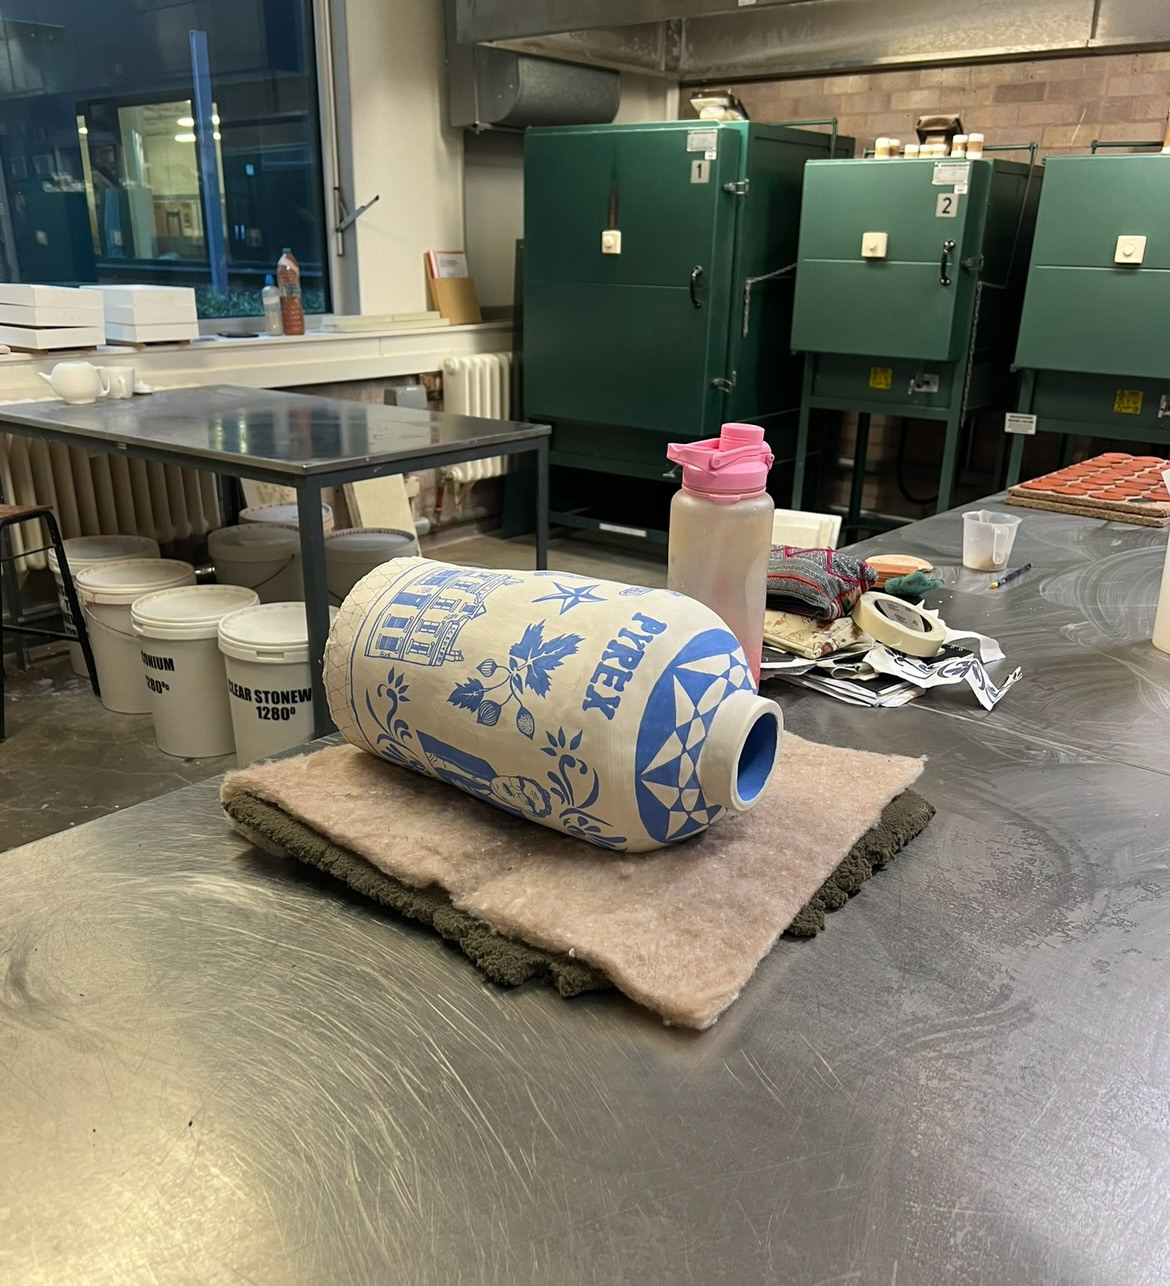
Once I had finished all of my hand painted under glazing, it was time to do final quality checks and move onto the final glazing step, which was applying my final layer of ivory stoneware clear glaze. I was at first unsure on how I would best go about this due to the size of my piece. I had originally played with the idea of using a spray gun to apply the glaze, however I thought that as the entirety of the build and decoration of my pot up to this point had been done by hand, that it would be a shame if the last process was completed using machinery. I also thought that a large amount of my practice was centred around an organic feel, and that the even spotless surface provided by a spray gun, would not be the desired effect I was looking for. I opted to hand brush my glaze on. First however I had to glaze the inside of my pot. This was quite a scary process as after spending countless weeks building and painting my pot, I now had to pick it up and rotate it in my hands without dropping it. I poured the glaze into my pot and picked it up to do just that, the pot, with the added liquid of the glaze was in fact quite difficult to pick up but I managed in the end as the glaze was spread around the interior. once the inside of the pot was sufficiently coated, I could then move onto hand applying the top glaze with a brush. I placed my pot on a turn table to make sure I could manoeuvre it as easily as possible. I was extra careful around the areas of detail to not be heavy handed with the brush as I didn't want the underglaze to smudge.
(see UC2 Video page "Glazing day 4 - Top Glazing")
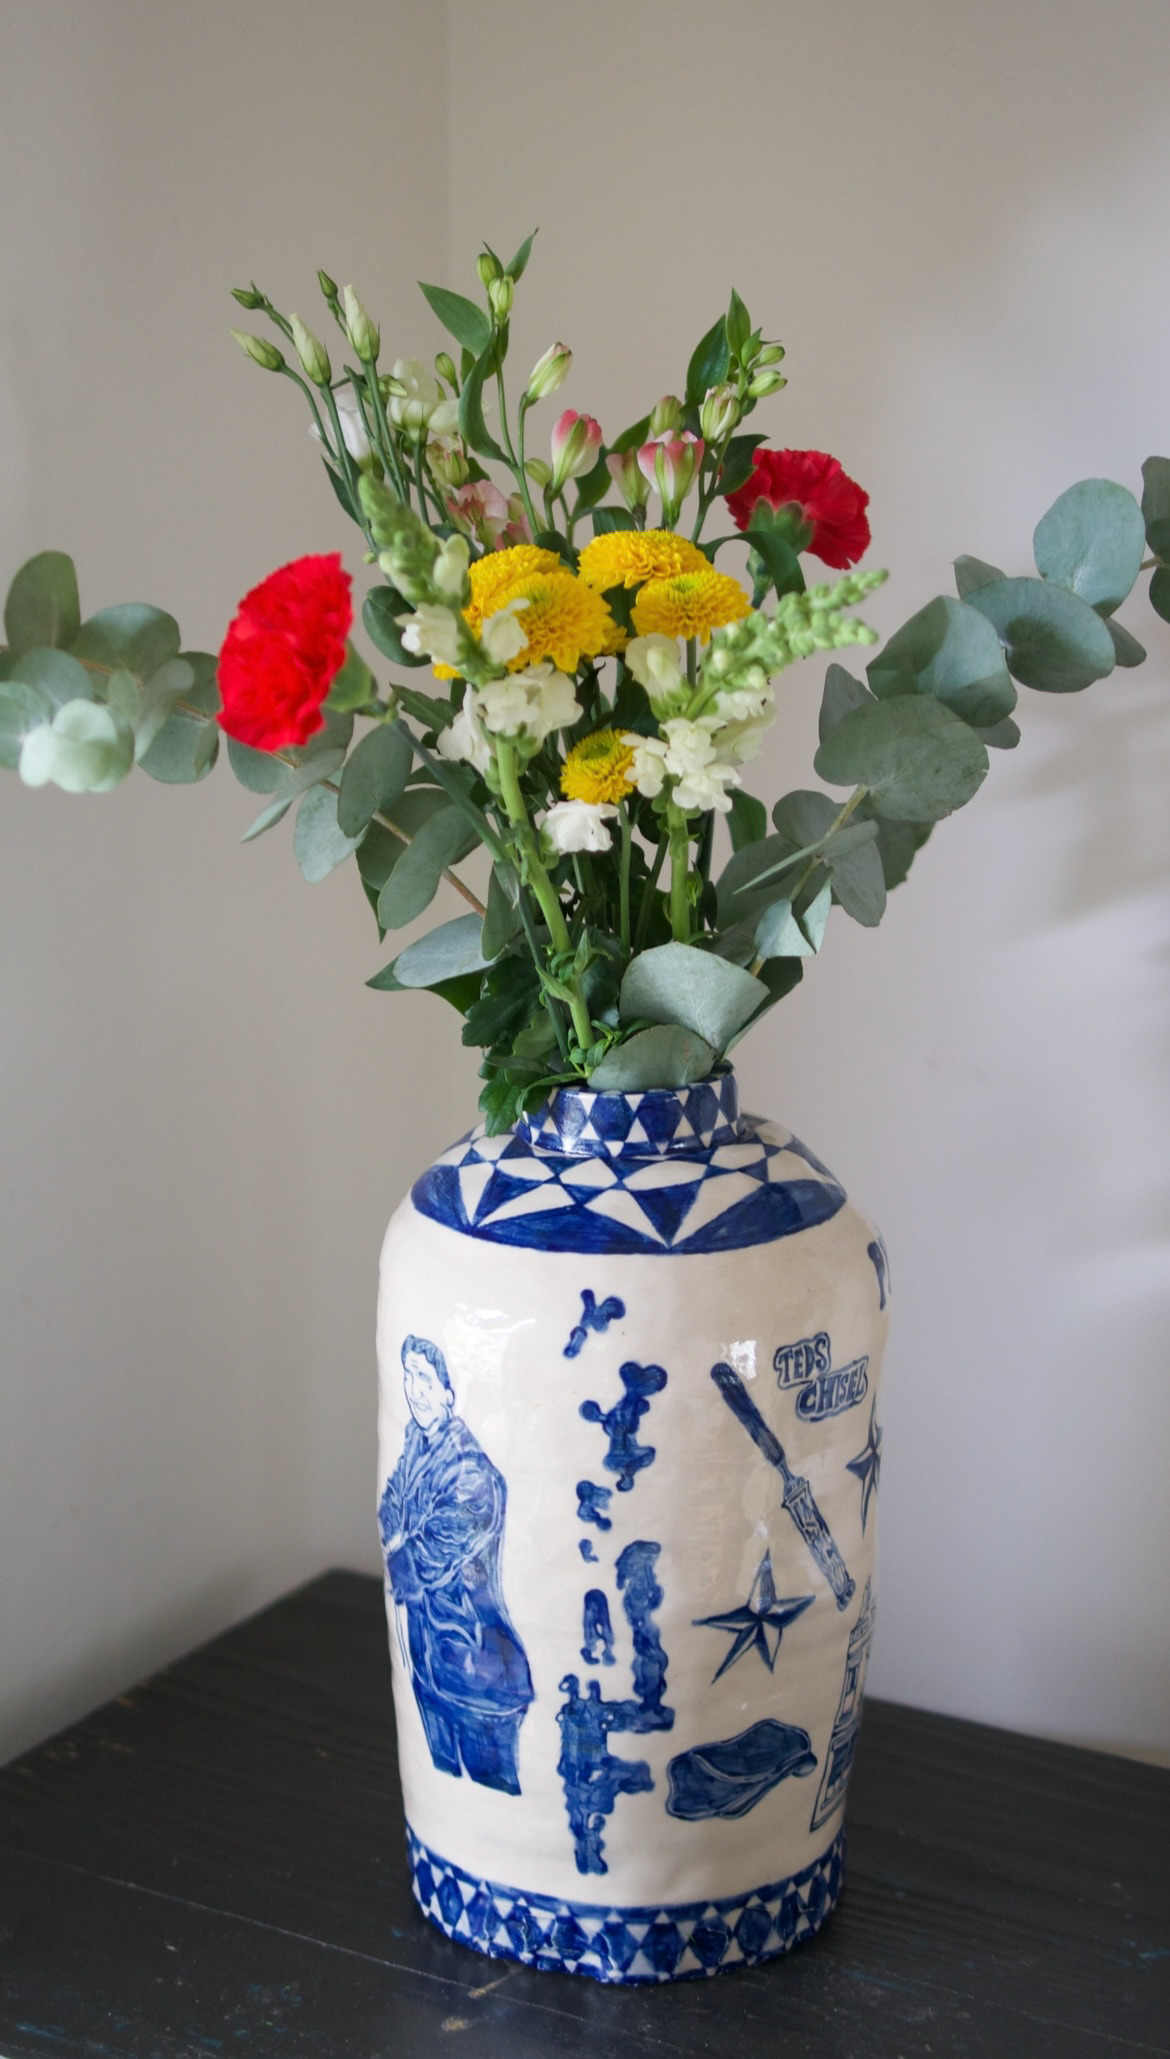
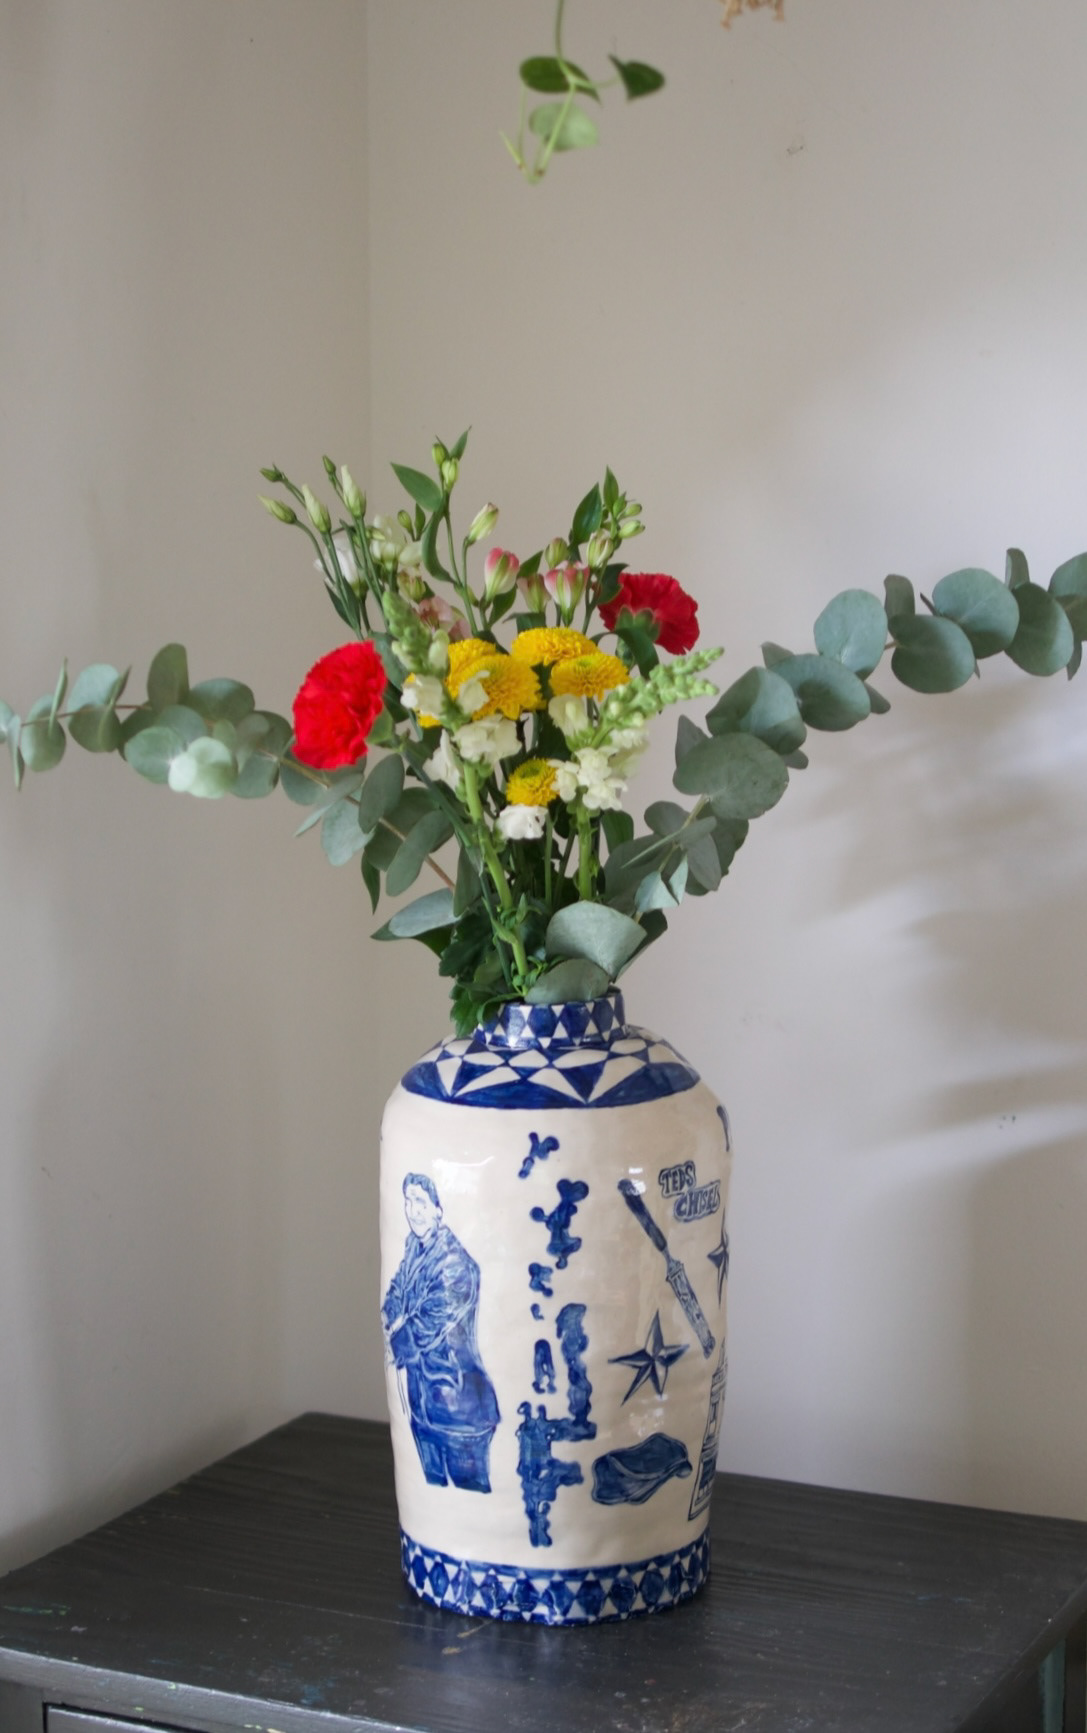
Final glazed pot ready to go in the stoneware kiln (below).
my pot was in the kiln, I had a look into pricing my work. At the start of this project we had a talk on pricing our work and what extra things you have to think about when going about doing this. (talk notes below).

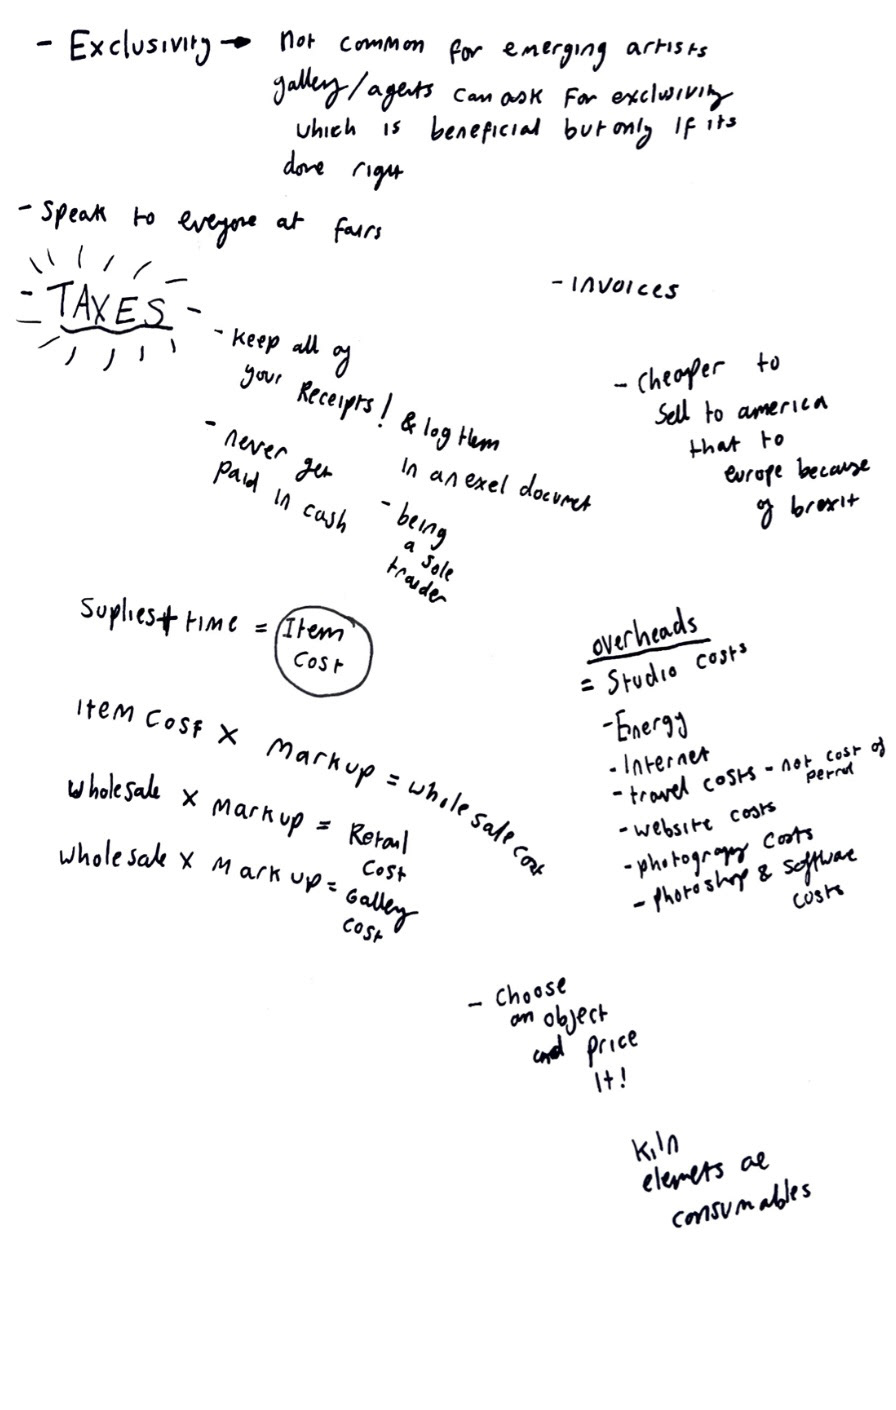
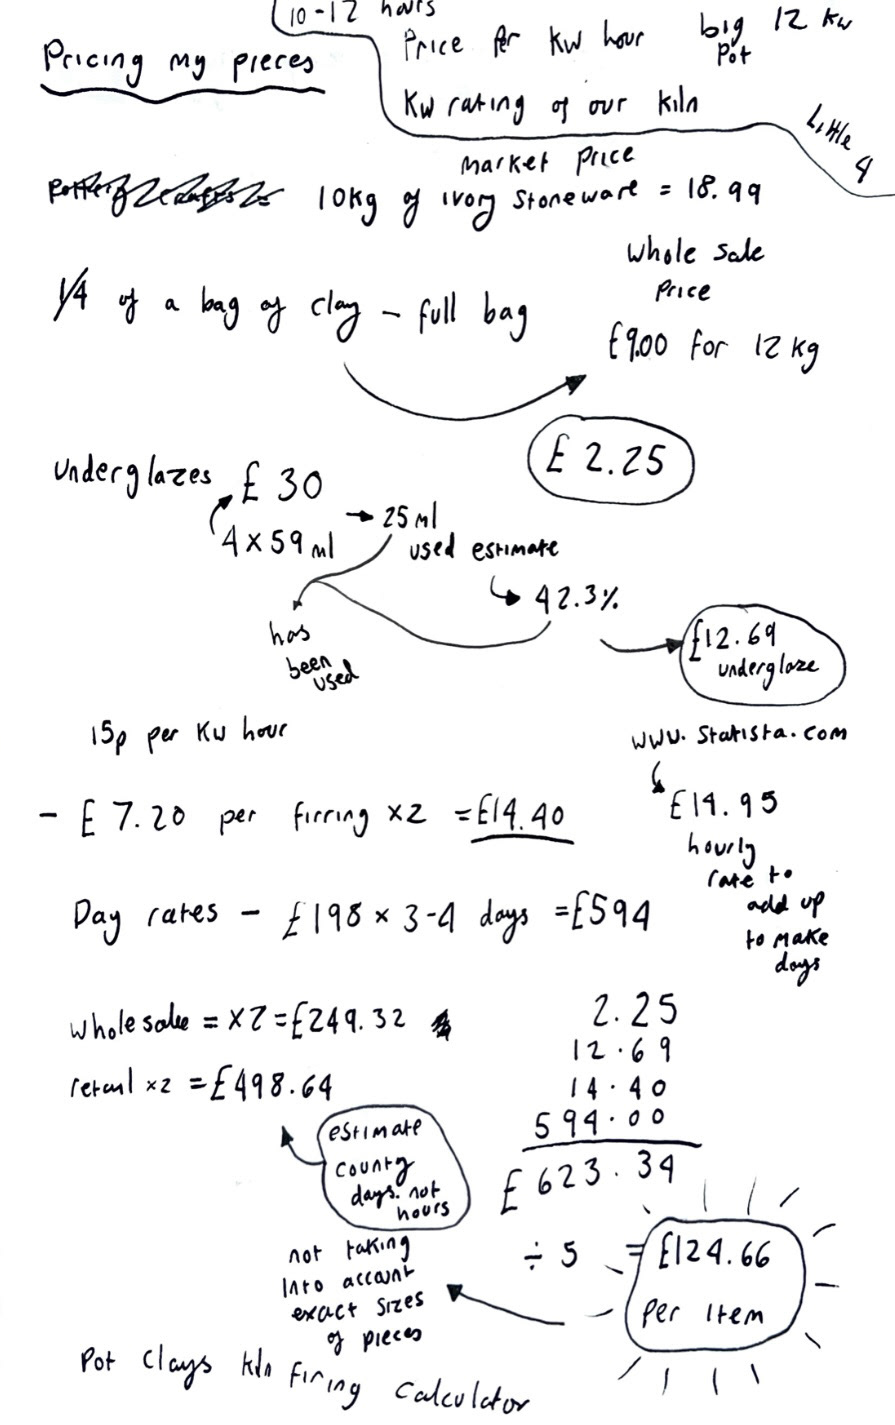
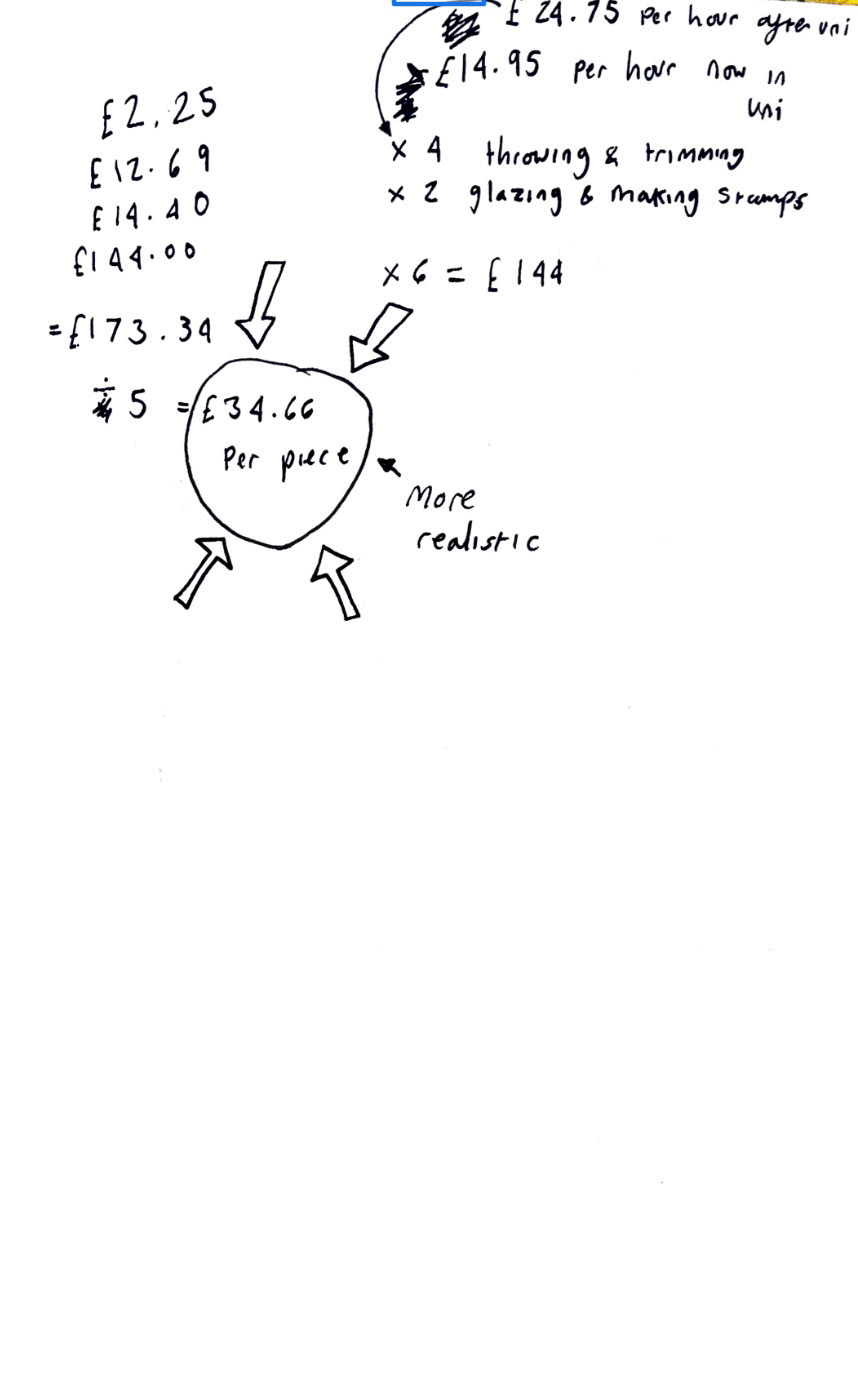
I then chose to test out the basics of what I had learnt using the small tester pieces that I had made at the end of last term. using the cost of materials, time taken, prices for firings via KW hours I could calculate the vague prices of the pieces swell as their whole sale and retail value. As it was my first time pricing my work properly I made a few mistakes but I think I got it more accurately on my second attempt. (below).
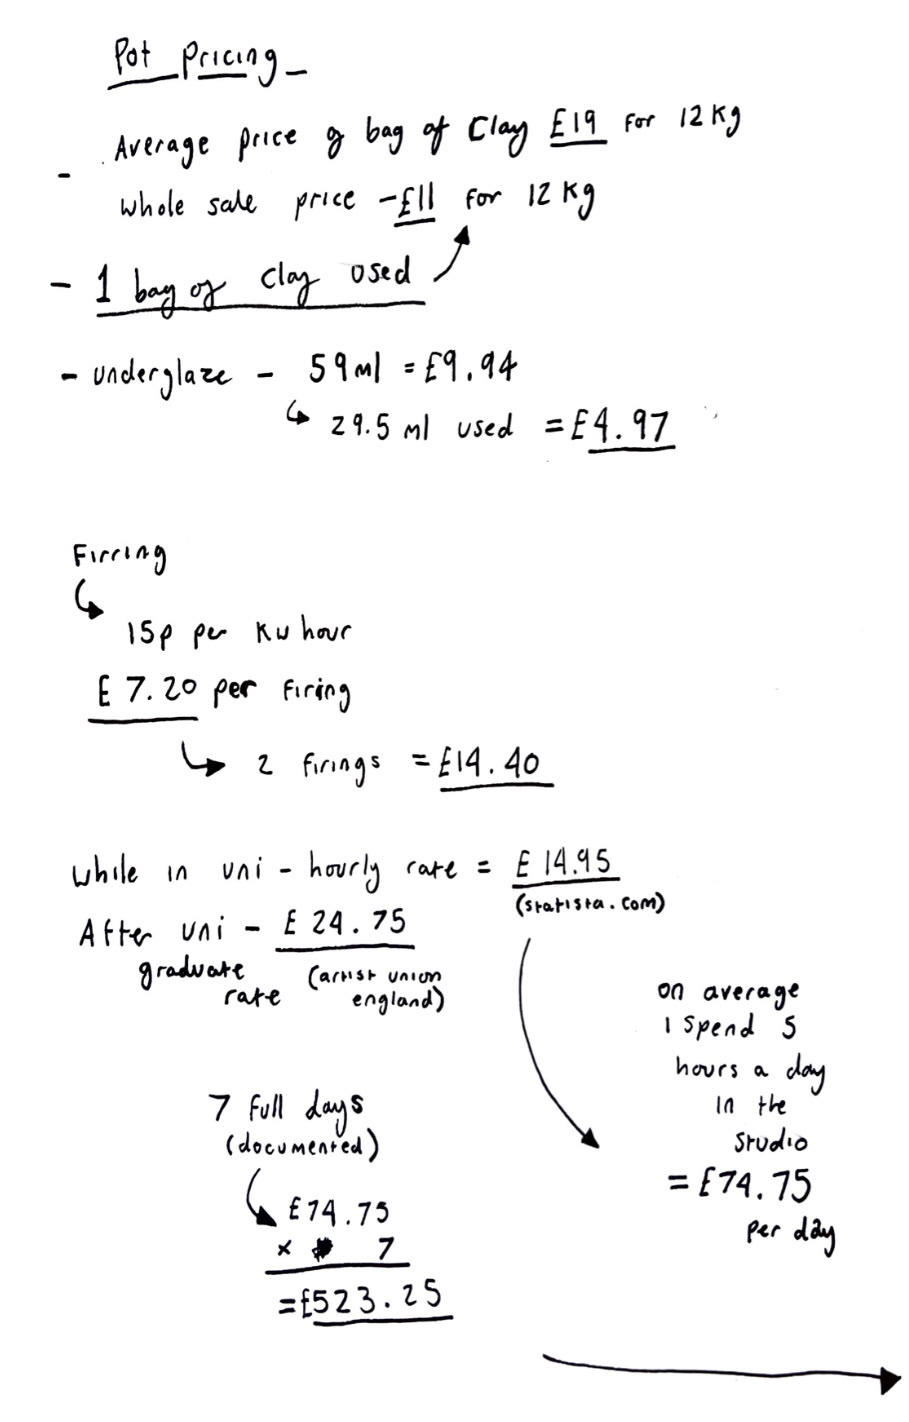
After this fairly accurate practice run, I took the information that I had learnt and started trying to price my big pot. I came up with two prices, one as if I was selling my piece now and the other as if I was selling it as a graduate.(below).
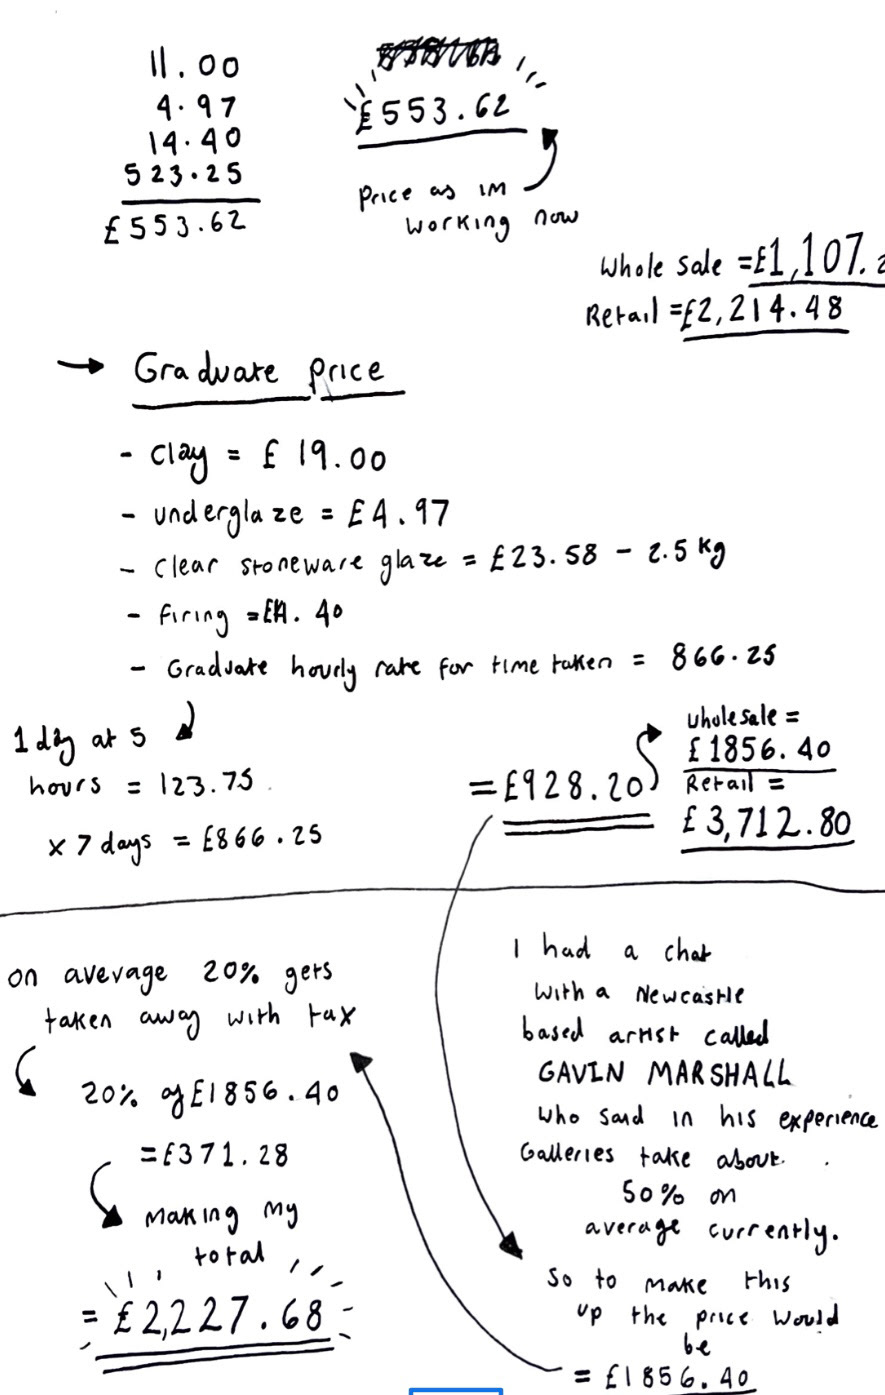
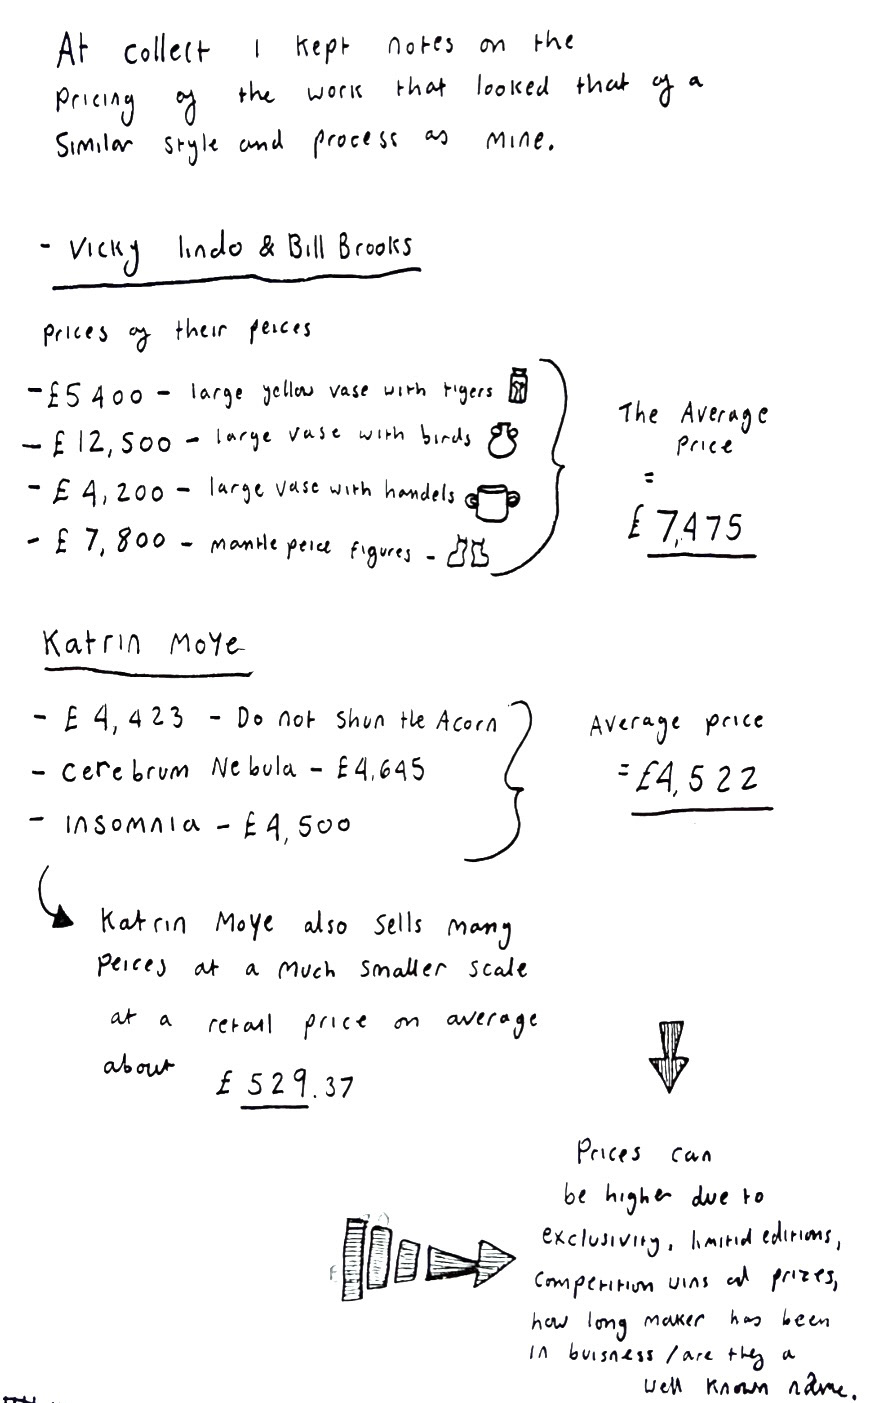
I then compared my price with some other artists from collect that I had seen with a similar style of work to me and worked out a vague estimate of their average prices and reasons why they were considerably higher than mine. (below).
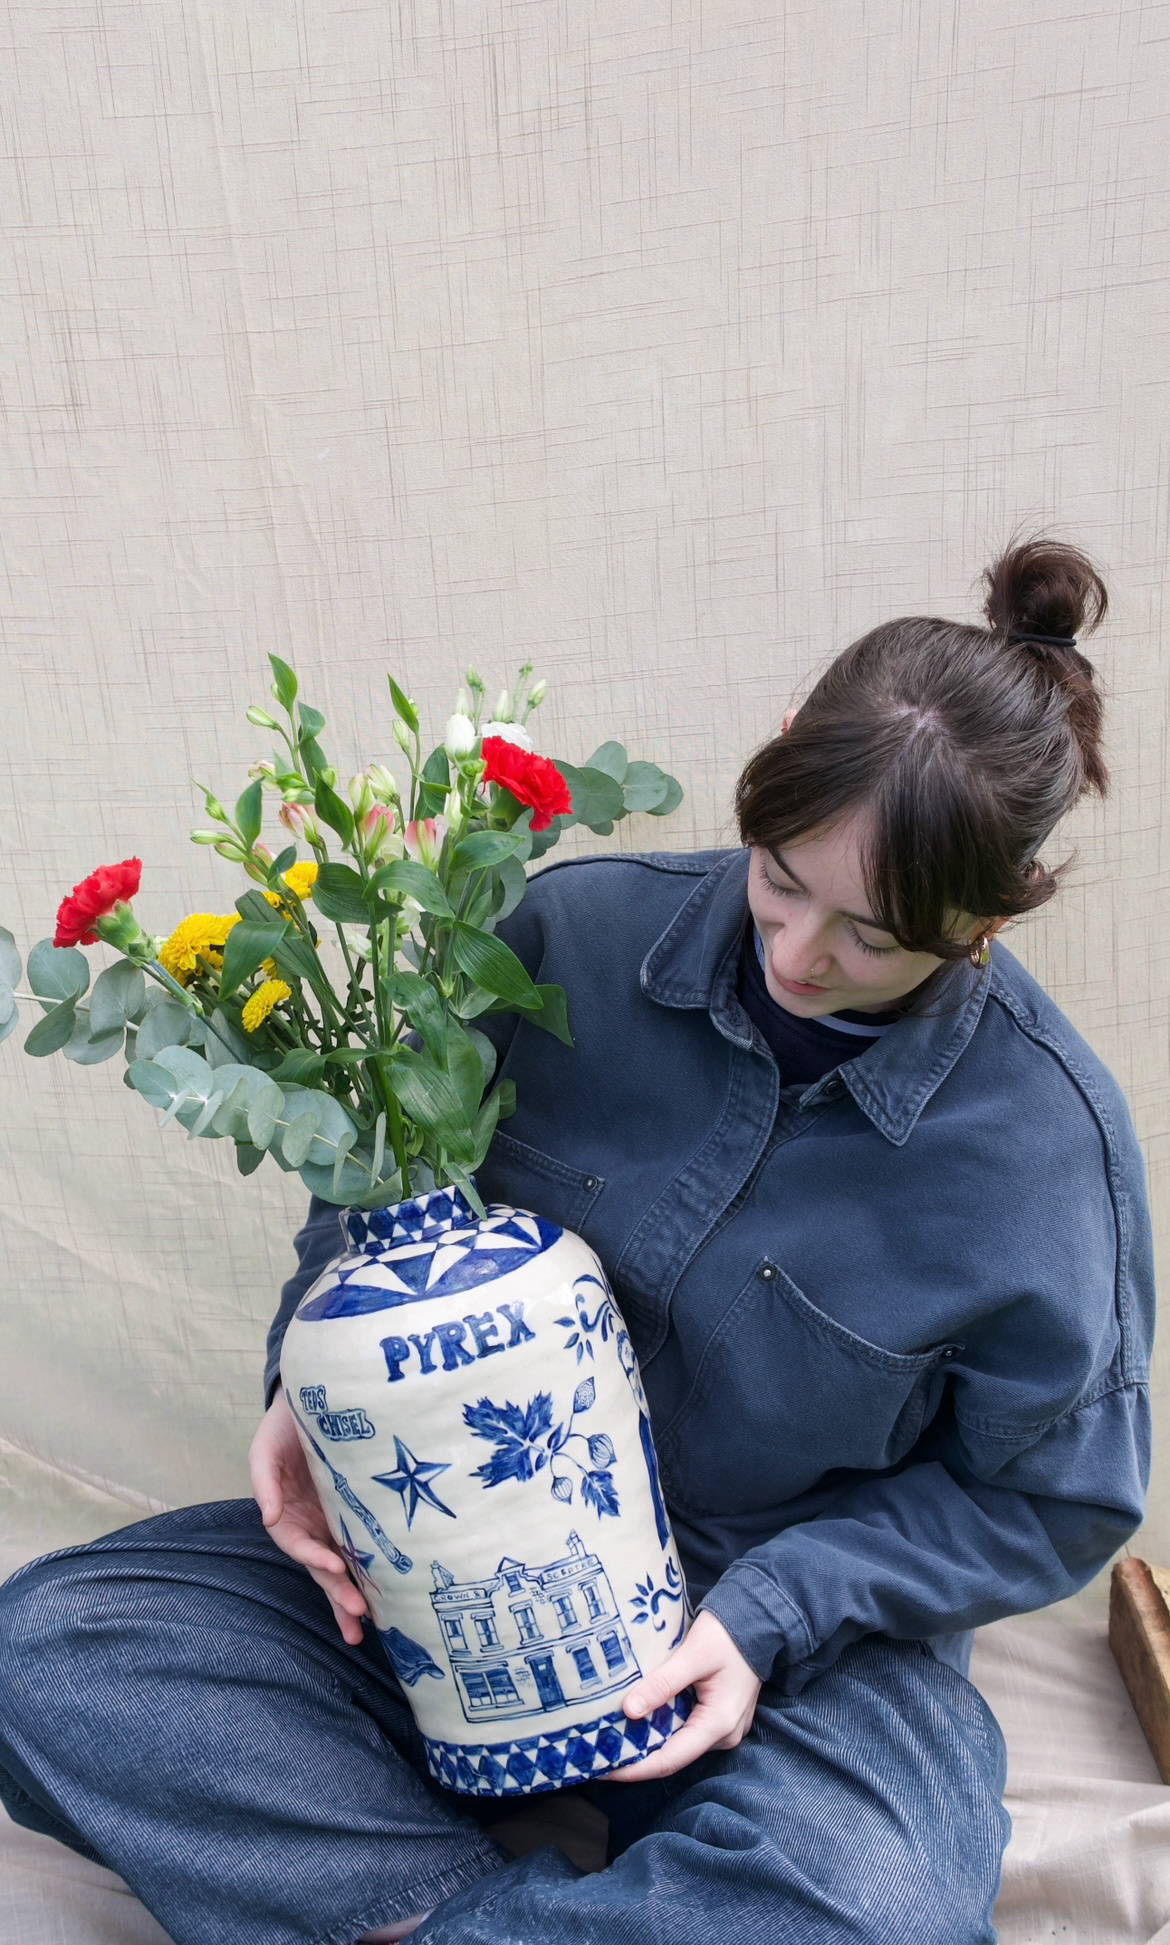
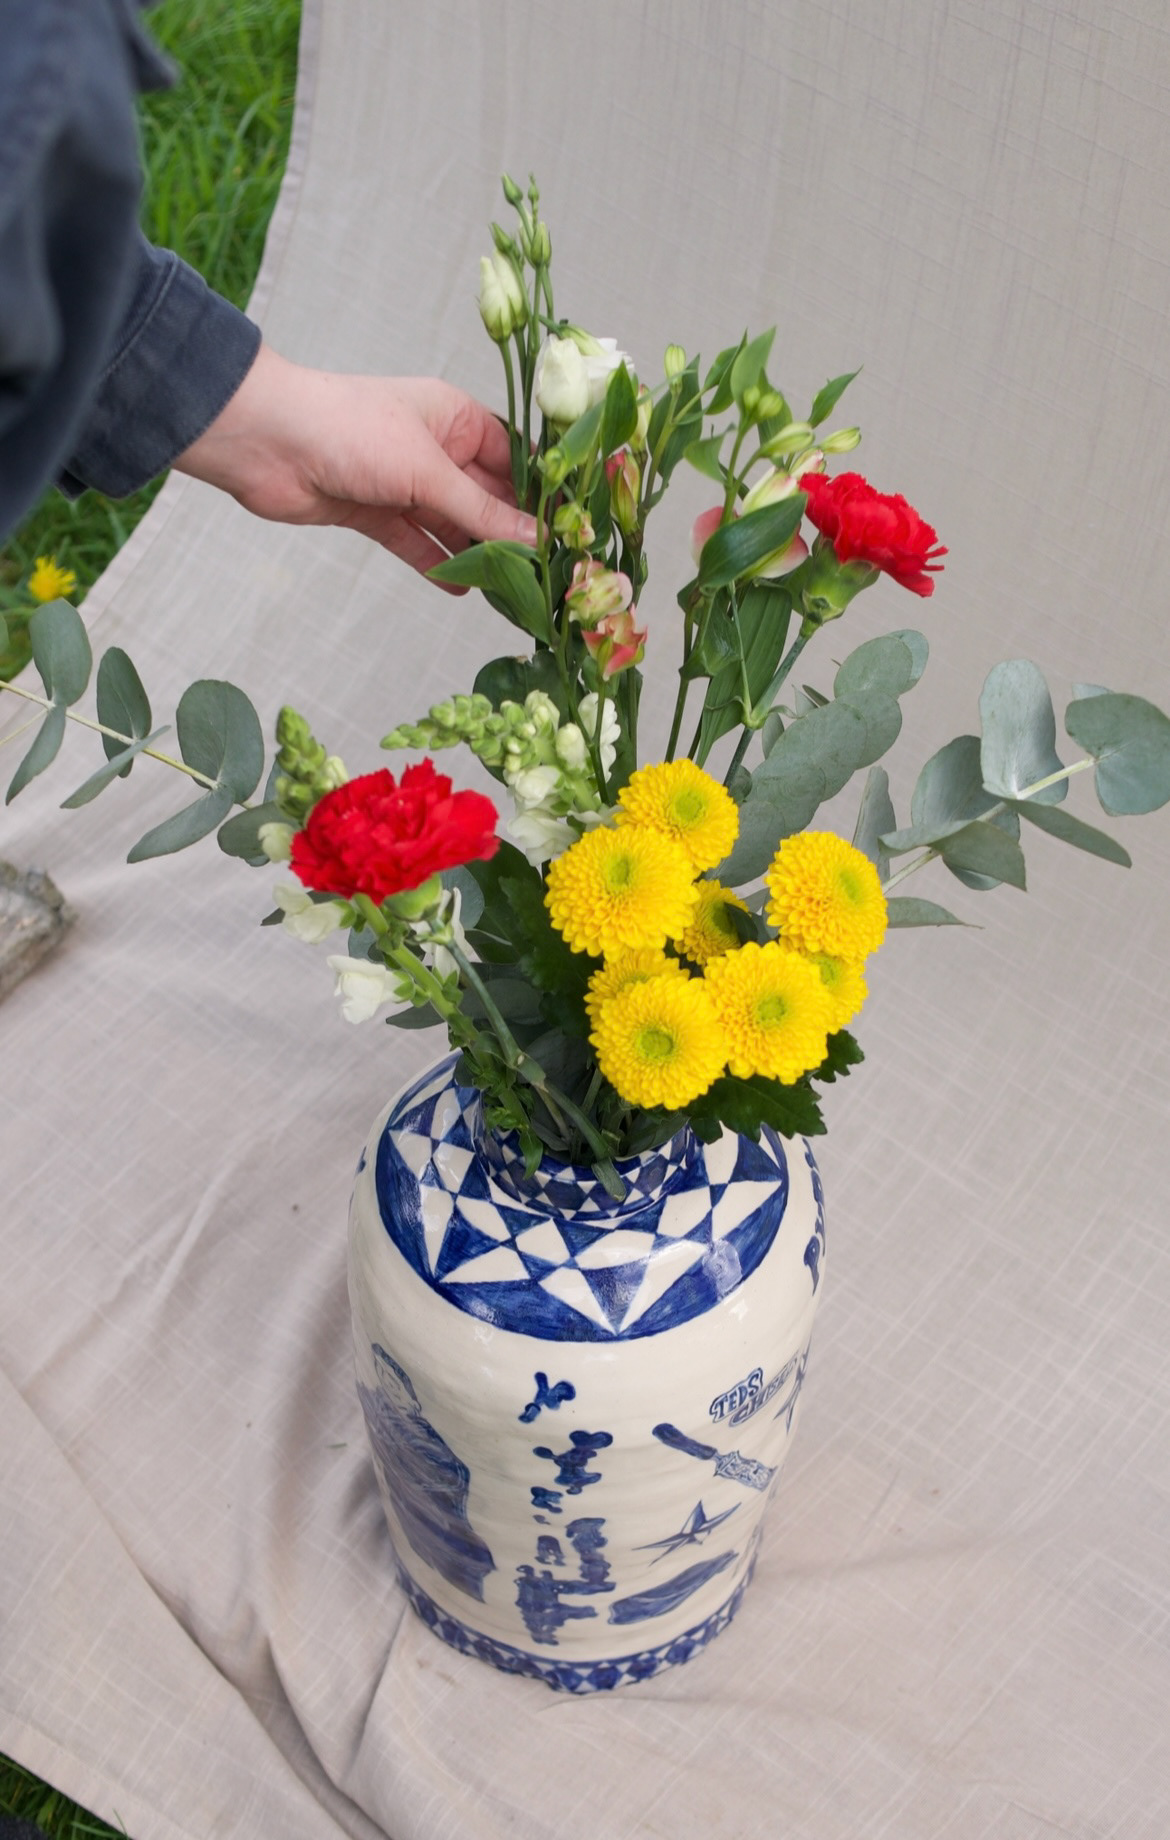
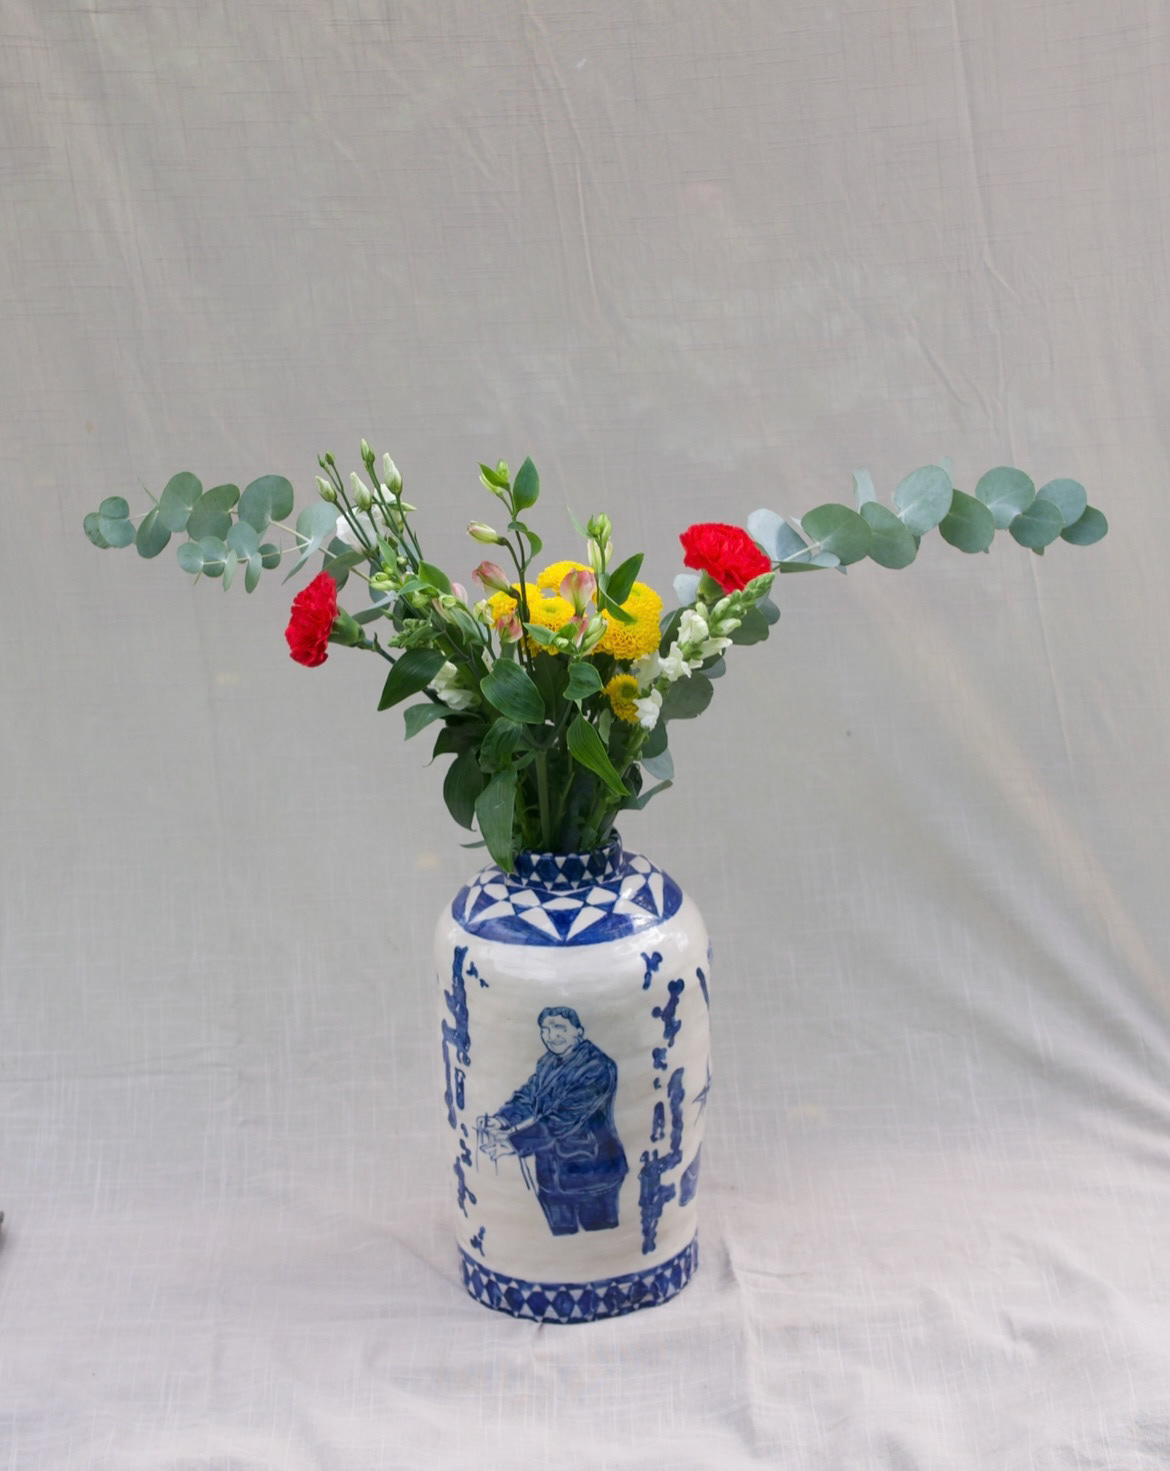
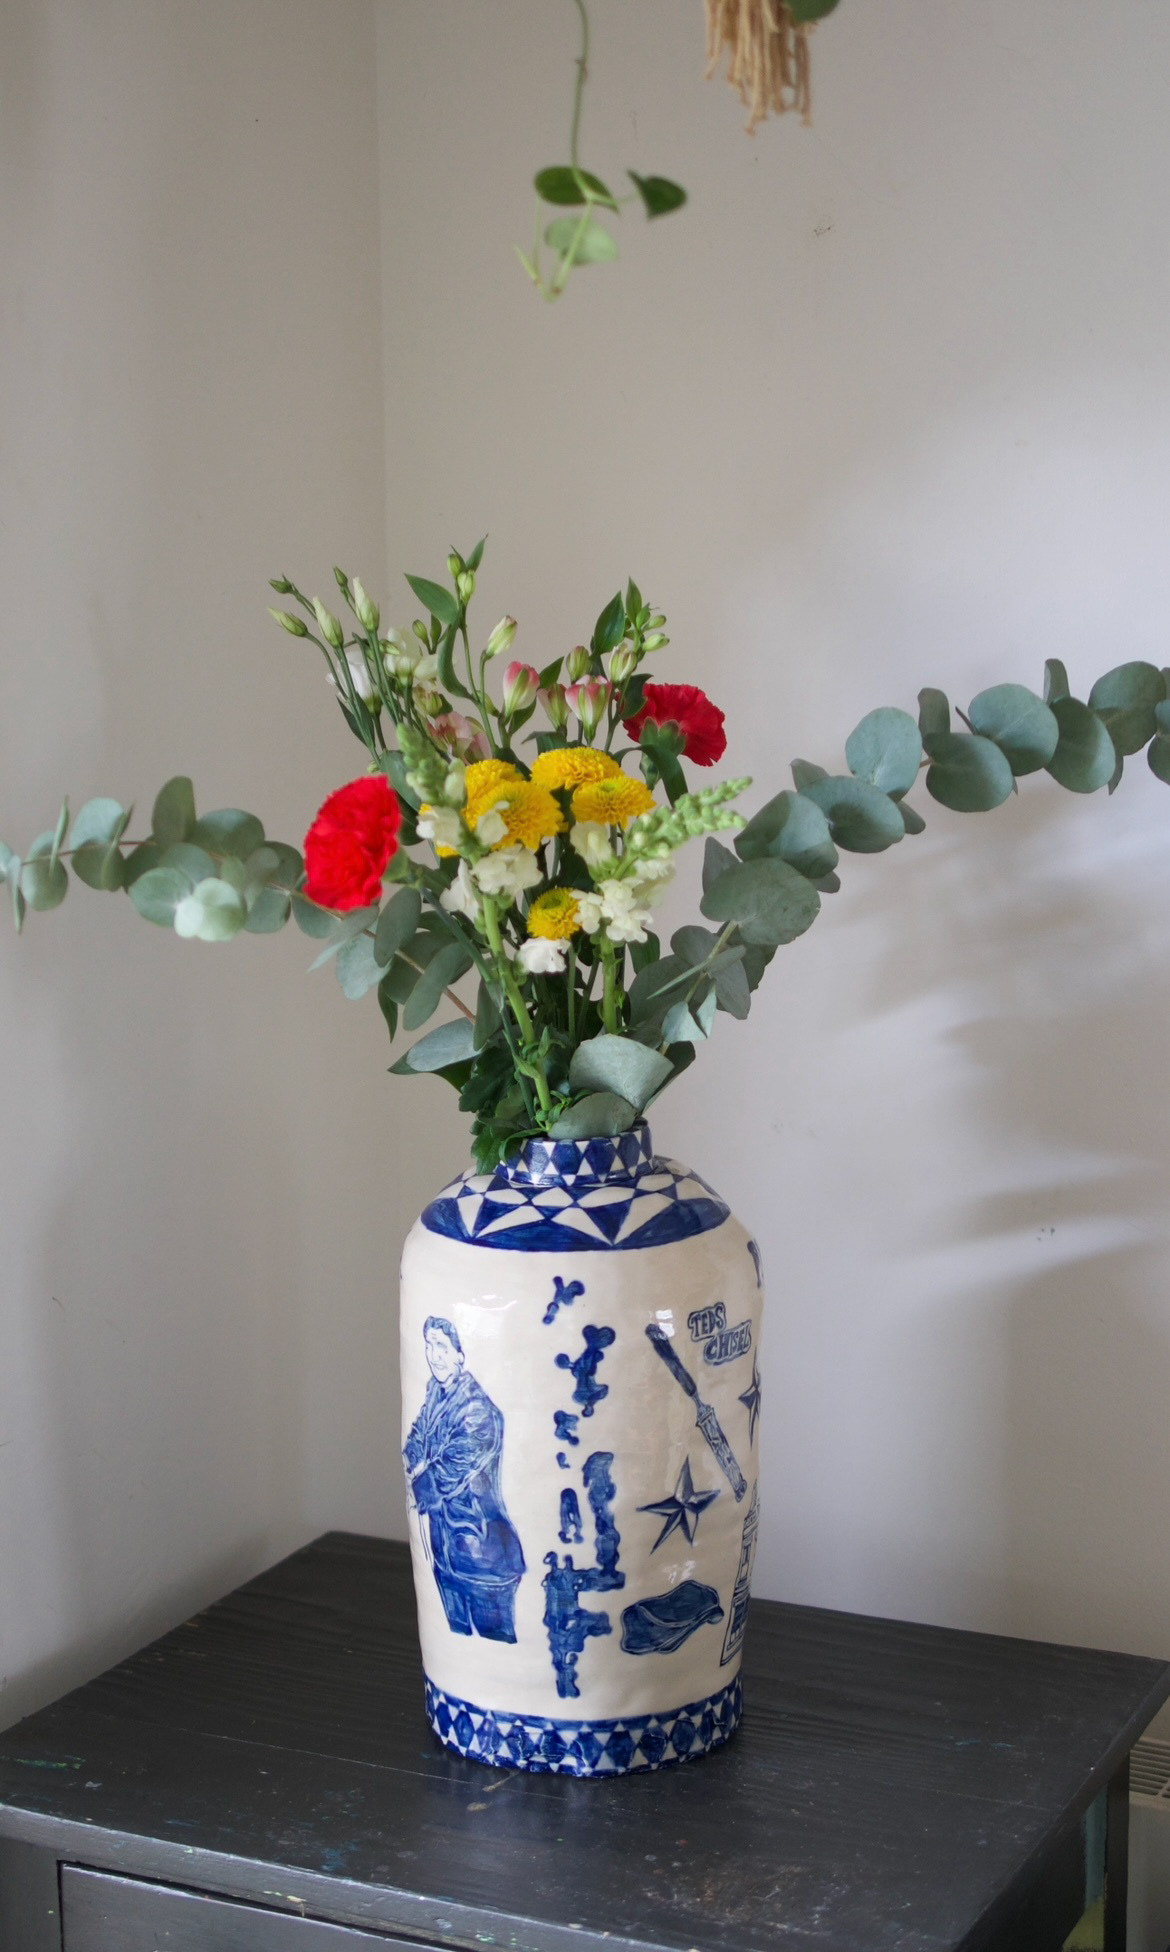
By now my final piece had come out of the kiln and it was time to take some context photos of my piece.
(see UC2 Videos page "Context Photos Behind The Scenes")
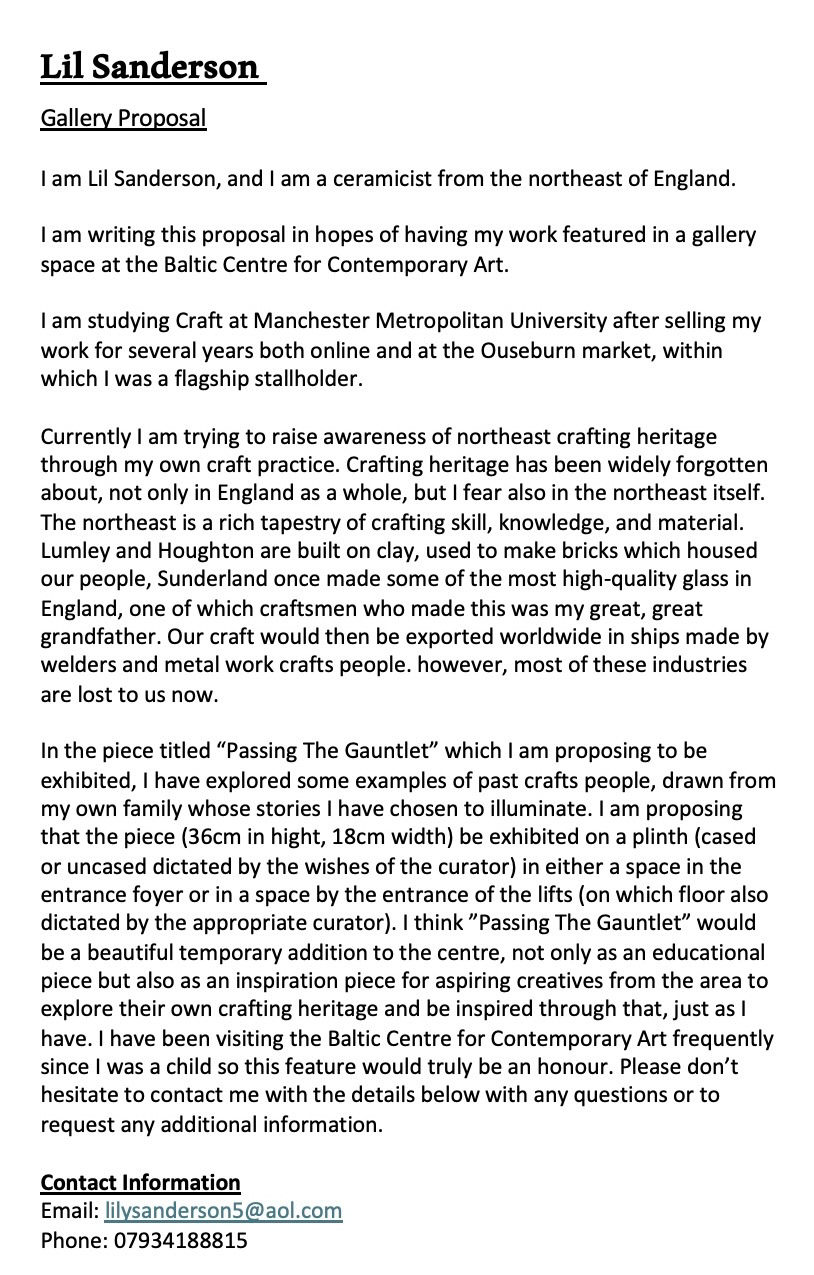
After my piece was finished and my photos were taken I started to think about the future of my piece and where it could go next. I wrote a mock gallery proposal to the Baltic Centre of Contemporary Art in Newcastle. I thought that this gallery would be a perfect fit for my pot and for the subject matter as it is a very reputable and well known gallery based in the North East which is known for showcasing up and coming artists from the area. My thinking for writing this proposal was to aim high but also appropriately for my piece and if it were to be accepted would act as a good springboard for my career as a craftsperson.
I then tried my best to fill out the Collect- open call application form as best as I could for the time.